Robotics and computer vision are entering a new phase—one where performance, memory safety, and reliability are non-negotiable. Traditionally dominated by C++ and Python, these fields are now seeing growing adoption of Rust programming language as a serious alternative.
Rust combines near C/C++ performance with compile-time memory safety, making it especially attractive for robotics systems that must run continuously, concurrently, and often on resource-constrained hardware. From autonomous robots and drones to real-time vision pipelines, Rust is emerging as a strong foundation for the next generation of intelligent machines.
In this tutorial, we’ll explore why Rust matters in robotics and computer vision, where it fits today, and how developers can start using it effectively.
Why Rust for Robotics?
1. Memory Safety Without a Garbage Collector
Robotics software often runs for days or weeks. A single memory leak or race condition can cause catastrophic failures. Rust’s ownership model eliminates entire classes of bugs—at compile time—without introducing runtime GC pauses.
2. Concurrency You Can Trust
Robotics systems are inherently concurrent:
-
Sensor data streams
-
Control loops
-
Vision pipelines
-
Actuator commands
Rust’s type system guarantees thread safety by design, making data races extremely difficult to introduce.
3. Performance Close to C++
Low-latency perception and control loops demand predictable performance. Rust delivers deterministic execution suitable for real-time-ish robotics workloads, especially when paired with async runtimes and zero-copy data handling.
Rust in Computer Vision


Computer vision workloads—image decoding, filtering, feature extraction—are CPU-intensive and data-heavy. Rust shines here due to:
-
Efficient memory layouts
-
SIMD-friendly code
-
Strong FFI support for native libraries
Popular Rust Vision Libraries
-
OpenCV bindings for Rust – Leverage the full OpenCV ecosystem
-
image-rs – Pure Rust image processing
-
ndarray – Numerical operations for vision & ML
Rust can handle real-time video streams, camera drivers, and image pipelines while maintaining safety guarantees that Python and C++ cannot offer simultaneously.
Rust and Robotics Middleware


Most modern robotics projects rely on middleware for messaging, discovery, and tooling.
Rust + ROS 2
-
ROS 2 supports Rust via community crates
-
Rust nodes can interoperate with C++ and Python nodes
-
Ideal for safety-critical or performance-sensitive components
Rust is often used for:
-
Sensor drivers
-
Control nodes
-
High-performance perception modules
while Python remains useful for prototyping and experimentation.
Where Rust Fits Best Today
Rust is not replacing everything—but it excels in specific layers:
| Robotics Layer | Rust Fit |
|---|---|
| Low-level drivers | ⭐⭐⭐⭐⭐ |
| Perception (vision, lidar) | ⭐⭐⭐⭐ |
| Control systems | ⭐⭐⭐⭐ |
| High-level planning | ⭐⭐ |
| Rapid prototyping | ⭐⭐ |
A hybrid architecture (Rust + Python/C++) is currently the most practical approach.
Setting Up a Rust Environment for Robotics and Computer Vision
Before writing any robotics or computer vision code, we need a stable, performant Rust development environment. In this section, you’ll install Rust, configure essential tooling, and prepare your system for image processing and robotics middleware development.
This setup works well on Linux, macOS, and Windows, but Linux (especially Ubuntu) is strongly recommended for robotics work.
1. Installing Rust (rustup)
The official and recommended way to install Rust is via rustup.
Install Rust
curl --proto '=https' --tlsv1.2 -sSf https://sh.rustup.rs | sh
After installation, reload your shell:
source $HOME/.cargo/env
Verify the installation:
rustc --version
cargo --version
You should see the latest stable Rust version.
2. Essential Rust Tooling
Rust ships with powerful tools out of the box:
-
cargo– Package manager & build system -
rustfmt– Code formatter -
clippy– Linter for catching common mistakes
Install additional components:
rustup component add rustfmt clippy
For robotics projects, clean and consistent code is critical—clippy warnings often catch subtle logic bugs early.
3. IDE and Editor Setup
A good editor significantly improves productivity.
Recommended Editors
-
Visual Studio Code + rust-analyzer (most popular)
-
CLion (commercial, excellent Rust support)
-
Neovim / Emacs (advanced users)
VS Code Extensions
Install:
-
rust-analyzer
-
CodeLLDB (debugging)
-
Even Better TOML
Rust-analyzer provides inline type hints, error explanations, and jump-to-definition, which are extremely helpful when working with complex lifetimes and concurrency.
4. System Dependencies for Computer Vision
Most computer vision work relies on native libraries, especially OpenCV.
Ubuntu / Debian
sudo apt update
sudo apt install -y \
  libopencv-dev \
  pkg-config \
  libclang-dev \
  cmake
These packages allow Rust crates to link against OpenCV and other native dependencies.
5. Creating Your First Rust Vision Project
Create a new Rust project:
cargo new rust_vision
cd rust_vision
Add OpenCV bindings to Cargo.toml:
[dependencies]
opencv = "0.98.1"
Build the project:
cargo build
If OpenCV is installed correctly, the build should succeed without errors.
6. Verifying OpenCV Integration
Replace src/main.rs with:
use opencv::prelude::*;
use opencv::core;

fn main() -> opencv::Result<()> {
    let mat = core::Mat::zeros(480, 640, core::CV_8UC3)?;
    println!("Matrix size: {:?}", mat.size()?);
    Ok(())
}
Run the program:
cargo run
If you see the matrix size printed, your Rust + OpenCV environment is ready.
7. Optional: Preparing for Robotics Middleware (ROS 2)
If you plan to integrate with robotics middleware, install ROS 2 (Humble or Iron recommended).
Basic steps on Ubuntu:
sudo apt install ros-humble-desktop
Rust bindings for ROS 2 allow you to write native Rust nodes that communicate seamlessly with C++ and Python nodes.
8. Cross-Compilation & Embedded Targets (Optional)
Robotics often runs on embedded systems.
Install common targets:
rustup target add aarch64-unknown-linux-gnu
rustup target add armv7-unknown-linux-gnueabihf
Rust’s excellent cross-com
Summary
By the end of this section, you will have:
✅ Rust installed and configured
✅ A productive editor setup
✅ OpenCV integrated with Rust
✅ (Optional) ROS 2 ready for robotics integration
You now have a solid foundation for building safe, high-performance robotics and computer vision applications in Rust.
pilation story makes it ideal for ARM-based robots, SBCs, and edge devices.
Summary
By the end of this section, you will have:
✅ Rust installed and configured
✅ A productive editor setup
✅ OpenCV integrated with Rust
✅ (Optional) ROS 2 ready for robotics integration
You now have a solid foundation for building safe, high-performance robotics and computer vision applications in Rust.
Capturing and Processing Images in Rust
In robotics and computer vision systems, image capture and processing form the foundation of perception. Cameras provide raw data, while vision pipelines transform pixels into meaningful information—edges, objects, features, and decisions.
In this section, you’ll learn how to capture images from a camera, process frames in real time, and build a basic vision pipeline in Rust using OpenCV bindings.
1. Understanding the Vision Pipeline
A typical robotics vision pipeline looks like this:
-
Capture a frame from the camera
-
Convert color space (BGR → Gray / RGB)
-
Apply filters (blur, threshold, edge detection)
-
Extract features or objects
-
Send results to control or decision logic
Rust is well-suited for this flow because it enables zero-copy data handling and safe concurrency.
2. Capturing Frames from a Camera
OpenCV provides VideoCapture for accessing webcams and camera devices.
Basic Camera Capture Example
use opencv::{
    core,
    highgui,
    prelude::*,
    videoio,
};

fn main() -> opencv::Result<()> {
    let mut cam = videoio::VideoCapture::new(0, videoio::CAP_ANY)?; // default camera
    if !videoio::VideoCapture::is_opened(&cam)? {
        panic!("Unable to open default camera!");
    }

    highgui::named_window("Camera", highgui::WINDOW_AUTOSIZE)?;

    loop {
        let mut frame = core::Mat::default();
        cam.read(&mut frame)?;

        if frame.empty()? {
            continue;
        }

        highgui::imshow("Camera", &frame)?;
        if highgui::wait_key(10)? > 0 {
            break;
        }
    }

    Ok(())
}
Run the program:
cargo run
You should see a live camera feed displayed in a window.
3. Converting and Processing Images
Most vision algorithms operate on grayscale images. Let’s convert the camera frame and apply edge detection.
Grayscale + Canny Edge Detection
use opencv::{
    core,
    highgui,
    imgproc,
    prelude::*,
    videoio,
};

fn main() -> opencv::Result<()> {
    let mut cam = videoio::VideoCapture::new(0, videoio::CAP_ANY)?;
    highgui::named_window("Edges", highgui::WINDOW_AUTOSIZE)?;

    loop {
        let mut frame = core::Mat::default();
        let mut gray = core::Mat::default();
        let mut edges = core::Mat::default();

        cam.read(&mut frame)?;
        if frame.empty()? {
            continue;
        }

        imgproc::cvt_color(&frame, &mut gray, imgproc::COLOR_BGR2GRAY, 0)?;
        imgproc::canny(&gray, &mut edges, 50.0, 150.0, 3, false)?;

        highgui::imshow("Edges", &edges)?;
        if highgui::wait_key(10)? > 0 {
            break;
        }
    }

    Ok(())
}
This example demonstrates:
-
Color space conversion
-
Edge detection
-
Real-time frame processing
4. Performance Considerations in Rust Vision Code
Rust allows you to optimize without sacrificing safety:
-
Reuse
Matbuffers to avoid repeated allocations -
Avoid unnecessary cloning of frames
-
Prefer references and borrowing
-
Process frames in-place when possible
Example (buffer reuse):
let mut frame = core::Mat::default();
let mut gray = core::Mat::default();
Reuse these buffers inside the loop instead of re-allocating each iteration.
5. Saving Frames and Debug Images
Saving intermediate images is useful for debugging robotics perception.
use opencv::imgcodecs;

imgcodecs::imwrite("frame.png", &frame, &opencv::types::VectorOfi32::new())?;
This is especially helpful when:
-
Debugging sensor issues
-
Tuning thresholds
-
Running vision code headlessly
6. From Vision to Robotics Logic
In robotics systems, vision output typically feeds into:
-
Object detection modules
-
Navigation and mapping systems
-
Control loops (PID, MPC)
-
Middleware messages (e.g., ROS 2 topics)
Rust’s thread-safe concurrency model makes it easy to:
-
Capture frames in one thread
-
Process them in another
-
Publish results safely
7. Common Camera Issues (Troubleshooting)
-
Camera not opening: Check device index (
0,1,2) -
Low FPS: Reduce resolution or disable debug windows
-
Black frames: Camera permissions or driver issue
-
High CPU usage: Use frame skipping or resize input
On Linux, verify camera access:
ls /dev/video*
Summary
In this section, you learned how to:
✅ Capture live camera frames in Rust
✅ Convert and process images using OpenCV
✅ Apply real-time edge detection
✅ Optimize vision code for performance
✅ Prepare vision output for robotics systems
You now have the core building blocks of a robotics perception pipeline written safely and efficiently in Rust.
Building a Simple Real-Time Vision Pipeline in Rust
Now that we can capture frames and process images, it’s time to structure everything into a real-time vision pipeline—the kind used in robotics perception systems, autonomous robots, and embedded vision devices.
In this section, we’ll build a modular, real-time pipeline in Rust using OpenCV, focusing on clarity, performance, and extensibility.
1. What Is a Vision Pipeline?
A real-time vision pipeline is a sequence of stages applied to each frame:
Camera → Preprocessing → Feature Extraction → Output
In robotics, this output might be:
-
Detected edges or objects
-
Navigation markers
-
Signals sent to control systems
-
Messages published to middleware (e.g., ROS 2)
Our goal is to design this pipeline so it’s:
-
Easy to extend
-
Efficient
-
Safe under concurrency
2. Pipeline Architecture in Rust
We’ll structure the pipeline as clear processing steps:
-
Frame capture
-
Preprocessing (resize, grayscale)
-
Feature extraction (edges)
-
Visualization or output
Each step will be expressed as a Rust function operating on references—no unnecessary cloning.
3. Project Structure
Suggested structure:
src/
 ├── main.rs
 ├── camera.rs
 ├── preprocess.rs
 ├── features.rs
For simplicity in this tutorial, we’ll keep everything in main.rs, but the same design scales well to larger robotics projects.
4. Implementing the Vision Pipeline
Full Real-Time Pipeline Example
use opencv::{
    core,
    highgui,
    imgproc,
    prelude::*,
    videoio,
};

fn preprocess(frame: &core::Mat, gray: &mut core::Mat) -> opencv::Result<()> {
    imgproc::cvt_color(frame, gray, imgproc::COLOR_BGR2GRAY, 0)?;
    imgproc::gaussian_blur(
        gray,
        gray,
        core::Size::new(5, 5),
        0.0,
        0.0,
        core::BORDER_DEFAULT,
    )?;
    Ok(())
}

fn extract_edges(gray: &core::Mat, edges: &mut core::Mat) -> opencv::Result<()> {
    imgproc::canny(gray, edges, 50.0, 150.0, 3, false)?;
    Ok(())
}

fn main() -> opencv::Result<()> {
    let mut cam = videoio::VideoCapture::new(0, videoio::CAP_ANY)?;
    if !videoio::VideoCapture::is_opened(&cam)? {
        panic!("Failed to open camera");
    }

    highgui::named_window("Edges", highgui::WINDOW_AUTOSIZE)?;

    let mut frame = core::Mat::default();
    let mut gray = core::Mat::default();
    let mut edges = core::Mat::default();

    loop {
        cam.read(&mut frame)?;
        if frame.empty()? {
            continue;
        }

        preprocess(&frame, &mut gray)?;
        extract_edges(&gray, &mut edges)?;

        highgui::imshow("Edges", &edges)?;
        if highgui::wait_key(1)? > 0 {
            break;
        }
    }

    Ok(())
}
5. Why This Design Works Well in Robotics
This pipeline demonstrates several Rust best practices:
-
Buffer reuse → avoids per-frame allocations
-
Clear separation of concerns → easy to replace stages
-
Borrowing over cloning → minimal memory overhead
-
Deterministic execution → predictable frame timing
This pattern scales naturally to:
-
Object detection
-
Optical flow
-
Marker tracking
-
Sensor fusion pipelines
6. Measuring Frame Rate (FPS)
Real-time systems need feedback. Let’s add simple FPS logging:
use std::time::Instant;

let mut last = Instant::now();
let mut frames = 0;

frames += 1;
if last.elapsed().as_secs() >= 1 {
    println!("FPS: {}", frames);
    frames = 0;
    last = Instant::now();
}
Drop this inside the main loop to monitor performance.
7. Preparing for Concurrency
In real robots, pipelines often run concurrently:
-
Thread 1: Camera capture
-
Thread 2: Vision processing
-
Thread 3: Control or messaging
Rust enables this safely using:
-
Channels (
std::sync::mpscorcrossbeam) -
Shared immutable data
-
Compile-time race prevention
We’ll explore this in a later section.
8. Common Optimization Tips
-
Downscale frames before processing
-
Convert to grayscale early
-
Disable
imshowin production -
Use release mode:
cargo run --release
On embedded or ARM devices, this often yields 2–4× speedups.
Summary
In this section, you built a clean, real-time vision pipeline in Rust, learning how to:
✅ Structure perception code into pipeline stages
✅ Process camera frames efficiently
✅ Reuse buffers for performance
✅ Prepare vision output for robotics systems
This is the core pattern behind most robotics perception stacks—now implemented safely and efficiently in Rust.
Integrating Rust Vision Pipelines with Robotics Middleware (ROS 2)
A vision pipeline becomes truly useful in robotics when it can communicate with the rest of the system—navigation, planning, and control. This is where robotics middleware comes in.
In this section, you’ll learn how to connect a Rust-based vision pipeline to ROS 2, publish vision results, and interoperate seamlessly with nodes written in C++ and Python using ROS 2.
1. Why Use ROS 2 with Rust?
ROS 2 provides:
-
Standardized message passing (topics, services, actions)
-
Real-time-friendly DDS communication
-
Multi-language interoperability
-
Tools for visualization and debugging (rviz, ros2 CLI)
Rust complements ROS 2 by providing:
-
Memory safety for long-running nodes
-
Reliable concurrency
-
High-performance perception modules
A common pattern is:
-
Rust → perception, drivers, performance-critical logic
-
Python/C++ → planning, ML, experimentation
2. ROS 2 + Rust Ecosystem
The most commonly used Rust client library for ROS 2 is:
-
rclrs – Official ROS 2 Rust bindings
It allows you to:
-
Create ROS 2 nodes in Rust
-
Publish/subscribe to topics
-
Use standard ROS 2 messages
3. Installing ROS 2 (Quick Recap)
On Ubuntu (recommended for robotics):
sudo apt update
sudo apt install ros-humble-desktop
Source ROS 2 in your shell:
source /opt/ros/humble/setup.bash
You’ll want to add this to .bashrc for convenience.
4. Creating a Rust ROS 2 Node
Create a New Rust Package
cargo new rust_vision_ros2
cd rust_vision_ros2
Add ROS 2 dependencies to Cargo.toml:
[dependencies]
rclrs = "0.10"
sensor_msgs = "0.10"
opencv = "0.92"
This setup lets us publish camera-derived data as ROS 2 messages.
5. Publishing Vision Data to ROS 2
Let’s publish a simple signal (edge pixel count) derived from our vision pipeline.
Example: Publishing Vision Metrics
use rclrs;
use std::sync::Arc;
use sensor_msgs::msg::Image;

fn main() -> Result<(), Box<dyn std::error::Error>> {
    let context = rclrs::Context::new(std::env::args())?;
    let node = rclrs::create_node(&context, "rust_vision_node")?;

    let publisher = node.create_publisher::<Image>(
        "/vision/image",
        rclrs::QOS_PROFILE_DEFAULT,
    )?;

    println!("Rust vision node started");

    loop {
        let msg = Image {
            height: 480,
            width: 640,
            encoding: "mono8".to_string(),
            data: vec![0; 480 * 640],
            step: 640,
            ..Default::default()
        };

        publisher.publish(&msg)?;
        std::thread::sleep(std::time::Duration::from_millis(33));
    }
}
This example shows:
-
Creating a ROS 2 node in Rust
-
Publishing a
sensor_msgs/Imagemessage -
Running at ~30 FPS
In a real robot, this message would contain actual processed image data.
6. Connecting the Vision Pipeline to ROS 2
Typical integration flow:
OpenCV Camera
     ↓
Rust Vision Pipeline
     ↓
ROS 2 Publisher
     ↓
Navigation / Control Nodes
You might publish:
-
Processed images (
sensor_msgs/Image) -
Detected objects (
vision_msgs) -
Simple metrics (edge count, confidence scores)
This decouples perception from decision-making—a core ROS principle.
7. Visualizing Vision Output
Use ROS 2 tools to inspect your data:
ros2 topic list
ros2 topic echo /vision/image
For image visualization, use rviz2 or image viewer subscribed to the same topic.
This makes debugging perception pipelines much easier than standalone OpenCV windows.
8. Concurrency: Vision + ROS 2
In real systems:
-
Vision runs in one thread
-
ROS 2 publishing runs in another process
Rust handles this safely using:
-
Channels (
std::sync::mpsc) -
Arc<Mutex<T>>(when necessary) -
Zero-copy message preparation (advanced)
This avoids race conditions that commonly plague C++ ROS nodes.
9. Best Practices for Rust + ROS 2 Vision Nodes
-
Keep vision processing outside ROS callbacks
-
Publish only what’s needed (avoid raw frames if possible)
-
Downscale or compress images for bandwidth
-
Prefer metrics and features over full images
Rust nodes are ideal for edge devices where stability matters more than rapid iteration.
Summary
In this section, you learned how to:
✅ Create ROS 2 nodes in Rust
✅ Publish vision data from a Rust pipeline
✅ Integrate OpenCV processing with ROS 2 messaging
✅ Visualize and debug perception output
✅ Design safe, concurrent robotics perception nodes
At this point, you’ve built a full perception stack:
Camera → Rust Vision Pipeline → ROS 2 Middleware → Robot Brain
Performance Optimization and Best Practices for Rust Robotics Vision Systems
Robotics vision systems are performance-critical. Frames arrive continuously, decisions must be made in milliseconds, and the software often runs on embedded or edge hardware. Rust gives you the tools to meet these constraints—but only if you use them correctly.
In this section, we’ll explore practical optimization techniques and best practices for building fast, stable, and production-ready vision pipelines in Rust.
1. Build in Release Mode (Always)
The single most important optimization:
cargo run --release
Rust’s release builds enable:
-
LLVM optimizations
-
Inlining
-
Loop unrolling
-
Vectorization (SIMD)
📌 Rule of thumb:
Never evaluate robotics or vision performance in debug mode.
2. Minimize Memory Allocations
Frequent allocations cause:
-
CPU overhead
-
Cache misses
-
Unpredictable latency
Best Practice: Reuse Buffers
let mut frame = core::Mat::default();
let mut gray = core::Mat::default();
let mut edges = core::Mat::default();
Reuse these buffers every frame instead of re-creating them inside the loop.
Rust + OpenCV already minimizes copying—don’t defeat that advantage.
3. Avoid Unnecessary Cloning
Rust makes cloning explicit for a reason.
❌ Bad:
let processed = frame.clone();
✅ Better:
fn process(input: &Mat, output: &mut Mat)
Use borrowing and mutable references wherever possible.
4. Downscale Early, Process Faster
Robotics vision often doesn’t need full resolution.
Resize Before Heavy Processing
imgproc::resize(
    &frame,
    &mut small,
    core::Size::new(320, 240),
    0.0,
    0.0,
    imgproc::INTER_LINEAR,
)?;
This can:
-
Reduce CPU usage by 4×
-
Increase FPS significantly
-
Improve real-time behavior
📌 Many robots process at 320×240 or 640×480, not HD.
5. Convert to Grayscale ASAP
Color is expensive.
imgproc::cvt_color(&frame, &mut gray, imgproc::COLOR_BGR2GRAY, 0)?;
Most vision algorithms (edges, contours, features) work perfectly in grayscale.
6. Disable GUI in Production
imshow and window handling is slow and blocks execution.
Development:
highgui::imshow("Debug", &edges)?;
Production:
-
Disable windows
-
Publish results to ROS 2
-
Log metrics only
📌 Headless systems run much faster and more reliably.
7. Measure Performance (FPS & Latency)
You can’t optimize what you don’t measure.
Simple FPS Counter
use std::time::Instant;

let mut last = Instant::now();
let mut frames = 0;

frames += 1;
if last.elapsed().as_secs() >= 1 {
    println!("FPS: {}", frames);
    frames = 0;
    last = Instant::now();
}
Track:
-
FPS
-
Frame processing time
-
End-to-end latency (camera → decision)
8. Use Threads Safely (Rust’s Superpower)
A common robotics pattern:
| Thread | Responsibility |
|---|---|
| 1 | Camera capture |
| 2 | Vision processing |
| 3 | ROS 2 publishing |
Rust guarantees:
-
No data races
-
No use-after-free
-
No undefined behavior
Use:
-
std::sync::mpsc -
crossbeam::channel -
Immutable data sharing
This is where Rust clearly outperforms C++ in safety.
9. Optimize ROS 2 Communication
When integrating with ROS 2:
-
Don’t publish raw frames unless necessary
-
Prefer:
-
Bounding boxes
-
Keypoints
-
Confidence scores
-
-
Reduce publish frequency if vision runs faster than control loops
📌 Vision at 60 FPS + control at 10–20 Hz is common.
10. Embedded & Edge Deployment Tips
For ARM-based robots:
-
Cross-compile with Rust targets
-
Disable unused OpenCV modules
-
Use smaller kernels (3×3 instead of 7×7)
-
Avoid dynamic memory in hot loops
Rust excels in:
-
Raspberry Pi
-
NVIDIA Jetson
-
Industrial ARM SBCs
11. Stability Best Practices (Production Robotics)
Robotics software must run for weeks without crashing.
✔ Prefer explicit error handling (Result)
✔ Avoid unwrap() in runtime code
✔ Log errors, don’t panic
✔ Handle camera disconnects gracefully
✔ Restart failed threads safely
Rust’s strictness is an advantage here—not a burden.
Summary
In this section, you learned how to:
✅ Optimize Rust vision pipelines for real-time performance
✅ Reduce memory allocations and copying
✅ Design safe multi-threaded perception systems
✅ Tune ROS 2 communication for robotics workloads
✅ Build stable, long-running vision software
With these best practices, Rust becomes a production-grade foundation for robotics and computer vision—not just an experiment.
Real-World Robotics Vision Use Cases and the Future of Rust in Robotics
Rust is no longer just an experimental language in robotics—it’s increasingly being used where reliability, performance, and safety matter most. In this final section, we’ll look at real-world robotics vision use cases, how Rust fits into each, and where the ecosystem is heading next.
1. Autonomous Robots and Mobile Navigation
Autonomous robots rely heavily on vision for:
-
Obstacle detection
-
Lane or corridor following
-
Visual SLAM and localization
-
Object and human avoidance
Rust is well-suited for these systems because:
-
Vision pipelines must run continuously
-
Concurrency is unavoidable (sensors + control)
-
Crashes are unacceptable
Rust-based perception nodes integrated with ROS 2 are increasingly used for:
-
Edge detection and feature extraction
-
Depth image preprocessing
-
Visual odometry pre-stages
2. Industrial Robotics and Quality Inspection

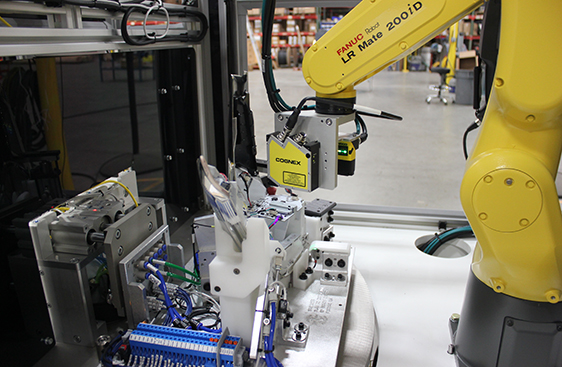
In factories, computer vision is used for:
-
Defect detection
-
Measurement and alignment
-
Assembly verification
Why Rust fits industrial vision:
-
Systems run 24/7
-
Deterministic behavior is critical
-
Memory leaks can halt production
Rust vision services built on OpenCV or pure-Rust pipelines reduce downtime and maintenance costs compared to unmanaged C++ systems.
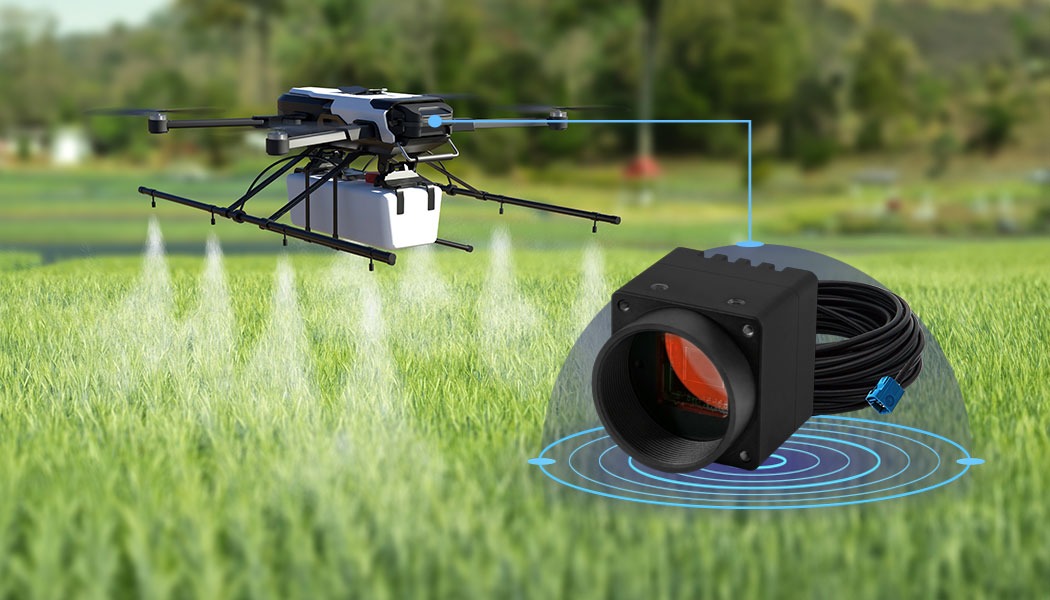
3. Drones and Aerial Robotics
Drones have extreme constraints:
-
Limited CPU and memory
-
Strict power budgets
-
Real-time perception requirements
Rust excels here by offering:
-
Zero-cost abstractions
-
Fine-grained control over memory
-
Efficient ARM performance
Typical Rust-powered drone vision tasks include:
-
Optical flow
-
Marker detection
-
Visual landing assistance
-
Obstacle avoidance
Rust is increasingly used in flight-adjacent systems where safety matters.
4. Agriculture and Field Robotics
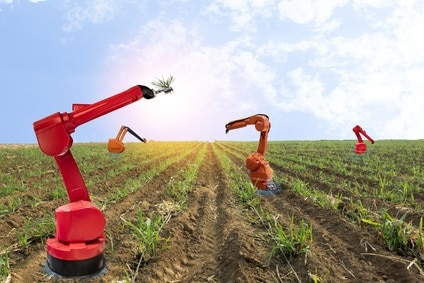
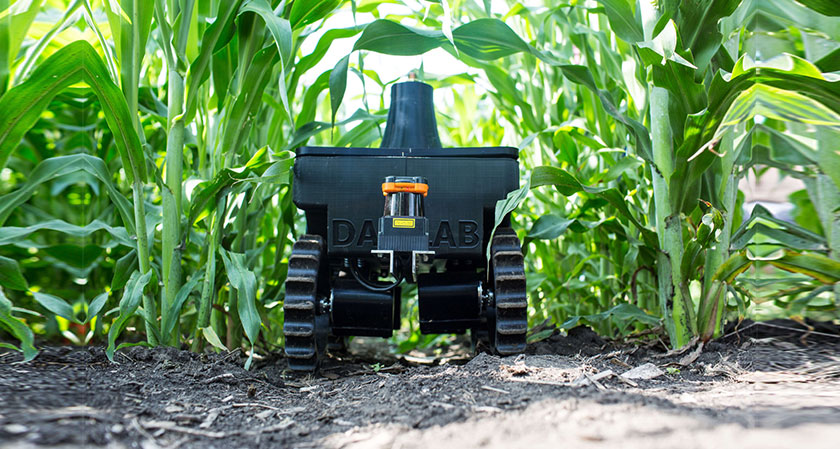
Agricultural robots use vision for:
-
Crop detection and classification
-
Weed identification
-
Yield estimation
-
Autonomous navigation in fields
Rust helps by:
-
Running reliably in harsh environments
-
Supporting edge processing (no cloud dependency)
-
Enabling safe parallel processing of camera + sensor data
These systems often combine Rust perception with Python ML inference.
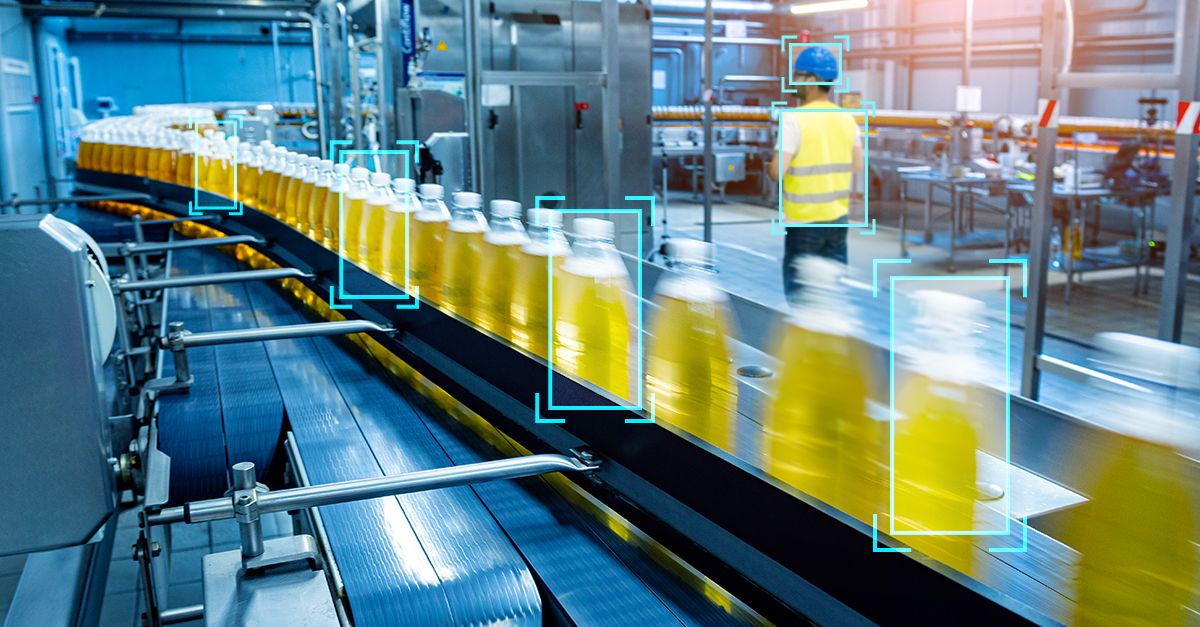
5. Warehouse and Logistics Robots
Vision-powered warehouse robots rely on:
-
Barcode and QR detection
-
Pallet and shelf recognition
-
Human-aware navigation
Rust is a strong fit because:
-
High throughput is required
-
Systems operate continuously
-
Downtime is expensive
Rust vision pipelines often serve as backend perception engines, feeding results into higher-level planning systems.
6. Where Rust Fits Today (Reality Check)
Rust is not replacing everything yet.
| Layer | Rust Adoption |
|---|---|
| Sensor drivers | ⭐⭐⭐⭐⭐ |
| Vision preprocessing | ⭐⭐⭐⭐ |
| Control & middleware | ⭐⭐⭐ |
| ML training | ⭐ |
| Rapid prototyping | ⭐⭐ |
Most production systems today use hybrid stacks:
-
Rust for perception & infrastructure
-
Python for ML & experimentation
-
C++ where legacy code exists
7. The Future of Rust in Robotics
Several trends strongly favor Rust’s growth:
Growing Safety Requirements
As robots move into public spaces, memory safety becomes non-negotiable. Rust offers safety guarantees unmatched by C++.
Better Middleware & Tooling
-
ROS 2 Rust support continues to improve
-
Async Rust enables high-throughput sensor pipelines
-
Cross-compilation and embedded support are mature
Industry Adoption
More robotics companies are adopting Rust internally—even if not publicly—especially for:
-
Safety-critical components
-
Infrastructure services
-
Long-running perception nodes
8. Rust + AI + Robotics (What’s Next)
The future stack often looks like:
Rust (Vision + Systems)
   ↓
ML Inference (ONNX / Python)
   ↓
Control & Planning (ROS 2)
Rust will increasingly:
-
Prepare and validate data for ML
-
Run inference at the edge
-
Enforce safety boundaries around AI systems
This positions Rust as the “trust layer” of intelligent robotics.
Final Thoughts
Rust is not just a faster or safer language—it’s a strategic choice for robotics teams building systems that must be:
-
Reliable
-
Concurrent
-
High-performance
-
Long-running
For robotics and computer vision engineers, learning Rust today is an investment in the next decade of intelligent machines.
Conclusion
Robotics and computer vision are pushing software to its limits—real-time performance, concurrency, and long-term reliability are no longer optional. Throughout this tutorial, we explored how Rust programming language rises to meet these demands and why it’s becoming a serious contender in modern robotics stacks.
You learned how to:
-
Set up a Rust environment for robotics and vision
-
Capture and process camera images efficiently
-
Build a clean, real-time vision pipeline
-
Integrate Rust perception systems with ROS 2
-
Optimize performance for embedded and edge devices
-
Apply Rust vision systems to real-world robotics use cases
By combining Rust’s memory safety, predictable performance, and fearless concurrency with proven ecosystems like OpenCV and ROS 2, you get a foundation that is not only fast—but trustworthy enough for long-running, safety-critical robotic systems.
Importantly, Rust doesn’t demand an all-or-nothing approach. Today’s most effective robotics architectures are hybrid:
-
Rust for perception, drivers, and infrastructure
-
Python for experimentation and ML workflows
-
C++ where legacy systems already exist
This pragmatic integration is where Rust shines—quietly reducing crashes, eliminating data races, and simplifying complex concurrent code.
The Road Ahead
As robots move deeper into public spaces, factories, farms, and warehouses, the industry’s tolerance for unstable software will continue to shrink. Rust’s design aligns perfectly with this future, positioning it as a long-term investment rather than a short-lived trend.
If you’re building robotics systems that must run fast, safely, and reliably, Rust is no longer just an interesting option—it’s a compelling choice.
You can find the full source code of Rust Vision and Rust Vision ROS 2 on our GitHub.
That's just the basics. If you need more deep learning about Rust, you can take the following cheap course:
- Learn to Code with Rust
- Rust: The Complete Developer's Guide
- Master The Rust Programming Language : Beginner To Advanced
- Embedded Rust Development with STM32: Absolute Beginners
- Build an AutoGPT Code Writing AI Tool With Rust and GPT-4
- Rust Programming Bootcamp - 100 Projects in 100 Days
- Learn Rust by Building Real Applications
- Building web APIs with Rust (advanced)
- Developing P2P Applications with Rust
- Real time web applications in Rust
Welcome to the new frontier of robotics and computer vision. 🚀