In this tutorial, we’ll walk through how to create an AI-powered image generator using the Stability AI API and Vue 3. You’ll learn how to integrate an external AI service, build a reactive front-end with Vue, and handle asynchronous image generation and display.
Prerequisites
-
Basic knowledge of Vue 3 and JavaScript
-
Node.js and npm are installed
-
Stability AI API key (you can sign up at platform.stability.ai)
1. Set Up Your Vue 3 Project
Use Vite to scaffold a Vue 3 app.
npm create vite@latest ai-image-generator -- --template vue
cd ai-image-generator
npm install
npm run dev
Open this URL http://localhost:5173/ in your browser. You will see this Vite + Vue welcome page.

2. Create the Form to Generate Images
Create a simple input form for entering a prompt and a button to generate the image.
src/components/ImageForm.vue
<template>
  <div class="form">
    <input v-model="prompt" placeholder="Enter image prompt..." />
    <button @click="generateImage" :disabled="loading">Generate</button>
    <div v-if="loading">Generating...</div>
  </div>
</template>

<script setup>
import { ref } from 'vue';

const prompt = ref('');
const loading = ref(false);

const emit = defineEmits(['imageGenerated']);

async function generateImage() {
  if (!prompt.value) return;
  loading.value = true;

  const response = await fetch('/api/generate', {
    method: 'POST',
    headers: { 'Content-Type': 'application/json' },
    body: JSON.stringify({ prompt: prompt.value }),
  });

  const data = await response.json();
  emit('imageGenerated', data.imageUrl);
  loading.value = false;
}
</script>
3. Display the Generated Image
src/App.vue
<template>
  <div class="container">
    <ImageForm @imageGenerated="image = $event" />
    <div v-if="image">
      <h2>Generated Image</h2>
      <img :src="image" alt="AI Generated" />
    </div>
  </div>
</template>

<script setup>
import ImageForm from './components/ImageForm.vue';
import { ref } from 'vue';

const image = ref('');
</script>
4. Create a Backend Proxy with Express
Install all required modules and dependencies:
npm i express node-fetch cors dotenvserver/index.js
import express from 'express';
import fetch from 'node-fetch';
import cors from 'cors';
import dotenv from 'dotenv';
dotenv.config();

const app = express();
app.use(cors());
app.use(express.json());

app.post('/api/generate', async (req, res) => {
  const { prompt } = req.body;

  const response = await fetch('https://api.stability.ai/v1/generation/stable-diffusion-v1-5/text-to-image', {
    method: 'POST',
    headers: {
      'Authorization': `Bearer ${process.env.STABILITY_API_KEY}`,
      'Content-Type': 'application/json',
    },
    body: JSON.stringify({
      text_prompts: [{ text: prompt }],
      cfg_scale: 7,
      height: 512,
      width: 512,
      steps: 30,
      samples: 1,
    }),
  });

  const result = await response.json();
  const imageBase64 = result.artifacts?.[0]?.base64;

  res.json({ imageUrl: `data:image/png;base64,${imageBase64}` });
});

app.listen(3001, () => console.log('API running on http://localhost:3001'));
5. Connect Vue Frontend with Backend
Edit vite.config.js to proxy API requests:
export default defineConfig({
  plugins: [vue()],
  server: {
    proxy: {
      '/api': 'http://localhost:3001',
    },
  },
});
6. Run Everything
Run the Vue frontend:
npm run devIn another terminal, start the Express backend:
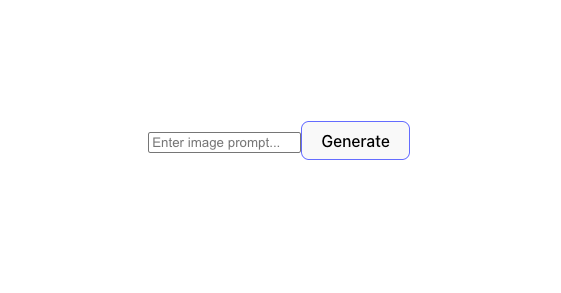
node server/index.jsYou will find this image form.

Conclusion
You’ve now built a simple AI image generator using Stability AI’s API and Vue 3! This is a great starting point to explore advanced image models, prompt engineering, and integrating other services like saving generated images or adding image history.
You can get the full source code on our GitHub.
That's just the basics. If you need more deep learning about Vue/Vue.js, you can take the following cheap course:
- Vue - The Complete Guide (incl. Router & Composition API)
- Vue JS - The Complete Guide [2025]
- Complete Vue Developer Bootcamp (Pinia, Vitest)
- Vue.js 3 Masterclass: Build 7 Real-World Apps
- Build Web Apps with Vue JS 3 & Firebase
- Vue.js 3 - The Complete Guide Interview Q&S
- Vue JS 3 For Modern Web Development - Beginner to Advanced
- Nuxt 3 & Supabase Mastery: Build 2 Full-Stack Apps
- Vue.js 3 Essentials: Build Dynamic Web Apps with Confidence
- Complete Vue.js 3 Course: Vuejs 3, Vite, TailwindCSS, Pinia
Thanks!
