
Authentication is one of the most important parts of any modern web application. Whether you are building a blog, an e-commerce platform, or a SaaS product, you’ll need a secure way for users to sign up, log in, and manage their sessions. In the Nuxt 4 ecosystem, this is made easier with the help of Nuxt Auth and server routes.
Nuxt 4 is the latest version of the popular Vue.js framework, designed for building full-stack, performant, and developer-friendly applications. It introduces powerful features like server routes, server-side rendering, hybrid rendering, and enhanced developer experience out of the box.
In this tutorial, we’ll walk through how to implement authentication in a Nuxt 4 app using the @sidebase/nuxt-auth module (commonly referred to as Nuxt Auth). You’ll learn how to:
-
Set up a new Nuxt 4 project.
-
Install and configure Nuxt Auth with a credentials provider.
-
Create server routes for login, signup, and session management.
-
Build authentication pages (login, signup, dashboard).
-
Protect routes using middleware.
-
Display user info and handle logout.
By the end of this tutorial, you’ll have a working Nuxt 4 application with a secure authentication system that you can extend with more advanced features like OAuth, JWT, or role-based access control.
Prerequisites
Before diving into this tutorial, make sure you have the following:
-
Basic Knowledge
-
Familiarity with JavaScript or TypeScript
-
Understanding of Vue.js basics (components, composables, reactive state)
-
Some knowledge of Nuxt.js is helpful but not required
-
-
Installed Tools
-
Node.js 20+ (Nuxt 4 requires a modern Node.js version)
-
A package manager: npm, yarn, or pnpm
-
A code editor such as Visual Studio Code
-
-
What We’ll Build
-
A simple Nuxt 4 app with authentication (signup, login, logout)
-
Protected dashboard route that only authenticated users can access
-
Session handling using Nuxt Auth with a credentials provider
-
If you already have these prerequisites set up, you’re ready to start building your Nuxt 4 authentication app.
Setting Up a New Nuxt 4 Project
First, we’ll create a fresh Nuxt 4 project as the foundation of our authentication app.
Step 1: Create a Nuxt 4 project
Run the following command in your terminal to generate a new Nuxt 4 project:
npx nuxi init nuxt3-auth-tutorialThis will create a new folder called nuxt4-auth-tutorial with the default Nuxt 4 starter template.
Step 2: Install dependencies
Navigate into your project folder and install the dependencies:
cd nuxt4-auth-tutorial
npm install
💡 You can also use
yarnorpnpmif that’s your preferred package manager.
Step 3: Run the development server
Start the local development server with:
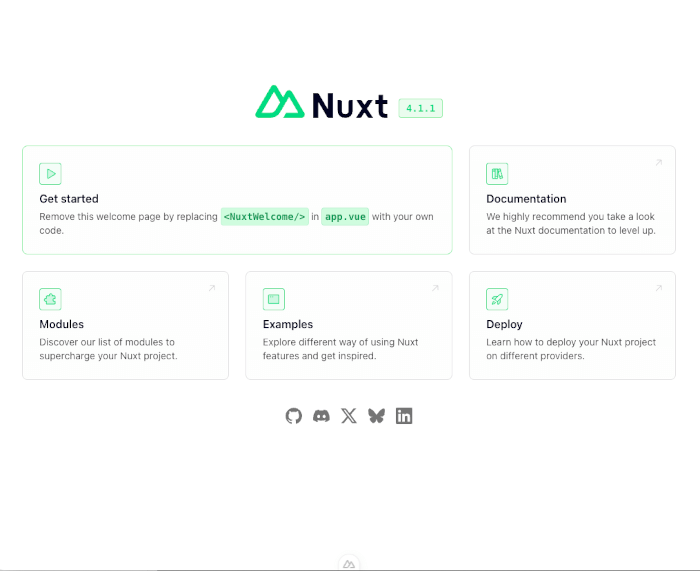
npm run devBy default, Nuxt will launch at http://localhost:3000. You should see the sleek new Nuxt 4 starter interface—this means everything is set up!
Step 4: Explore the Nuxt 4 Project Structure
Nuxt 4 introduced a refined project layout that improves clarity and performance. Here's what to expect:
nuxt4-auth-tutorial/
├── app/
│   ├── components/
│   ├── layouts/
│   ├── pages/
│   └── app.vue
├── public/
├── server/
│   └── api/
├── shared/
├── nuxt.config.ts
└── ...
Key notes:
-
.app/houses your UI logic (pages, components, layouts, entryapp.vue). -
.server/is where your server-side logic lives, including API routes. -
.shared/is ideal for code that’s used by both client and server. -
Nuxt’s separation enhances IDE support and build performance.
Summary Table
| Step | Command / Action |
|---|---|
| Scaffold project | npm create nuxt@latest nuxt4-auth-tutorial |
| Install dependencies | cd nuxt4-auth-tutorial && npm install |
| Confirm version | npx nuxi info → should show v4.1.1 |
| Run development server | npm run dev → open http://localhost:3000 |
| Familiarize with structure | Note the new app/, server/, and shared/ folders in your project root |
You're now set with a Nuxt 4.1.1 project—an optimized, future-ready foundation for your authentication tutorial.
Installing and Configuring Nuxt Auth
Nuxt doesn’t come with built-in authentication, but the community-maintained module @sidebase/nuxt-auth integrates seamlessly with NextAuth.js, providing powerful authentication features (credentials, OAuth, JWT, etc.) while working with Nuxt’s new server routes.
In this tutorial, we’ll use the Credentials Provider (email + password) to keep things simple, but the setup is flexible enough to add Google, GitHub, or other OAuth providers later.
Step 1: Install Nuxt Auth
From your project root, run:
npm install @sidebase/nuxt-authStep 2: Enable the Module in nuxt.config.ts
Open your nuxt.config.ts file and register the module:
// https://nuxt.com/docs/api/configuration/nuxt-config
export default defineNuxtConfig({
  compatibilityDate: '2025-07-15',
  devtools: { enabled: true },
  modules: [
    '@sidebase/nuxt-auth'
  ]
})
💡 We’ll be using environment variables (like
AUTH_ORIGIN) so you can easily switch between local and production setups.
Step 3: Set up Auth API Route
Nuxt Auth expects an API route that handles authentication. Create a new file:
server/api/auth/[...].tsInside, add:
import { NuxtAuthHandler } from '#auth'
import CredentialsProvider from 'next-auth/providers/credentials'
import bcrypt from 'bcrypt'

const users = [
    {
        id: '1',
        name: 'John Doe',
        email: '[email protected]',
        // pre-hashed password for demo purposes
        password: bcrypt.hashSync('password123', 10)
    }
]

export default NuxtAuthHandler({
    secret: process.env.AUTH_SECRET,
    providers: [
        CredentialsProvider({
            name: 'Credentials',
            credentials: {
                email: { label: 'Email', type: 'text' },
                password: { label: 'Password', type: 'password' }
            },
            async authorize(credentials) {
                const user = users.find(u => u.email === credentials?.email)
                if (user && await bcrypt.compare(credentials?.password || '', user.password)) {
                    return { id: user.id, name: user.name, email: user.email }
                }
                return null
            }
        })
    ],
    pages: {
        signIn: '/login'
    }
})
This sets up a credentials provider with a mock user. Later, you can replace this with database queries (e.g., Prisma, MongoDB, or direct SQL).
Step 4: Environment Variables
Create a .env file in the root of your project:
AUTH_ORIGIN=http://localhost:3000
AUTH_SECRET=your-secret-key-
AUTH_ORIGIN→ the base URL of your Nuxt app (important for callbacks). -
AUTH_SECRET→ a random string used to sign cookies and tokens. Generate a secure value, for example:
openssl rand -base64 32Step 5: Use the useAuth Composable
Nuxt Auth exposes a useAuth() composable to manage login, logout, and session state in your components. For example:
<script setup lang="ts">
const { status, data, signIn, signOut } = useAuth()
</script>

<template>
  <div>
    <p v-if="status === 'authenticated'">Welcome, {{ data.user?.name }}</p>
    <button v-if="status !== 'authenticated'" @click="signIn()">Login</button>
    <button v-else @click="signOut()">Logout</button>
  </div>
</template>
This gives us the building blocks to create full login and signup pages.
✅ At this point, Nuxt Auth is installed and connected to a credentials provider via server routes. You can already sign in/out with the mock user!
Creating Authentication Server Routes
So far, our auth setup only supports logging in with a mock user. In this section, we’ll extend it by adding:
-
A signup route (
/api/auth/signup) for creating users. -
A login/session route powered by Nuxt Auth (
/api/auth/[...].ts). -
Basic in-memory storage for users (later you can replace this with a database like Prisma + Postgres, MongoDB, or MySQL).
Step 1: Set up an In-Memory User Store
For demo purposes, we’ll use a simple array. In production, this should be replaced with a real database.
// server/utils/userStore.ts
import bcrypt from 'bcrypt'

export interface User {
  id: string
  name: string
  email: string
  password: string // hashed password
}

// Fake in-memory DB
export const users: User[] = []

// Add new user
export async function addUser(name: string, email: string, password: string) {
  const hashedPassword = await bcrypt.hash(password, 10)
  const user: User = {
    id: Date.now().toString(),
    name,
    email,
    password: hashedPassword
  }
  users.push(user)
  return user
}

// Find user by email
export function findUserByEmail(email: string) {
  return users.find(u => u.email === email)
}
Step 2: Sign up API Route
Now, let’s create a signup endpoint.
// server/api/auth/signup.post.ts
import { addUser, findUserByEmail } from '../../utils/userStore'

export default defineEventHandler(async (event) => {
  const body = await readBody(event)
  const { name, email, password } = body

  if (!name || !email || !password) {
    throw createError({ statusCode: 400, statusMessage: 'Missing fields' })
  }

  const existingUser = findUserByEmail(email)
  if (existingUser) {
    throw createError({ statusCode: 400, statusMessage: 'User already exists' })
  }

  const user = await addUser(name, email, password)

  return {
    message: 'User registered successfully',
    user: { id: user.id, name: user.name, email: user.email }
  }
})
Now we can call /api/auth/signup with POST and register new users 🎉
Step 3: Update the Nuxt Auth Login Handler
We’ll use the same userStore.ts to validate credentials.
// server/api/auth/[...].ts
import { NuxtAuthHandler } from '#auth'
import CredentialsProvider from 'next-auth/providers/credentials'
import { findUserByEmail } from '../../utils/userStore'
import bcrypt from 'bcrypt'

export default NuxtAuthHandler({
  secret: process.env.AUTH_SECRET,
  providers: [
    CredentialsProvider({
      name: 'Credentials',
      credentials: {
        email: { label: 'Email', type: 'text' },
        password: { label: 'Password', type: 'password' }
      },
      async authorize(credentials) {
        if (!credentials?.email || !credentials?.password) return null

        const user = findUserByEmail(credentials.email)
        if (user && await bcrypt.compare(credentials.password, user.password)) {
          return { id: user.id, name: user.name, email: user.email }
        }
        return null
      }
    })
  ],
  pages: {
    signIn: '/login'
  }
})
Step 4: Session Handling
With Nuxt Auth, sessions are automatically managed for you via cookies.
-
On login, a session cookie is created.
-
You can access the session client-side via
useAuth(). -
You can also access it server-side via
getServerSession(event)if needed in API routes.
Example server-side usage:
// server/api/profile.get.ts
import { getServerSession } from '#auth'

export default defineEventHandler(async (event) => {
  const session = await getServerSession(event)
  if (!session) {
    throw createError({ statusCode: 401, statusMessage: 'Unauthorized' })
  }
  return session.user
})
✅ At this stage:
-
You can sign up a user with
/api/auth/signup. -
You can log in with those credentials at
/login. -
Sessions persist across refreshes and are accessible both client and server side.
Building the Login and Signup Pages
We’ll create two pages:
-
/signup→ allows users to register (calls our custom/api/auth/signup). -
/login→ allows users to log in using Nuxt Auth’ssignIn()method.
Both pages will use Nuxt 4’s file-based routing system (app/pages/ directory).
Step 1: Signup Page
Create a new file app/pages/signup.vue:
<script setup lang="ts">
import { ref } from 'vue'
import { useRouter } from '#imports'

const name = ref('')
const email = ref('')
const password = ref('')
const error = ref('')
const success = ref('')
const router = useRouter()

const handleSignup = async () => {
  error.value = ''
  success.value = ''

  try {
    const res = await $fetch('/api/auth/signup', {
      method: 'POST',
      body: { name: name.value, email: email.value, password: password.value }
    })
    success.value = res.message
    // Redirect to login after successful signup
    setTimeout(() => router.push('/login'), 1000)
  } catch (err: any) {
    error.value = err?.data?.statusMessage || 'Signup failed'
  }
}
</script>

<template>
  <div class="max-w-md mx-auto mt-10 p-6 border rounded-xl shadow">
    <h1 class="text-2xl font-bold mb-4">Signup</h1>

    <form @submit.prevent="handleSignup" class="space-y-4">
      <input v-model="name" type="text" placeholder="Name" class="w-full p-2 border rounded" required />
      <input v-model="email" type="email" placeholder="Email" class="w-full p-2 border rounded" required />
      <input v-model="password" type="password" placeholder="Password" class="w-full p-2 border rounded" required />

      <button type="submit" class="w-full bg-blue-600 text-white p-2 rounded">Sign Up</button>
    </form>

    <p v-if="error" class="text-red-600 mt-2">{{ error }}</p>
    <p v-if="success" class="text-green-600 mt-2">{{ success }}</p>

    <p class="mt-4">
      Already have an account?
      <NuxtLink to="/login" class="text-blue-600">Login</NuxtLink>
    </p>
  </div>
</template>
Step 2: Login Page
Create app/pages/login.vue:
<script setup lang="ts">
import { ref } from 'vue'
import { useAuth } from '#imports'
import { useRouter } from '#imports'

const email = ref('')
const password = ref('')
const error = ref('')
const router = useRouter()

const { signIn, status } = useAuth()

const handleLogin = async () => {
  error.value = ''
  const res = await signIn('credentials', {
    redirect: false,
    email: email.value,
    password: password.value
  })

  if (res?.error) {
    error.value = 'Invalid email or password'
  } else {
    router.push('/dashboard')
  }
}
</script>

<template>
  <div class="max-w-md mx-auto mt-10 p-6 border rounded-xl shadow">
    <h1 class="text-2xl font-bold mb-4">Login</h1>

    <form @submit.prevent="handleLogin" class="space-y-4">
      <input v-model="email" type="email" placeholder="Email" class="w-full p-2 border rounded" required />
      <input v-model="password" type="password" placeholder="Password" class="w-full p-2 border rounded" required />

      <button type="submit" class="w-full bg-green-600 text-white p-2 rounded">Login</button>
    </form>

    <p v-if="error" class="text-red-600 mt-2">{{ error }}</p>

    <p class="mt-4">
      Don’t have an account?
      <NuxtLink to="/signup" class="text-blue-600">Sign up</NuxtLink>
    </p>
  </div>
</template>
Step 3: Quick Test
-
Go to
/signup→ register a new user. -
Redirected to
/login→ log in with those credentials. -
If successful, you should be redirected to
/dashboard(we’ll protect this route in the next section).
✅ At this point:
-
You have working signup and login forms.
-
Users are stored in an in-memory store.
-
Sessions are managed automatically by Nuxt Auth.
Protecting Routes with Middleware
Nuxt 4 makes it easy to protect routes using route middleware. With @sidebase/nuxt-auth, we can leverage useAuth() to check if a user is logged in and redirect them if not.
Step 1: Create Auth Middleware
Create a new file app/middleware/auth.global.ts:
// app/middleware/auth.global.ts
import { defineNuxtRouteMiddleware, navigateTo } from '#app'
import { useAuth } from '#imports'

export default defineNuxtRouteMiddleware((to) => {
  const { status } = useAuth()

  // Protect only specific routes
  if (to.path.startsWith('/dashboard') && status.value !== 'authenticated') {
    return navigateTo('/login')
  }
})
🔑 How it works:
-
This middleware runs before navigation.
-
If the route starts with
/dashboardand the user is not authenticated, we redirect to/login.
Step 2: Create a Dashboard Page
Let’s add a dashboard that should only be accessible to logged-in users.
app/pages/dashboard.vue:
<script setup lang="ts">
import { useAuth } from '#imports'

const { status, data, signOut } = useAuth()
</script>

<template>
  <div class="max-w-2xl mx-auto mt-10 p-6 border rounded-xl shadow">
    <h1 class="text-2xl font-bold mb-4">Dashboard</h1>

    <div v-if="status === 'authenticated'">
      <p class="mb-4">Welcome, <strong>{{ data.user?.name }}</strong> ({{ data.user?.email }})</p>
      <button @click="signOut()" class="bg-red-600 text-white px-4 py-2 rounded">Logout</button>
    </div>

    <div v-else>
      <p>You are not logged in.</p>
      <NuxtLink to="/login" class="text-blue-600">Login</NuxtLink>
    </div>
  </div>
</template>
Step 3: Test It
-
Try visiting
/dashboardwithout logging in → you should be redirected to/login. -
Log in with valid credentials → you’ll see the dashboard with your user info and a logout button.
-
Click logout → you’ll be redirected back to
/login.
✅ At this stage:
-
Your app now has protected routes.
-
Only authenticated users can access
/dashboard. -
The session persists thanks to Nuxt Auth.
Displaying User Info & Logout
Now that authentication and protected routes are working, let’s enhance the UX by displaying the logged-in user’s info in a global navigation bar.
Step 1: Create a Layout with Navbar
Nuxt 4 supports layouts via the app/layouts directory. Let’s create a default layout with a navbar.
app/layouts/default.vue:
<script setup lang="ts">
import { useAuth } from '#imports'

const { status, data, signOut } = useAuth()
</script>

<template>
  <div>
    <!-- Navbar -->
    <header class="bg-gray-800 text-white px-6 py-4 flex justify-between items-center">
      <NuxtLink to="/" class="font-bold text-lg">Nuxt Auth App</NuxtLink>

      <nav class="flex items-center gap-4">
        <NuxtLink to="/" class="hover:underline">Home</NuxtLink>
        <NuxtLink to="/dashboard" class="hover:underline">Dashboard</NuxtLink>

        <!-- Show login/signup if not authenticated -->
        <template v-if="status === 'unauthenticated'">
          <NuxtLink to="/login" class="hover:underline">Login</NuxtLink>
          <NuxtLink to="/signup" class="hover:underline">Signup</NuxtLink>
        </template>

        <!-- Show user info & logout if authenticated -->
        <template v-else-if="status === 'authenticated'">
          <span class="mr-2">Hi, {{ data.user?.name }}</span>
          <button
            @click="signOut({ callbackUrl: '/' })"
            class="bg-red-600 hover:bg-red-700 px-3 py-1 rounded"
          >
            Logout
          </button>
        </template>
      </nav>
    </header>

    <!-- Main content -->
    <main class="p-6">
      <slot />
    </main>
  </div>
</template>
Step 2: Apply Layout Automatically
Since the file is named default.vue, Nuxt will automatically apply it to all pages. You don’t need to configure anything extra.
Step 3: Test It
-
Visit
/loginand log in → the navbar should now display Hi, username with a Logout button. -
Try logging out → you’ll be redirected to
/, and the navbar will switch back to Login / Signup.
✅ At this stage:
-
The app has a global navbar that adapts based on authentication state.
-
Users can easily log out from anywhere.
-
The experience feels more complete and professional.
Conclusion + Next Steps
In this tutorial, we built a Nuxt 4 authentication system using @sidebase/nuxt-auth and server routes. Along the way, we covered:
-
✅ Setting up a Nuxt 4.1.1 project
-
✅ Installing and configuring Nuxt Auth with a credentials provider
-
✅ Creating server routes for signup, login, and user fetching
-
✅ Building login and signup pages with forms and API calls
-
✅ Protecting routes using middleware
-
✅ Displaying user info globally and adding a logout button
By following these steps, you now have a fully functional authentication system with session handling, protected routes, and a clean user experience.
Next Steps
Here are some ways you can extend this project further:
-
🔒 Add Role-Based Access Control (RBAC) → e.g., only admins can access
/admin. -
🗄️ Connect a real database → integrate Prisma, PostgreSQL, or MongoDB instead of a dummy in-memory array.
-
🔑 OAuth Providers → enable login with Google, GitHub, or other identity providers via
@sidebase/nuxt-auth. -
📱 Improve UI/UX → enhance forms with validation libraries (like Vee-Validate or Zod) and use Tailwind UI components.
-
🌐 API Security → add CSRF protection, HTTPS, and JWT-based APIs if you want to support mobile apps.
✨ With Nuxt 4 and @sidebase/nuxt-auth, building secure, scalable authentication is easier than ever. You now have a solid foundation to expand into production-ready authentication systems.
You can get the full source code on our GitHub.
That's just the basics. If you need more deep learning about Nuxt.js, you can take the following cheap course:
- Nuxt 3 & Supabase Mastery: Build 2 Full-Stack Apps
- Build Web Apps with Nuxt.js 3: Master TypeScript & API [New]
- The Nuxt 3 Bootcamp - The Complete Developer Guide
- Complete Nuxt.js Course (EXTRA React)
- The Complete NUXT 3 Bootcamp: Full-Stack Guide
- Nuxt 3 Authentication with Laravel Sanctum:A Practical Guide
- Learn How to Make Your Nuxt 3 App SEO-Friendly
- Headless Prestashop with Nuxt JS
Thanks!