
State management is one of the most important aspects of building React applications. As your app grows, managing data flow between components can quickly become complicated — especially when multiple components need access to the same state. That’s where tools like React Context API and Redux come in.
Both solutions aim to make state sharing easier, but they do so in different ways. The React Context API is a built-in solution for passing data through the component tree without prop drilling. Redux, on the other hand, is an external library designed for predictable and centralized state management, often used in larger applications.
In this tutorial, you’ll learn the practical differences between Context API and Redux by building two small apps side by side — one using each approach. By the end, you’ll understand:
-
How Context API and Redux handle state.
-
When to use each approach depending on your app’s size and complexity.
-
The pros and cons of both tools through real code examples.
Whether you’re a beginner exploring state management for the first time or looking to decide which tool suits your next project, this guide will give you a clear, hands-on comparison of React Context API vs Redux.
Prerequisites
Before diving into the examples, make sure you have the following tools and knowledge ready. This tutorial is designed for beginners who already have some basic experience with React and TypeScript.
What You Should Know
To get the most out of this tutorial, you should be familiar with:
-
The fundamentals of React components and hooks (
useState,useEffect, anduseContext). -
Basic TypeScript syntax for defining types and interfaces.
-
How to run a React app using the command line.
If you’re completely new to React, check out the official React documentation before proceeding.
What You’ll Need Installed
Make sure you have the following installed on your system:
-
Node.js (v18 or higher) – Download from nodejs.org.
-
npm or yarn – Comes bundled with Node.js.
-
A code editor – Visual Studio Code is recommended.
-
A modern browser – Preferably Chrome, Firefox, or Edge for running and testing the app.
Project Overview
In this tutorial, you’ll create two simple counter applications:
-
One uses React Context API for state management.
-
Another is using Redux Toolkit, the modern way to implement Redux in React.
This side-by-side comparison will help you understand how each approach handles state updates, component communication, and scalability.
Setting Up the Project
To keep things simple and modern, we’ll use Vite to quickly scaffold our React 19.2 + TypeScript project. Vite is fast, lightweight, and works perfectly with the latest React features.
Step 1: Create a New React App with Vite
Open your terminal and run the following command to create a new project:
npm create vite@latest react-context-vs-redux -- --template react-tsThe Vite + React application will run automatically. Then open the URL shown in the terminal (usually http://localhost:5173/) in your browser.

You should see the default Vite + React welcome page. Stop the running Vite + React application, then move into the project folder:
cd react-context-vs-reduxThis command sets up a new React project with TypeScript support out of the box.
Step 2: Install Dependencies
We’ll first install dependencies that are common for both examples:
npm installNext, install the Redux Toolkit and React-Redux (for the Redux section later):
npm install @reduxjs/toolkit react-reduxStep 3: Project Structure Overview
After installation, your folder structure should look like this:
react-context-vs-redux/
├── node_modules/
├── public/
├── src/
│   ├── assets/
│   ├── App.css
│   ├── App.tsx
│   ├── main.tsx
│   └── vite-env.d.ts
├── index.html
├── package.json
├── tsconfig.json
└── vite.config.ts
We’ll create two folders inside src/ — one for each example:
src/
├── context-example/
├── redux-example/
Each folder will contain its own components, store (if applicable), and context files, so you can easily compare how Context API and Redux manage state.
Managing State with React Context API
The React Context API is a built-in feature that allows you to share data across components without passing props manually at every level (known as prop drilling).
For small to medium apps, Context API is often all you need to manage global state effectively.
In this section, you’ll build a simple counter app using Context API and the useReducer hook — similar to Redux logic but simpler and built into React.
Step 1: Create the Context
Inside src/context-example/, create a file named CounterContext.tsx:
import React, {
  createContext,
  useReducer,
  type ReactNode,
  type Dispatch
} from "react";

type State = {
  count: number;
};

type Action = { type: "INCREMENT" } | { type: "DECREMENT" } | { type: "RESET" };

const initialState: State = { count: 0 };

function counterReducer(state: State, action: Action): State {
  switch (action.type) {
    case "INCREMENT":
      return { count: state.count + 1 };
    case "DECREMENT":
      return { count: state.count - 1 };
    case "RESET":
      return { count: 0 };
    default:
      return state;
  }
}

type CounterContextType = {
  state: State;
  dispatch: Dispatch<Action>;
};

export const CounterContext = createContext<CounterContextType | undefined>(
  undefined
);

export const CounterProvider = ({ children }: { children: ReactNode }) => {
  const [state, dispatch] = useReducer(counterReducer, initialState);
  return (
    <CounterContext.Provider value={{ state, dispatch }}>
      {children}
    </CounterContext.Provider>
  );
};
✅ What’s happening here:
-
We define our state and actions using TypeScript types.
-
The
useReducerhook manages state updates based on dispatched actions. -
We wrap everything in a
CounterProvidercomponent, which provides state to any child components.
Step 2: Create the Counter Component
Now, inside the same folder, create Counter.tsx:
import React, { useContext } from "react";
import { CounterContext } from "./CounterContext";

const Counter = () => {
  const context = useContext(CounterContext);

  if (!context) {
    throw new Error("Counter must be used within a CounterProvider");
  }

  const { state, dispatch } = context;

  return (
    <div style={{ textAlign: "center", marginTop: "2rem" }}>
      <h2>React Context API Counter</h2>
      <h3>Count: {state.count}</h3>
      <button onClick={() => dispatch({ type: "INCREMENT" })}>Increment</button>
      <button onClick={() => dispatch({ type: "DECREMENT" })}>Decrement</button>
      <button onClick={() => dispatch({ type: "RESET" })}>Reset</button>
    </div>
  );
};

export default Counter;
✅ Explanation:
-
The component is used
useContextto access the global counter state and dispatch actions. -
When a button is clicked, it sends an action (
INCREMENT,DECREMENT, orRESET) to update the state.
Step 3: Integrate the Provider into App
Open src/App.tsx and replace its contents with:
import React from "react";
import { CounterProvider } from "./context-example/CounterContext";
import Counter from "./context-example/Counter";

function App() {
  return (
    <CounterProvider>
      <Counter />
    </CounterProvider>
  );
}

export default App;
✅ How it works:
-
The
CounterProviderwraps theCountercomponent, making the shared state accessible to it. -
You can now add more components anywhere inside
CounterProvider, and they’ll all share the same counter state.
Step 4: Run the App
Run the development server again:
npm run devThen open your browser and navigate to http://localhost:5173/.
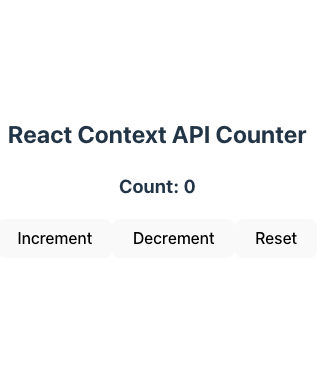
You’ll see your React Context API Counter App in action — increment, decrement, and reset the count. 🎉
Pros and Cons of Context API
✅ Pros
-
Built into React — no extra library needed.
-
Simple setup and minimal boilerplate.
-
Great for small and medium projects.
⚠️ Cons
-
Not optimized for large or deeply nested applications.
-
Frequent re-renders can affect performance if used for high-frequency updates.
-
Lacks advanced features like devtools or middleware.
Managing State with Redux (Redux Toolkit)
While React Context API is great for smaller projects, Redux Toolkit (RTK) shines when your app grows larger and you need predictable, centralized state management.
Redux Toolkit is the official, modern way to use Redux. It eliminates most of the old boilerplate and adds convenient tools for reducers, actions, and async logic.
In this section, you’ll recreate the same counter app using Redux Toolkit and compare it with the Context version.
Step 1: Create a Redux Slice
Inside src/redux-example/, create a file named counterSlice.ts:
import { createSlice } from "@reduxjs/toolkit";

type CounterState = {
  value: number;
};

const initialState: CounterState = {
  value: 0,
};

const counterSlice = createSlice({
  name: "counter",
  initialState,
  reducers: {
    increment: (state) => {
      state.value += 1;
    },
    decrement: (state) => {
      state.value -= 1;
    },
    reset: (state) => {
      state.value = 0;
    },
  },
});

export const { increment, decrement, reset } = counterSlice.actions;
export default counterSlice.reducer;
✅ What’s happening here:
-
createSlice()automatically generates action creators and reducer logic. -
State updates can directly modify the state thanks to Immer, which Redux Toolkit uses internally.
-
We export both the reducer (for the store) and the actions (for the UI).
Step 2: Configure the Redux Store
Now, create a new file in the same folder called store.ts:
import { configureStore } from "@reduxjs/toolkit";
import counterReducer from "./counterSlice";

export const store = configureStore({
  reducer: {
    counter: counterReducer,
  },
});

export type RootState = ReturnType<typeof store.getState>;
export type AppDispatch = typeof store.dispatch;
✅ Explanation:
-
The store combines all reducers (in this case, just
counter). -
We export
RootStateandAppDispatchtypes for strong TypeScript support throughout the app.
Step 3: Connect Redux to React
Open src/main.tsx and wrap your app with the Redux Provider component:
import { StrictMode } from "react";
import { createRoot } from "react-dom/client";
import "./index.css";
import App from "./App.tsx";
import type { Provider } from "react-redux";

createRoot(document.getElementById("root")!).render(
  <StrictMode>
    <Provider store={store}>
      <App />
    </Provider>
  </StrictMode>
);
✅ What this does:
-
The
Providermakes the Redux store available to all React components inside your app.
Step 4: Create the Redux Counter Component
Inside src/redux-example/, create Counter.tsx:
import React from "react";
import { useSelector, useDispatch } from "react-redux";
import { RootState, AppDispatch } from "./store";
import { increment, decrement, reset } from "./counterSlice";

const Counter = () => {
  const count = useSelector((state: RootState) => state.counter.value);
  const dispatch = useDispatch<AppDispatch>();

  return (
    <div style={{ textAlign: "center", marginTop: "2rem" }}>
      <h2>Redux Toolkit Counter</h2>
      <h3>Count: {count}</h3>
      <button onClick={() => dispatch(increment())}>Increment</button>
      <button onClick={() => dispatch(decrement())}>Decrement</button>
      <button onClick={() => dispatch(reset())}>Reset</button>
    </div>
  );
};

export default Counter;
✅ Explanation:
-
useSelectorextracts data from the Redux store. -
useDispatchsends actions to update the state. -
Each button dispatches an action created automatically by Redux Toolkit.
Step 5: Render the Redux Counter App
Modify your src/App.tsx to use the Redux version:
import React from "react";
import Counter from "./redux-example/Counter";

function App() {
  return <Counter />;
}

export default App;
Then start the app again:
npm run devOpen your browser at http://localhost:5173/, and you’ll see the Redux Toolkit Counter App in action.
Pros and Cons of Redux Toolkit
✅ Pros
-
Centralized, predictable state management.
-
Scales easily across large apps.
-
Powerful DevTools and middleware support.
-
Built-in support for async operations (
createAsyncThunk).
⚠️ Cons
-
More setup compared to Context API.
-
Overkill for small or simple apps.
-
Requires basic understanding of Redux patterns.
Context API vs Redux — Head-to-Head Comparison
Both React Context API and Redux Toolkit help you manage state globally across components — but they differ in setup, scalability, and developer experience.
Let’s compare them side by side to understand when each one fits best.
🔍 1. Setup and Complexity
| Criteria | Context API | Redux Toolkit |
|---|---|---|
| Setup | Built-in, no extra libraries needed | Requires installing Redux Toolkit and React-Redux |
| Boilerplate | Minimal | Slightly more setup (store, slice, provider) |
| Learning curve | Easy for beginners | Moderate — requires understanding Redux concepts |
✅ Verdict: Context API wins for simplicity and small apps. Redux Toolkit adds structure, which pays off in larger apps.
⚙️ 2. Performance and Scalability
| Criteria | Context API | Redux Toolkit |
|---|---|---|
| Re-renders | Can cause unnecessary re-renders | Optimized with selector-based updates |
| Scalability | Suitable for small to medium apps | Ideal for large, complex applications |
| State organization | Shared across one provider | Modular — state split into slices |
✅ Verdict: Redux Toolkit handles large-scale apps better, especially with frequent updates or complex state trees.
🧩 3. Developer Experience
| Criteria | Context API | Redux Toolkit |
|---|---|---|
| DevTools | None (manual debugging) | Excellent Redux DevTools integration |
| Async logic | Must use useEffect or custom hooks |
Built-in support with createAsyncThunk |
| Code maintainability | Can get messy as app grows | Enforces clear structure and separation of concerns |
✅ Verdict: Redux Toolkit provides a smoother experience for debugging, async workflows, and team collaboration.
🚀 4. Real-World Use Cases
| Scenario | Recommended Approach |
|---|---|
| Small personal projects or prototypes | ✅ Context API |
| Medium-sized apps with simple data flow | ✅ Context API or light Redux Toolkit |
| Large enterprise apps with complex state logic | 🚀 Redux Toolkit |
| Apps requiring async actions (API calls, caching) | 🚀 Redux Toolkit |
| Components that rarely share state | ⚙️ Local state or Context API |
🧠 Key Takeaways
-
Use Context API when:
-
Your app’s state is simple and doesn’t require advanced features.
-
You want to avoid extra dependencies.
-
Performance isn’t heavily impacted by re-renders.
-
-
Use Redux Toolkit when:
-
Your app involves multiple domains or async data fetching.
-
You need powerful debugging and time-travel capabilities.
-
You’re working in a team and want consistent, predictable state management.
-
💡 Pro Tip
For very large applications, it’s common to combine both:
-
Use Context API for UI-related global state (e.g., theme, language).
-
Use Redux Toolkit for application data (e.g., authentication, API responses, user preferences).
This hybrid approach gives you the best of both worlds — simplicity and scalability.
Best Practices and Tips
When deciding between the React Context API and Redux Toolkit, it’s essential to not only understand their technical differences but also apply them effectively. Here are some best practices and tips to help you make the most of your state management choice:
1. Choose the Right Tool for the Right Use Case
-
Use Context API for simple, local, or theme-based state, such as authentication status, user preferences, or UI themes.
-
Use Redux Toolkit for large, complex, or collaborative applications where you need time-travel debugging, middleware, or predictable global state updates.
2. Keep Contexts Small and Specific
Avoid putting your entire app’s state into a single context. Instead, split contexts by domain (e.g., AuthContext, ThemeContext, SettingsContext) to reduce unnecessary re-renders and improve performance.
3. Use Redux Toolkit for Predictable and Testable Logic
Redux’s strict state immutability and predictable reducer pattern make it ideal for debugging and testing. When building scalable apps, leverage:
-
createSlice()for structured reducers -
createAsyncThunk()for async API calls -
configureStore()for cleaner store setup
4. Don’t Overuse Context
Context re-renders every component that consumes it when the value changes. To mitigate performance hits:
-
Use memoization with
React.memoanduseMemo. -
Keep context values minimal—store large or frequently updated data in local state instead.
5. Combine Tools When Needed
You don’t have to choose just one. For example:
-
Use Context API for static UI-level state (theme, language).
-
Use Redux Toolkit for dynamic data and complex application logic (API responses, user management).
6. Structure Your State Management
Maintain consistent folder structures for easier scalability:
src/
├── context/
│   └── AppContext.tsx
├── store/
│   ├── counterSlice.ts
│   └── store.ts
├── components/
├── pages/
└── App.tsx
7. Monitor and Optimize Performance
Use the React Developer Tools and Redux DevTools extensions to track state changes and ensure updates are efficient. Always profile large applications for unnecessary re-renders.
✅ Pro Tip:
If you start small, begin with the Context API. As your project grows and state management becomes complex, migrate to Redux Toolkit for better scalability and maintainability.
Conclusion and Final Thoughts
Both the React Context API and Redux Toolkit are powerful tools for managing state in modern React applications. The key lies in understanding when to use each and how to apply them efficiently.
-
The Context API is best suited for smaller or medium-sized projects where simplicity and minimal setup are priorities. It shines in handling lightweight global states such as themes, authentication, or localization.
-
Redux Toolkit, on the other hand, is designed for complex, large-scale applications that demand predictability, middleware support, and developer tools like time-travel debugging.
If you’re just getting started, try implementing the Context API first—it’s built into React and easy to understand. As your project evolves and requires more control over state mutations, async actions, and debugging, you can transition smoothly to Redux Toolkit.
In short:
-
Use Context API for simplicity.
-
Use Redux Toolkit for scalability.
By mastering both, you’ll be able to handle virtually any state management scenario in React with confidence and precision.
Next Steps:
-
Explore Recoil, Zustand, or Jotai if you’re curious about other modern state management libraries.
-
Integrate Redux Persist for persisting Redux state between sessions.
-
Experiment with React Query for server state management alongside client state tools.
You can find the full source code on our GitHub.
That's just the basics. If you need more deep learning about React, you can take the following cheap course:
- React - The Complete Guide 2025 (incl. Next.js, Redux)
- The Ultimate React Course 2025: React, Next.js, Redux & More
- Modern React From The Beginning
- Complete React, Next.js & TypeScript Projects Course 2025
- 100 Hours Web Development Bootcamp - Build 23 React Projects
- React JS Masterclass: Zero To Job Ready With 10 Projects
- Big React JS Course With AI (Redux / Router / Tailwind CSS)
- React JS + ChatGPT Crash Course: Build Dynamic React Apps
- Advanced React: Design System, Design Patterns, Performance
- Microfrontends with React: A Complete Developer's Guide
Thanks!