
Blazor WebAssembly is a modern framework from Microsoft that allows developers to build interactive client-side web applications using C# instead of JavaScript. It runs directly in the browser via WebAssembly, a powerful low-level technology that enables near-native performance and secure sandboxed execution.
With Blazor WebAssembly, you can use the same language, libraries, and tools across both client and server, unifying your development stack under .NET. This eliminates the need to maintain separate codebases for frontend (JavaScript/TypeScript) and backend (C#) development.
Why Blazor WebAssembly?
-
C# Everywhere – Use C# for frontend logic, API calls, and data models.
-
Full .NET Ecosystem – Access .NET libraries and tools in the browser.
-
Component-Based Architecture – Build reusable, modular UI components.
-
Offline and Progressive Web App (PWA) Support – Run even without an internet connection.
-
Interoperability with JavaScript – Use existing JS libraries when needed.
Blazor WebAssembly vs. Blazor Server
| Feature | Blazor WebAssembly | Blazor Server |
|---|---|---|
| Execution | Runs in browser via WebAssembly | Runs on server via SignalR |
| Latency | Low (client-side) | Depends on the network |
| Offline Support | Yes | No |
| Initial Load Time | Larger (downloads runtime) | Smaller |
| Scalability | Excellent for many users | Limited by server connections |
What’s New in ASP.NET Core 10
ASP.NET Core 10 (part of .NET 10) introduces several enhancements for Blazor WebAssembly development:
-
Improved render performance for interactive components.
-
Enhanced JavaScript interop for better integration with modern front-end libraries.
-
Simplified hosting models that combine server and client-side rendering seamlessly.
-
Smaller runtime downloads for faster app startup.
-
New project templates that streamline setup and deployment.
By the end of this tutorial, you’ll have a solid understanding of how to create, build, and run your first Blazor WebAssembly app with ASP.NET Core 10, along with key concepts like components, routing, and data fetching.
Prerequisites
Before you dive into building your first Blazor WebAssembly app with ASP.NET Core 10, make sure your development environment is properly set up. This section covers everything you need to install and know before getting started.
System Requirements
You’ll need a machine capable of running .NET 10 SDK and your preferred code editor or IDE. The following platforms are supported:
-
Windows 10/11
-
macOS 12 or later
-
Linux (Ubuntu, Fedora, Debian, etc.)
Required Tools
-
.NET 10 SDK
Download and install the latest .NET 10 SDK from the official Microsoft website:
👉 https://dotnet.microsoft.com/download
To verify the installation, open a terminal or command prompt and run:dotnet --versionYou should see an output starting with
10.(e.g.,10.0.100). -
Visual Studio Code or Visual Studio 2025
You can use any editor, but the following are recommended:-
Visual Studio Code (cross-platform)
Download: https://code.visualstudio.com/
Make sure to install the C# Dev Kit extension for full Blazor support. -
Visual Studio 2025 (Windows/macOS)
Choose the ASP.NET and web development workload during installation.
-
-
Modern Web Browser
Use a browser that supports WebAssembly, such as:-
Google Chrome
-
Microsoft Edge
-
Mozilla Firefox
-
Safari (latest version)
-
-
Optional: Git
If you plan to version control your code or push it to GitHub, install Git from:
👉 https://git-scm.com/downloads
Basic Knowledge Requirements
This tutorial assumes you have:
-
A basic understanding of C# and .NET concepts
-
Familiarity with HTML and CSS
-
Some experience with web development (not required but helpful)
With your environment ready, you’re all set to create your first Blazor WebAssembly project and explore its structure.
Setting Up the Project
In this section, you’ll create and run your first Blazor WebAssembly app using ASP.NET Core 10. We’ll go step by step — from project creation to exploring the structure and understanding the default setup.
Step 1: Create a New Blazor WebAssembly Project
Open your terminal or command prompt, navigate to your desired workspace, and run the following command:
dotnet new blazorwasm -n BlazorWasmDemoThis command does the following:
-
Creates a new Blazor WebAssembly project named
BlazorWasmDemo -
Configures all required dependencies for a standalone Blazor client app
Once created, move into the project folder:
cd BlazorWasmDemoStep 2: Run the Application
To make sure everything works, run the app with:
dotnet runYou’ll see output similar to:
info: Microsoft.Hosting.Lifetime[14]
      Now listening on: http://localhost:5267
info: Microsoft.Hosting.Lifetime[0]
      Application started. Press Ctrl+C to shut down.
info: Microsoft.Hosting.Lifetime[0]
      Hosting environment: Development
info: Microsoft.Hosting.Lifetime[0]
      Content root path: /Users/didin/ASPNETProjects/BlazorWasmDemo
Now, open your browser and navigate to the displayed URL (e.g., https://localhost:5267).
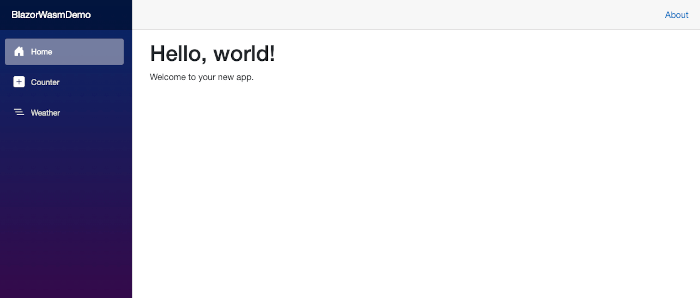
You should see the default Blazor WebAssembly welcome page — congratulations, your app is running! 🎉
Step 3: Explore the Project Structure
Let’s take a look at what was generated by the template. Your project folder should look like this:
BlazorWasmDemo/
│
├── Program.cs
├── wwwroot/
│   ├── css/
│   ├── favicon.ico
│   └── index.html
│
├── Pages/
│   ├── Counter.razor
│   ├── FetchData.razor
│   └── Index.razor
│
├── Shared/
│   ├── MainLayout.razor
│   └── NavMenu.razor
│
├── App.razor
├── Imports.razor
└── BlazorWasmDemo.csproj
Here’s what each part does:
| Folder/File | Description |
|---|---|
| Program.cs | The entry point of your Blazor app — configures services and starts the WebAssembly host. |
| wwwroot/ | The web root folder that contains static files like CSS, JS, and images. |
| Pages/ | Contains Razor components that represent individual pages (routes). |
| Shared/ | Stores shared UI components such as layouts or navigation menus. |
| App.razor | The root component that sets up the router and defines the app structure. |
| Imports.razor | Defines global namespaces that are available across all components. |
| .csproj | Project configuration file — includes package references and build settings. |
Step 4: Modify and Rebuild
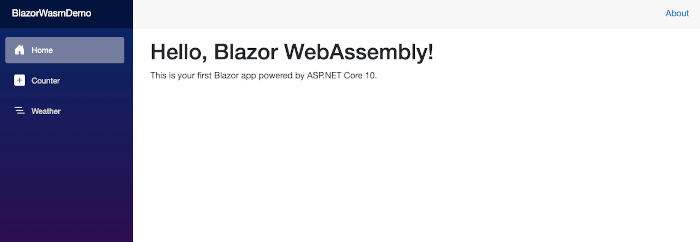
Try changing the text in Pages/Home.razor:
@page "/"

<h1>Hello, Blazor WebAssembly!</h1>

<p>This is your first Blazor app powered by ASP.NET Core 10.</p>
Save the file and refresh your browser — your changes should appear instantly.
You’ve successfully set up your first Blazor WebAssembly project and explored its core structure.
Understanding Blazor Components
At the heart of every Blazor application are components. Components are the fundamental building blocks of the UI — they define layout, behavior, and logic. Each Blazor page, layout, and even reusable widget is a component written using Razor syntax, which combines C# and HTML seamlessly.
What is a Component?
A Blazor component is a .razor file that contains:
-
UI markup written in HTML
-
C# code that controls the logic and data
-
Optional CSS for styling
Components can be nested, reused, and parameterized — similar to React or Angular components.
Here’s a simple example of a custom component:
<!-- Greeting.razor -->
<h3>Hello, @Name!</h3>

@code {
    [Parameter]
    public string Name { get; set; } = "World";
}
You can then use this component inside another page like so:
<!-- Index.razor -->
@page "/"

<h1>Welcome to Blazor WebAssembly</h1>

<Greeting Name="Djamware" />
When you run the app, it will render:
Hello, Djamware!Component Structure Explained
A typical component includes three key sections:
| Section | Purpose |
|---|---|
| Markup (HTML) | Defines the UI layout and elements |
Code Block (@code) |
Contains C# logic (properties, methods, event handlers) |
| Directives | Special keywords starting with @ to control routing, imports, etc. |
Example:
@page "/counter"

<h3>Counter</h3>

<p>Current count: @count</p>

<button class="btn btn-primary" @onclick="IncrementCount">Click me</button>

@code {
    private int count = 0;

    private void IncrementCount()
    {
        count++;
    }
}
When you click the button, the count variable updates instantly — no page reload required!
This reactive rendering is one of Blazor’s key strengths.
Component Lifecycle Methods
Blazor provides lifecycle methods (similar to Angular’s hooks or React’s lifecycle) that allow you to execute logic at specific times.
The most commonly used ones include:
| Method | Description |
|---|---|
OnInitialized() |
Called once when the component is initialized. |
OnParametersSet() |
Called each time component parameters are updated. |
OnAfterRender() |
Called after the component has rendered. |
Dispose() |
Called when the component is removed from the UI. |
Example usage:
@code {
    protected override void OnInitialized()
    {
        Console.WriteLine("Component initialized");
    }
}
Passing Data Between Components
Blazor components communicate using parameters and event callbacks.
Example – parent to child:
<!-- Parent.razor -->
<ChildComponent Message="Hello from parent!" />
<!-- ChildComponent.razor -->
<h4>@Message</h4>
@code {
[Parameter]
public string Message { get; set; }
}Example – child to parent via callback:
<!-- Parent.razor -->
<ChildComponent OnClick="HandleClick" />

@code {
    private void HandleClick()
    {
        Console.WriteLine("Button clicked in child component!");
    }
}
<!-- ChildComponent.razor -->
<button @onclick="OnClick">Click Me</button>
@code {
[Parameter]
public EventCallback OnClick { get; set; }
}Best Practices for Components
-
Keep components small and focused on a single purpose.
-
Use parameters for input and callbacks for output.
-
Place reusable components in the
Sharedfolder. -
Use partial classes if you want to separate logic from markup (e.g.,
MyComponent.razor+MyComponent.razor.cs).
Now that you understand how Blazor components work, let’s move on to routing and navigation — how Blazor connects all these components into a seamless single-page app.
Adding Routing and Navigation
Blazor WebAssembly uses client-side routing to navigate between pages without reloading the browser. Each page in your app corresponds to a Razor component that has a @page directive defining its route. This allows your app to behave like a single-page application (SPA) while providing fast, smooth transitions.
How Routing Works in Blazor
Routing in Blazor is handled by the Router component, which is defined in App.razor.
Here’s what it looks like by default:
<Router AppAssembly="@typeof(App).Assembly" NotFoundPage="typeof(Pages.NotFound)">
    <Found Context="routeData">
        <RouteView RouteData="@routeData" DefaultLayout="@typeof(MainLayout)"/>
        <FocusOnNavigate RouteData="@routeData" Selector="h1" />
    </Found>
</Router>
This tells Blazor:
-
Use the current assembly (project) to find routes (
AppAssembly) -
Render the appropriate page based on the route (
RouteView) -
Apply a default layout (
MainLayout) -
Display a NotFound message when no route matches
Defining Routes in Pages
Each Blazor page (component) becomes routable when you add the @page directive at the top of the file.
For example:
<!-- Pages/Index.razor -->
@page "/"

<h1>Welcome to Blazor WebAssembly!</h1>
<!-- Pages/About.razor -->
@page "/about"
<h1>About This App</h1>
<p>This is a simple Blazor WebAssembly demo built with ASP.NET Core 10.</p>Once defined, you can navigate to:
- https://localhost:7160/ → loads Index.razor
- https://localhost:7160/about → loads About.razor
Adding Navigation Links
Blazor provides the NavLink component for navigation, which works like HTML’s <a> tag but includes automatic active link styling.
You can add links in Layout/NavMenu.razor:
<!-- Layout/NavMenu.razor -->
<div class="nav flex-column">
    <NavLink href="/" Match="NavLinkMatch.All">
        <span class="oi oi-home"></span> Home
    </NavLink>
    <NavLink href="/about">
        <span class="oi oi-info"></span> About
    </NavLink>
</div>
When the user navigates, the current link will automatically get the CSS class active.
Dynamic Routes with Parameters
You can pass parameters through the route using curly braces {}.
Example:
<!-- Pages/Profile.razor -->
@page "/profile/{username}"

<h3>Profile Page</h3>
<p>Welcome, @username!</p>

@code {
    [Parameter]
    public string? username { get; set; }
}
Now you can visit:
https://localhost:5267/profile/Djamwareand it will display:
Welcome, Djamware!Programmatic Navigation
You can also navigate between pages in C# using the NavigationManager service:
@inject NavigationManager Nav

<button class="btn btn-primary" @onclick="GoToAbout">Go to About</button>

@code {
    void GoToAbout()
    {
        Nav.NavigateTo("/about");
    }
}
This is useful for redirecting users after form submissions, authentication, or specific actions.
Custom Not Found Page
To provide a better user experience, you can customize the "Not Found" section in Pages/NotFound.razor:
@page "/not-found"
@layout MainLayout

<LayoutView Layout="@typeof(MainLayout)">
    <h3>404 - Page Not Found</h3>
    <p>Sorry, the page you’re looking for doesn’t exist.</p>
    <NavLink href="/">Back to Home</NavLink>
</LayoutView>
Now that routing and navigation are working, it’s time to connect your app to real data.
Working with Data and Services
One of the strengths of Blazor WebAssembly is its ability to consume and display real-time data — whether from APIs, databases, or local storage. Blazor uses dependency injection (DI) and services to handle data fetching and logic cleanly, keeping your components lightweight and focused on presentation.
In this section, you’ll learn how to:
-
Create and register a data service
-
Fetch data from a public API
-
Display data dynamically in a Blazor component
Step 1: Create a Data Model
Let’s start by creating a simple model to represent the data we’ll fetch.
For this example, we’ll use a public JSON API (https://jsonplaceholder.typicode.com/posts) that returns a list of posts.
Create a new folder named Models and add a file Post.cs:
// Models/Post.cs
namespace BlazorWasmDemo.Models
{
    public class Post
    {
        public int Id { get; set; }
        public int UserId { get; set; }
        public string? Title { get; set; }
        public string? Body { get; set; }
    }
}
Step 2: Create a Data Service
Next, we’ll create a service to handle HTTP requests using HttpClient.
Create a new folder named Services and add a file PostService.cs:
// Services/PostService.cs
using System.Net.Http.Json;
using BlazorWasmDemo.Models;

namespace BlazorWasmDemo.Services
{
    public class PostService
    {
        private readonly HttpClient _httpClient;

        public PostService(HttpClient httpClient)
        {
            _httpClient = httpClient;
        }

        public async Task<List<Post>> GetPostsAsync()
        {
            var posts = await _httpClient.GetFromJsonAsync<List<Post>>(
                "https://jsonplaceholder.typicode.com/posts"
            );
            return posts ?? new List<Post>();
        }
    }
}
This service uses HttpClient (built into Blazor) to fetch data asynchronously and return a list of posts.
Step 3: Register the Service
Open Program.cs and register the PostService with the dependency injection container:
using Microsoft.AspNetCore.Components.Web;
using Microsoft.AspNetCore.Components.WebAssembly.Hosting;
using BlazorWasmDemo;
using BlazorWasmDemo.Services;

var builder = WebAssemblyHostBuilder.CreateDefault(args);
builder.RootComponents.Add<App>("#app");
builder.RootComponents.Add<HeadOutlet>("head::after");

builder.Services.AddScoped(sp => new HttpClient { BaseAddress = new Uri(builder.HostEnvironment.BaseAddress) });
builder.Services.AddScoped<PostService>();

await builder.Build().RunAsync();
Now, the PostService is available for injection throughout your application.
Step 4: Create a Page to Display the Data
Create a new file named Posts.razor in the Pages folder:
@page "/posts"
@inject BlazorWasmDemo.Services.PostService PostService

<h3>Posts</h3>

@if (posts == null)
{
    <p><em>Loading...</em></p>
}
else
{
    <div class="list-group">
        @foreach (var post in posts)
        {
            <div class="list-group-item">
                <h5>@post.Title</h5>
                <p>@post.Body</p>
            </div>
        }
    </div>
}

@code {
    private List<BlazorWasmDemo.Models.Post>? posts;

    protected override async Task OnInitializedAsync()
    {
        posts = await PostService.GetPostsAsync();
    }
}
This component:
-
Injects the
PostService -
Loads data asynchronously in
OnInitializedAsync() -
Displays posts using a Bootstrap list group
Step 5: Add Navigation to the Posts Page
Open Layout/NavMenu.razor and add a link to the new page:
        <div class="nav-item px-3">
            <NavLink class="nav-link" href="/posts">
                <span class="oi oi-list"></span> Posts
            </NavLink>
        </div>
Save all changes, then run your app again:
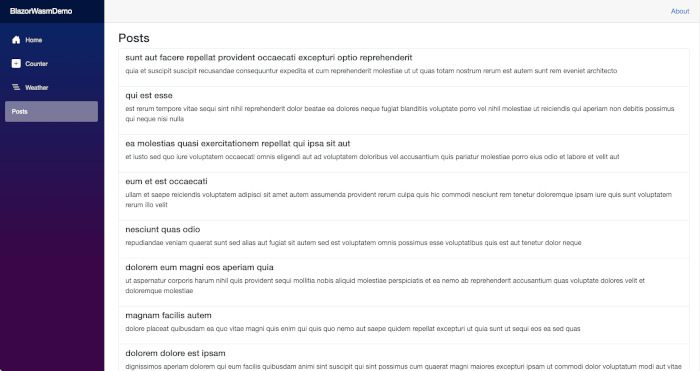
dotnet runVisit http://localhost:5267/posts — you should see a list of posts fetched from the JSONPlaceholder API.
Step 6: Handle Errors Gracefully
You can add error handling to improve reliability:
public async Task<List<Post>> GetPostsAsync()
{
    try
    {
        var posts = await _httpClient.GetFromJsonAsync<List<Post>>(
            "https://jsonplaceholder.typicode.com/posts"
        );
        return posts ?? new List<Post>();
    }
    catch (Exception ex)
    {
        Console.WriteLine($"Error fetching posts: {ex.Message}");
        return new List<Post>();
    }
}
This ensures your app won’t crash if the API is unreachable.
You’ve now learned how to inject services, fetch remote data, and display it dynamically in a Blazor WebAssembly app.
Styling and Layouts
A visually consistent layout and attractive styling make a big difference in any web application. In Blazor WebAssembly, you can style your app using CSS, Bootstrap, Tailwind, or even scoped component-specific styles. This section will show how to structure layouts, apply global and component-level styles, and integrate a CSS framework.
Understanding Layouts in Blazor
Layouts in Blazor are similar to master pages in ASP.NET MVC or templates in Angular — they define the common structure (like headers, footers, and navigation) shared across multiple pages.
By default, Blazor apps include a layout component called MainLayout.razor located in the Layout folder:
@inherits LayoutComponentBase
<div class="page">
    <div class="sidebar">
        <NavMenu />
    </div>

    <main>
        <div class="top-row px-4">
            <a href="https://learn.microsoft.com/aspnet/core/" target="_blank">About</a>
        </div>

        <article class="content px-4">
            @Body
        </article>
    </main>
</div>-
@Bodyis where each page’s content gets rendered. -
The
NavMenucomponent provides navigation links. -
The layout applies to all pages by default, as defined in
App.razor.
Using Bootstrap for Styling
The Blazor WebAssembly template already includes Bootstrap (via wwwroot/css/bootstrap/).
To customize styles or add Bootstrap components, open wwwroot/index.html and ensure this link is present:
<link href="css/bootstrap/bootstrap.min.css" rel="stylesheet" />
<link href="css/app.css" rel="stylesheet" />
You can now use Bootstrap classes directly in your Razor files:
@page "/"

<h1 class="text-primary text-center">Welcome to Blazor WebAssembly</h1>

<div class="alert alert-success mt-3">
    <strong>Success!</strong> Your Blazor app is up and running.
</div>
This adds a clean, professional look instantly.
Customizing Global Styles
You can define global styles in wwwroot/css/app.css:
/* wwwroot/css/app.css */
body {
    font-family: "Segoe UI", Roboto, Helvetica, Arial, sans-serif;
    background-color: #f8f9fa;
    color: #333;
}

h1, h3 {
    margin-top: 1rem;
}
These apply to the entire application.
Adding Component-Specific Styles
Blazor supports CSS isolation, which lets you scope styles to a specific component.
Simply create a .razor.css file next to your component.
For example, create Pages/Posts.razor.css:
/* Pages/Posts.razor.css */
.list-group-item {
    background-color: #fff;
    border: 1px solid #e0e0e0;
    margin-bottom: 10px;
    border-radius: 6px;
    transition: transform 0.2s ease;
}

.list-group-item:hover {
    transform: translateY(-3px);
    box-shadow: 0 2px 8px rgba(0,0,0,0.1);
}
Blazor automatically scopes these styles to elements inside Posts.razor — no global conflicts!
Using Tailwind CSS (Optional)
If you prefer Tailwind CSS, you can integrate it easily for utility-first styling.
-
Install Node.js (if not already): https://nodejs.org
-
From your project root, run:
npm init -y npm install tailwindcss postcss autoprefixer npx tailwindcss init -
Edit
tailwind.config.js:module.exports = { content: ["./**/*.razor", "./wwwroot/index.html"], theme: { extend: {} }, plugins: [], }; -
In
wwwroot/css/app.css, replace the contents with:@tailwind base; @tailwind components; @tailwind utilities; -
Build Tailwind styles:
npx tailwindcss -i ./wwwroot/css/app.css -o ./wwwroot/css/output.css --watch -
Update
index.htmlto useoutput.css:<link href="css/output.css" rel="stylesheet" />
Now you can use Tailwind classes directly:
<h1 class="text-3xl font-bold text-center text-blue-600">Hello Tailwind!</h1>Adding a Footer Component
Let’s create a simple reusable footer.
Create a new file Layout/Footer.razor:
<footer class="text-center mt-4 py-3 border-top">
<p>© @DateTime.Now.Year - BlazorWasmDemo | Built with ASP.NET Core 10</p>
</footer>Then include it in MainLayout.razor below @Body:
        <article class="content px-4">
            @Body
        </article>

        <Footer />
Now every page will have a consistent footer.
Your Blazor app now has a clean layout, responsive styling, and a modern look — ready for deployment or further customization.
Building and Running the App
Now that your Blazor WebAssembly app is complete, it’s time to run, test, and build it for production. Blazor WebAssembly compiles your C# code into WebAssembly and runs it directly in the browser — so everything happens client-side, without needing a .NET runtime installed on the client machine.
Running the App Locally
To start your application in development mode, open a terminal in your project directory and run:
dotnet runOnce the build completes, you’ll see output similar to:
info: Microsoft.Hosting.Lifetime[14]
      Now listening on: http://localhost:5267
Now, open your browser and navigate to the provided HTTPS URL (e.g., http://localhost:5267).
You should see your Blazor WebAssembly app running — complete with routing, navigation, and data fetched from the placeholder API.
💡 Tip: If you make changes to your
.razorfiles, the app will automatically rebuild and refresh in the browser when running in development mode.
Building for Production
When you’re ready to deploy your Blazor WebAssembly app, you’ll need to build it in Release mode. This optimizes the output by minimizing and compressing your files.
Run the following command:
dotnet publish -c ReleaseThis command generates your production-ready files in the bin/Release/net10.0/publish/wwwroot directory.
The output includes:
-
Compiled
.dllfiles (your app and its dependencies) -
A minimized
index.html -
A compressed
blazor.webassembly.jsloader -
Static assets such as CSS, JavaScript, and images
Hosting the Blazor App
Blazor WebAssembly apps are static web applications, meaning you can host them on:
-
Azure Static Web Apps
-
GitHub Pages
-
Netlify
-
Vercel
-
Any static file server (like Nginx or Apache)
For example, to host it on Azure Static Web Apps, simply upload the wwwroot folder contents to your Azure storage or use the Azure CLI to deploy directly.
Testing the Deployment
Once deployed, open your hosted URL in a browser — your app should load instantly and function identically to your local build.
You can confirm everything is working by navigating between pages and checking that data from the API loads correctly.
✅ Your Blazor WebAssembly App is Now Live!
You’ve just built and deployed your first Blazor WebAssembly app using ASP.NET Core 10. You now have a client-side app fully powered by C# and .NET — no JavaScript required.
Conclusion and Next Steps
Congratulations! 🎉
You’ve just built your first Blazor WebAssembly app with ASP.NET Core 10 — from project setup to component creation, routing, data fetching, and deployment.
Blazor WebAssembly empowers developers to build interactive web applications using C# and .NET, running entirely on the client side. This means you can write modern, single-page applications (SPAs) without needing to switch between multiple programming languages or frameworks like JavaScript or React.
What You Learned
In this tutorial, you learned how to:
-
Set up a Blazor WebAssembly project using .NET 10
-
Understand and build reusable Blazor components
-
Implement client-side routing and navigation
-
Fetch and display data from an API using dependency injection
-
Style your app using Bootstrap and shared layouts
-
Build and deploy your Blazor app for production
Next Steps
You’ve only scratched the surface of what Blazor can do. Here are some recommended next topics to explore:
-
Authentication and Authorization
Learn how to secure your Blazor apps using JWT tokens or ASP.NET Identity. -
Blazor with Web APIs
Connect your Blazor frontend with a .NET 10 Web API for full-stack development. -
Real-Time Features with SignalR
Add live chat, notifications, or dashboards using SignalR integration. -
Progressive Web Apps (PWA)
Turn your Blazor app into a PWA that works offline and installs like a native app. -
Performance Optimization
Explore ahead-of-time (AOT) compilation and lazy loading for faster performance.
By combining Blazor WebAssembly with the power of ASP.NET Core 10, you can build modern, scalable, and maintainable web apps — all in one unified .NET ecosystem.
You can find the full source code on our GitHub.
That's just the basics. If you need more deep learning about ASP.Net Core, you can take the following cheap course:
- Asp.Net Core 10 (.NET 10) | True Ultimate Guide
- .NET Core MVC - The Complete Guide 2025 [E-commerce]
- Learn C# Full Stack Development with Angular and ASP.NET
- Complete ASP.NET Core and Entity Framework Development
- Full Stack Web Development with C# OOP, MS SQL & ASP.NET MVC
- Build a complete distributed app using .Net Aspire
- .NET Microservices with Azure DevOps & AKS | Basic to Master
- ASP.NET Core - SOLID and Clean Architecture
- ANGULAR 20 and ASP.NET Core Web API - Real World Application
- .NET/C# Interview Masterclass- Top 500 Questions (PDF)(2025)
Thanks!