
In modern web applications, displaying large datasets efficiently is essential for both performance and user experience. Pagination helps by dividing data into smaller, manageable chunks, reducing the load on the client and making content easier to navigate.
In this tutorial, you’ll learn how to implement server-side pagination in Angular 20 using HttpClient and Angular Material Table components such as MatPaginator and MatSort. We’ll also enhance the table with search and sorting features, allowing users to filter and order the data directly from the interface.
Instead of setting up a real backend, we’ll use a mock REST API (like JSONPlaceholder) to simulate a server-side data source. This keeps the tutorial simple and focused on Angular’s client-side logic while maintaining real-world structure.
By the end of this tutorial, you will be able to:
-
Create a standalone Angular 20 application with Angular Material.
-
Integrate MatTable, MatPaginator, and MatSort for data display and interaction.
-
Implement server-side pagination, search, and sorting using Angular’s HttpClient.
-
Manage loading states and handle HTTP errors gracefully.
This guide is perfect for developers who want to build dynamic, data-driven Angular applications that can handle large datasets efficiently while maintaining a clean, responsive UI.
Prerequisites
Before we begin implementing pagination, make sure you have the necessary tools and a basic understanding of Angular concepts. This tutorial assumes you already have some familiarity with Angular components, services, and Angular Material.
What You’ll Need
-
Node.js and npm
Ensure that you have the latest stable versions installed. You can check by running:node -v npm -vIf not installed, download them from https://nodejs.org/.
-
Angular CLI 20
Install or update the Angular CLI globally:npm install -g @angular/cli@20 -
Code Editor
Use your preferred IDE or editor — Visual Studio Code is recommended for Angular development. -
Basic Knowledge
You should be comfortable with:-
Angular Components and Services
-
HTTP Client for RESTful communication
-
Angular Material UI components
-
What We’ll Use in This Tutorial
-
Angular 20 (Standalone Components) — for the latest, streamlined app structure.
-
Angular Material — for ready-made UI components like Table, Paginator, Sort Header, and Input.
-
HttpClient — to perform API requests for fetching paginated, sorted, and filtered data.
-
JSONPlaceholder API — as our mock data source to simulate server-side pagination.
With your environment ready, you’re set to start building the project.
Create a New Angular Project
In this section, you’ll create a brand-new Angular 20 standalone application, add Angular Material, and prepare the base structure for the pagination table.
Step 1: Create a New Angular Project
Run the following command to generate a new Angular standalone project:
ng new angular-pagination-demo --standaloneWhen prompted:
-
Would you like to add Angular routing? → Yes
-
Which stylesheet format would you like to use? → CSS (or SCSS if you prefer)
Once created, move into the project directory:
cd angular-pagination-demoThen, start the development server to verify that everything is working:
ng serveOpen your browser and navigate to http://localhost:4200/.
You should see the default Angular welcome page.

Step 2: Install Angular Material
Next, install Angular Material, which includes the UI components for the table, paginator, sorting, and form controls.
ng add @angular/materialDuring installation, choose your preferred theme (for example, Indigo/Pink) and confirm the inclusion of global typography and animations.
Angular Material will automatically import the theme and animation modules into your project.
Step 3: Set Up Project Structure
For clarity and scalability, we’ll create a dedicated folder for components and services.
mkdir src/app/components
mkdir src/app/services
Now generate a table component where the Angular Material table, pagination, and sorting logic will reside:
ng generate component components/table.component --standaloneThis command will create a standalone component named TableComponent with its own HTML, CSS, and TypeScript files.
Step 4: Import Angular Material Modules
Open src/app/app.config.ts and ensure the following Material modules are imported in the providers or added through a material.module.ts if you prefer a modular organization.
For a standalone setup, import them directly inside your component:
import { MatTableModule } from '@angular/material/table';
import { MatPaginatorModule } from '@angular/material/paginator';
import { MatSortModule } from '@angular/material/sort';
import { MatFormFieldModule } from '@angular/material/form-field';
import { MatInputModule } from '@angular/material/input';
import { MatProgressSpinnerModule } from '@angular/material/progress-spinner';
These modules will be used later to build the Material table with pagination, sorting, and a search box.
At this point, your Angular 20 app is ready, with Angular Material installed and the base component created for pagination.
Set Up Angular Material Table Component
Now that your Angular project is ready and Angular Material is installed, it’s time to set up the Material Table (MatTable) that will display our data. In this section, you’ll configure the table layout, define columns, and integrate Angular Material’s Paginator and Sort modules.
Step 1: Open the Table Component
Navigate to the table component created earlier:
src/app/components/table/table.component.ts
Replace the default code with the following:
import { Component, OnInit, ViewChild } from '@angular/core';
import { MatFormFieldModule } from '@angular/material/form-field';
import { MatInputModule } from '@angular/material/input';
import { MatPaginator, MatPaginatorModule } from '@angular/material/paginator';
import { MatProgressSpinnerModule } from '@angular/material/progress-spinner';
import { MatSort, MatSortModule } from '@angular/material/sort';
import { MatTableDataSource, MatTableModule } from '@angular/material/table';

interface User {
  id: number;
  name: string;
  email: string;
  username: string;
}

@Component({
  selector: 'app-table',
  imports: [MatTableModule, MatPaginatorModule, MatSortModule, MatFormFieldModule, MatInputModule, MatProgressSpinnerModule],
  templateUrl: './table.component.html',
  styleUrl: './table.component.scss'
})
export class TableComponent implements OnInit {
  displayedColumns: string[] = ['id', 'name', 'email', 'username'];
  dataSource = new MatTableDataSource<User>([]);
  isLoading = true;

  @ViewChild(MatPaginator) paginator!: MatPaginator;
  @ViewChild(MatSort) sort!: MatSort;

  ngOnInit(): void {
    // Temporary static data (will be replaced with API data)
    const mockData: User[] = [
      { id: 1, name: 'John Doe', email: '[email protected]', username: 'john' },
      { id: 2, name: 'Jane Smith', email: '[email protected]', username: 'jane' },
      { id: 3, name: 'Mike Lee', email: '[email protected]', username: 'mike' },
    ];
    this.dataSource.data = mockData;
    this.isLoading = false;
  }

  ngAfterViewInit() {
    this.dataSource.paginator = this.paginator;
    this.dataSource.sort = this.sort;
  }

  applyFilter(event: Event) {
    const filterValue = (event.target as HTMLInputElement).value.trim().toLowerCase();
    this.dataSource.filter = filterValue;
  }
}
This basic table setup includes:
-
Columns: ID, Name, Email, Username.
-
Paginator and Sort references for later connection.
-
Mock data for initial testing (replaced with live data in the next section).
-
Filtering function using an input field.
Step 2: Create the Table Template
Open the file src/app/components/table/table.component.html and replace its content with:
<div class="table-container">
<mat-form-field appearance="outline" class="filter-input">
<mat-label>Search</mat-label>
<input matInput (keyup)="applyFilter($event)" placeholder="Search users" />
</mat-form-field>
@if (isLoading) {
<div class="loading-spinner">
<mat-spinner diameter="40"></mat-spinner>
</div>
}
<table mat-table [dataSource]="dataSource" matSort *ngIf="!isLoading" class="mat-elevation-z8">
<!-- ID Column -->
<ng-container matColumnDef="id">
<th mat-header-cell *matHeaderCellDef mat-sort-header>ID</th>
<td mat-cell *matCellDef="let user">{{ user.id }}</td>
</ng-container>
<!-- Name Column -->
<ng-container matColumnDef="name">
<th mat-header-cell *matHeaderCellDef mat-sort-header>Name</th>
<td mat-cell *matCellDef="let user">{{ user.name }}</td>
</ng-container>
<!-- Email Column -->
<ng-container matColumnDef="email">
<th mat-header-cell *matHeaderCellDef mat-sort-header>Email</th>
<td mat-cell *matCellDef="let user">{{ user.email }}</td>
</ng-container>
<!-- Username Column -->
<ng-container matColumnDef="username">
<th mat-header-cell *matHeaderCellDef mat-sort-header>Username</th>
<td mat-cell *matCellDef="let user">{{ user.username }}</td>
</ng-container>
<!-- Table Header and Row Definitions -->
<tr mat-header-row *matHeaderRowDef="displayedColumns"></tr>
<tr mat-row *matRowDef="let row; columns: displayedColumns"></tr>
</table>
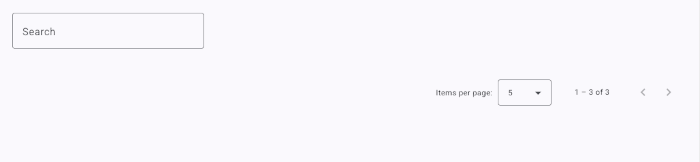
<mat-paginator [pageSize]="5" [pageSizeOptions]="[5, 10, 20]"></mat-paginator>
</div>Step 3: Add Some Basic Styling
In src/app/components/table/table.component.css, add:
.table-container {
  margin: 20px;
}

.filter-input {
  width: 300px;
  margin-bottom: 20px;
}

.loading-spinner {
  display: flex;
  justify-content: center;
  margin-top: 40px;
}

table {
  width: 100%;
}
Step 4: Display the Table Component
Finally, open src/app/app.html and replace the content with:
<app-table></app-table>Update src/app/app.ts.
import { CommonModule } from '@angular/common';
import { Component, signal } from '@angular/core';
import { TableComponent } from './components/table.component/table.component';

@Component({
  selector: 'app-root',
  imports: [CommonModule, TableComponent],
  templateUrl: './app.html',
  styleUrl: './app.scss'
})
export class App {
  protected readonly title = signal('angular-pagination-demo');
}
Run the app again:
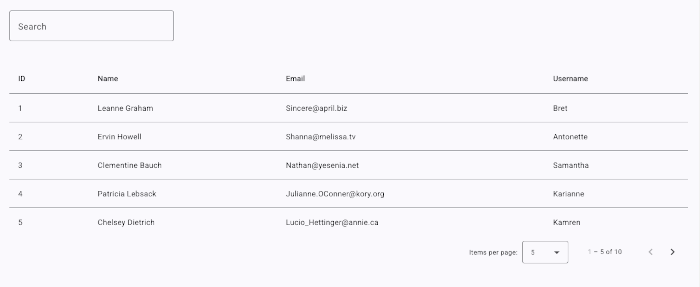
ng serveYou should now see a styled Angular Material table with a search box, sortable columns, and a paginator. Currently, it displays static data — we’ll replace this with dynamic API data and full server-side pagination in the next section.
Mock REST API for Data Source
Before implementing real HTTP data fetching, let’s set up a mock REST API that simulates server-side pagination, sorting, and searching. This will allow us to test real-world data behavior without creating a backend.
Step 1: Using JSONPlaceholder as Our Mock API
We’ll use JSONPlaceholder, a free fake REST API for testing.
It provides endpoints like /users, /posts, and /comments — perfect for simulating user data.
Example endpoint:
https://jsonplaceholder.typicode.com/usersThis endpoint returns an array of user objects similar to this:
[
  {
    "id": 1,
    "name": "Leanne Graham",
    "username": "Bret",
    "email": "[email protected]"
  },
  ...
]
However, JSONPlaceholder does not support true server-side pagination parameters, such as ?page= or ?limit=.
To simulate this behavior, we’ll use query parameters on the frontend and manually slice the results.
Later, if you integrate a real backend, you can easily switch to actual pagination endpoints (e.g., /users?page=1&limit=10&sort=name&search=john).
Step 2: Create a Data Service
Let’s create a service that fetches users from the mock API.
Run the following command:
ng generate service services/user.serviceThen open src/app/services/user.service.ts and replace its content with:
import { Injectable } from '@angular/core';
import { HttpClient } from '@angular/common/http';
import { Observable, map } from 'rxjs';

export interface User {
  id: number;
  name: string;
  email: string;
  username: string;
}

@Injectable({
  providedIn: 'root'
})
export class UserService {
  private apiUrl = 'https://jsonplaceholder.typicode.com/users';

  constructor(private http: HttpClient) { }

  getUsers(page: number, limit: number, search: string = '', sortField: string = '', sortOrder: string = 'asc'): Observable<{ users: User[]; total: number }> {
    return this.http.get<User[]>(this.apiUrl).pipe(
      map((data) => {
        // Apply search filter
        let filtered = data;
        if (search) {
          filtered = filtered.filter((user) =>
            user.name.toLowerCase().includes(search.toLowerCase()) ||
            user.email.toLowerCase().includes(search.toLowerCase()) ||
            user.username.toLowerCase().includes(search.toLowerCase())
          );
        }

        // Apply sorting
        if (sortField) {
          filtered = filtered.sort((a, b) => {
            const fieldA = (a as any)[sortField];
            const fieldB = (b as any)[sortField];
            if (fieldA < fieldB) return sortOrder === 'asc' ? -1 : 1;
            if (fieldA > fieldB) return sortOrder === 'asc' ? 1 : -1;
            return 0;
          });
        }

        // Apply pagination manually
        const start = (page - 1) * limit;
        const end = start + limit;
        const paged = filtered.slice(start, end);

        return { users: paged, total: filtered.length };
      })
    );
  }
}
What this service does
-
Fetches all users from JSONPlaceholder.
-
Filters, sorts, and paginates on the client side to simulate server-side logic.
-
Returns both the paginated users and the total record count.
Step 3: Test the Service
To ensure the service works, open your browser console after we integrate it into the table in the next section.
You’ll see that each time you change the page, sort, or filter, new data is fetched and displayed accordingly.
Step 4: Prepare for Integration
Now that our mock API service is ready, we’ll integrate it with the Angular Material Table in the next step — enabling real pagination, search, and sorting controls driven by live data from the service.
Implement Data Service with HTTP Client
Now that we’ve created our UserService, let’s integrate it into the Angular Material Table so that pagination, sorting, and searching all pull data dynamically from our mock API simulation.
Step 1: Inject the UserService into the Table Component
Open the file:
src/app/components/table/table.component.ts
Replace the existing code with the following:
import { CommonModule } from '@angular/common';
import { AfterViewInit, Component, OnInit, ViewChild } from '@angular/core';
import { MatFormFieldModule } from '@angular/material/form-field';
import { MatInputModule } from '@angular/material/input';
import { MatPaginator, MatPaginatorModule, PageEvent } from '@angular/material/paginator';
import { MatProgressSpinnerModule } from '@angular/material/progress-spinner';
import { MatSort, MatSortModule, Sort } from '@angular/material/sort';
import { MatTableModule } from '@angular/material/table';
import { UserService } from '../../services/user.service';

interface User {
  id: number;
  name: string;
  email: string;
  username: string;
}

@Component({
  selector: 'app-table',
  imports: [
    CommonModule,
    MatTableModule,
    MatPaginatorModule,
    MatSortModule,
    MatFormFieldModule,
    MatInputModule,
    MatProgressSpinnerModule
  ],
  templateUrl: './table.component.html',
  styleUrl: './table.component.scss'
})
export class TableComponent implements OnInit, AfterViewInit {
  displayedColumns: string[] = ['id', 'name', 'email', 'username'];
  data: User[] = [];
  totalItems = 0;
  pageSize = 5;
  currentPage = 1;
  searchQuery = '';
  sortField = '';
  sortOrder = 'asc';
  isLoading = false;

  @ViewChild(MatPaginator) paginator!: MatPaginator;
  @ViewChild(MatSort) sort!: MatSort;

  constructor(private userService: UserService) { }

  ngOnInit(): void {
    this.loadUsers();
  }

  ngAfterViewInit() {
    // Listen for sort and pagination changes
    this.sort.sortChange.subscribe((sort: Sort) => {
      this.sortField = sort.active;
      this.sortOrder = sort.direction || 'asc';
      this.paginator.firstPage();
      this.loadUsers();
    });
  }

  loadUsers(): void {
    this.isLoading = true;
    this.userService
      .getUsers(this.currentPage, this.pageSize, this.searchQuery, this.sortField, this.sortOrder)
      .subscribe({
        next: (response) => {
          this.data = response.users;
          this.totalItems = response.total;
          this.isLoading = false;
        },
        error: (err) => {
          console.error('Failed to load users:', err);
          this.isLoading = false;
        },
      });
  }

  onPageChange(event: PageEvent): void {
    this.pageSize = event.pageSize;
    this.currentPage = event.pageIndex + 1;
    this.loadUsers();
  }

  applyFilter(event: Event): void {
    const value = (event.target as HTMLInputElement).value.trim().toLowerCase();
    this.searchQuery = value;
    this.currentPage = 1;
    this.loadUsers();
  }
}
Register HTTPClient in src/app/app.config.ts.
import { ApplicationConfig, provideBrowserGlobalErrorListeners, provideZoneChangeDetection } from '@angular/core';
import { provideRouter } from '@angular/router';

import { routes } from './app.routes';
import { provideHttpClient } from '@angular/common/http';

export const appConfig: ApplicationConfig = {
  providers: [
    provideBrowserGlobalErrorListeners(),
    provideZoneChangeDetection({ eventCoalescing: true }),
    provideRouter(routes),
    provideHttpClient()
  ]
};
What this does
-
Injects the UserService for fetching data.
-
Implements real pagination via
MatPaginator. -
Reacts to sorting events via
MatSort. -
Adds filtering logic connected to the search input.
-
Automatically fetches data on table events (page change, sort, or search).
Step 2: Update the Table Template
Open src/app/components/table/table.component.html and update it as follows:
<div class="table-container">
  <mat-form-field appearance="outline" class="filter-input">
    <mat-label>Search</mat-label>
    <input
      matInput
      (keyup)="applyFilter($event)"
      placeholder="Search users"
      [disabled]="isLoading"
    />
  </mat-form-field>

  @if (isLoading) {
  <div class="loading-spinner">
    <mat-spinner diameter="40"></mat-spinner>
  </div>
  } @if (!isLoading && data.length) {
  <table
    mat-table
    [dataSource]="data"
    matSort
    *ngIf="!isLoading && data.length"
    class="mat-elevation-z8"
  >
    <!-- ID Column -->
    <ng-container matColumnDef="id">
      <th mat-header-cell *matHeaderCellDef mat-sort-header>ID</th>
      <td mat-cell *matCellDef="let user">{{ user.id }}</td>
    </ng-container>

    <!-- Name Column -->
    <ng-container matColumnDef="name">
      <th mat-header-cell *matHeaderCellDef mat-sort-header>Name</th>
      <td mat-cell *matCellDef="let user">{{ user.name }}</td>
    </ng-container>

    <!-- Email Column -->
    <ng-container matColumnDef="email">
      <th mat-header-cell *matHeaderCellDef mat-sort-header>Email</th>
      <td mat-cell *matCellDef="let user">{{ user.email }}</td>
    </ng-container>

    <!-- Username Column -->
    <ng-container matColumnDef="username">
      <th mat-header-cell *matHeaderCellDef mat-sort-header>Username</th>
      <td mat-cell *matCellDef="let user">{{ user.username }}</td>
    </ng-container>

    <tr mat-header-row *matHeaderRowDef="displayedColumns"></tr>
    <tr mat-row *matRowDef="let row; columns: displayedColumns"></tr>
  </table>
  } @if (!isLoading && !data.length) {
  <div class="no-data">No users found.</div>
  }

  <mat-paginator
    [length]="totalItems"
    [pageSize]="pageSize"
    [pageSizeOptions]="[5, 10, 20]"
    (page)="onPageChange($event)"
  ></mat-paginator>
</div>
Step 3: Add Styles (Optional)
You can keep the same styles from the previous section.
Optionally, add a “no data” message style to table.component.css:
.no-data {
  text-align: center;
  margin-top: 20px;
  color: #888;
}
Step 4: Test the Integration
Run your Angular app again:
ng serveThen open http://localhost:4200.
✅ You should now see:
-
A table populated with user data from JSONPlaceholder.
-
Working paginator, sortable headers, and search input.
-
Loading spinner during data fetching.
At this point, your Angular Material table is fully functional with mock server-side pagination powered by HttpClient.
Connect the Material Table with the Data Source
Now that we have the mock REST API and the data service ready, the next step is to connect our Angular Material table to this data source. This will allow the table to display real data fetched via HTTP requests from the TableService.
Step 1: Create TableService
ng generate service services/table.serviceThis will create two files:
src/app/services/table.service.ts
src/app/services/table.service.spec.ts
Step 2: Implement the TableService
Open src/app/services/table.service.ts and add the following code:
import { HttpClient } from '@angular/common/http';
import { Injectable } from '@angular/core';
import { Observable } from 'rxjs';

export interface User {
  id: number;
  name: string;
  email: string;
  role: string;
}

@Injectable({
  providedIn: 'root'
})
export class TableService {
  private apiUrl = 'http://localhost:3000/users'; // URL from your json-server mock API

  constructor(private http: HttpClient) { }

  getUsers(): Observable<User[]> {
    return this.http.get<User[]>(this.apiUrl);
  }
}
Step 3: Import the Service into the Component
Now, make sure your TableComponent imports the TableService and the User interface from it.
Update src/app/table/table.component.ts as follows:
import { Component, OnInit, ViewChild } from '@angular/core';
import { MatPaginator, MatPaginatorModule } from '@angular/material/paginator';
import { MatTableDataSource, MatTableModule } from '@angular/material/table';
import { TableService, User } from '../../services/table.service';
import { MatFormFieldModule } from '@angular/material/form-field';
import { MatInputModule } from '@angular/material/input';
import { CommonModule } from '@angular/common';
import { MatProgressSpinnerModule } from '@angular/material/progress-spinner';
import { MatSortModule } from '@angular/material/sort';

@Component({
  selector: 'app-table',
  standalone: true,
  imports: [
    CommonModule,
    MatTableModule,
    MatPaginatorModule,
    MatSortModule,
    MatFormFieldModule,
    MatInputModule,
    MatProgressSpinnerModule
  ],
  templateUrl: './table.component.html',
  styleUrls: ['./table.component.scss']
})
export class TableComponent implements OnInit {
  displayedColumns: string[] = ['id', 'name', 'email', 'role'];
  dataSource = new MatTableDataSource<User>();

  @ViewChild(MatPaginator) paginator!: MatPaginator;

  constructor(private tableService: TableService) { }

  ngOnInit(): void {
    this.fetchUsers();
  }

  fetchUsers(): void {
    this.tableService.getUsers().subscribe({
      next: (users) => {
        this.dataSource.data = users;
        this.dataSource.paginator = this.paginator;
      },
      error: (err) => console.error('Error fetching users:', err)
    });
  }

  applyFilter(event: Event) {
    const filterValue = (event.target as HTMLInputElement).value;
    this.dataSource.filter = filterValue.trim().toLowerCase();
  }
}
Step 4: Update the Template
Next, open the file src/app/table/table.component.html and replace the content with this updated version to include a search input field and paginator:
<div class="mat-elevation-z8">
  <div class="filter-container">
    <mat-form-field appearance="outline">
      <mat-label>Filter users</mat-label>
      <input matInput (keyup)="applyFilter($event)" placeholder="Search..." />
    </mat-form-field>
  </div>

  <table mat-table [dataSource]="dataSource" class="full-width-table">
    <!-- ID Column -->
    <ng-container matColumnDef="id">
      <th mat-header-cell *matHeaderCellDef>ID</th>
      <td mat-cell *matCellDef="let user">{{ user.id }}</td>
    </ng-container>

    <!-- Name Column -->
    <ng-container matColumnDef="name">
      <th mat-header-cell *matHeaderCellDef>Name</th>
      <td mat-cell *matCellDef="let user">{{ user.name }}</td>
    </ng-container>

    <!-- Email Column -->
    <ng-container matColumnDef="email">
      <th mat-header-cell *matHeaderCellDef>Email</th>
      <td mat-cell *matCellDef="let user">{{ user.email }}</td>
    </ng-container>

    <!-- Role Column -->
    <ng-container matColumnDef="role">
      <th mat-header-cell *matHeaderCellDef>Role</th>
      <td mat-cell *matCellDef="let user">{{ user.role }}</td>
    </ng-container>

    <tr mat-header-row *matHeaderRowDef="displayedColumns"></tr>
    <tr mat-row *matRowDef="let row; columns: displayedColumns"></tr>
  </table>

  <mat-paginator [pageSizeOptions]="[5, 10, 20]" showFirstLastButtons></mat-paginator>
</div>
Step 5: Add Styles for Better Presentation
Edit src/app/table/table.component.scss and add the following:
.full-width-table {
  width: 100%;
}

.filter-container {
  margin-bottom: 1rem;
}
Step 6: Verify Everything Works
Run the Angular app again:
ng serveThen open your browser at http://localhost:4200.
You should now see:
-
A table displaying user data fetched from the mock API.
-
A filter box to search user names, emails, or roles.
-
A paginator to navigate through pages.
✅ Expected Output:
A responsive, clean Angular Material table that dynamically loads and filters data from your mock REST API.
Add Sorting and Pagination Controls
Now that our Angular Material Table is connected to a data source, let’s enhance it with sorting and pagination powered by Angular Material — while still keeping our server-side pagination and sorting logic consistent.
Step 1: Update the HTML Template
Open src/app/components/table/table.component.html and replace its contents with:
<div class="table-container mat-elevation-z8">

  <!-- Search Input -->
  <mat-form-field appearance="outline" class="search-box">
    <mat-label>Search</mat-label>
    <input
      matInput
      (keyup)="applyFilter($event)"
      placeholder="Type to search users..."
    />
  </mat-form-field>

  <!-- Table -->
  <table mat-table [dataSource]="dataSource" matSort class="mat-elevation-z8">

    <!-- ID Column -->
    <ng-container matColumnDef="id">
      <th mat-header-cell *matHeaderCellDef mat-sort-header>ID</th>
      <td mat-cell *matCellDef="let user">{{ user.id }}</td>
    </ng-container>

    <!-- Name Column -->
    <ng-container matColumnDef="name">
      <th mat-header-cell *matHeaderCellDef mat-sort-header>Name</th>
      <td mat-cell *matCellDef="let user">{{ user.name }}</td>
    </ng-container>

    <!-- Email Column -->
    <ng-container matColumnDef="email">
      <th mat-header-cell *matHeaderCellDef mat-sort-header>Email</th>
      <td mat-cell *matCellDef="let user">{{ user.email }}</td>
    </ng-container>

    <!-- Role Column -->
    <ng-container matColumnDef="role">
      <th mat-header-cell *matHeaderCellDef mat-sort-header>Role</th>
      <td mat-cell *matCellDef="let user">{{ user.role }}</td>
    </ng-container>

    <tr mat-header-row *matHeaderRowDef="displayedColumns"></tr>
    <tr mat-row *matRowDef="let row; columns: displayedColumns"></tr>
  </table>

  <!-- Paginator -->
  <mat-paginator
    [length]="totalItems"
    [pageSize]="pageSize"
    [pageSizeOptions]="[5, 10, 20]"
    aria-label="Select page"
  >
  </mat-paginator>
</div>
Step 2: Update the Component Logic
Now open src/app/components/table/table.component.ts and update it to integrate sorting, pagination, and search using server-side parameters.
import { Component, OnInit, ViewChild } from '@angular/core';
import { MatPaginator, MatPaginatorModule, PageEvent } from '@angular/material/paginator';
import { MatTableDataSource, MatTableModule } from '@angular/material/table';
import { TableService, User } from '../../services/table.service';
import { MatFormFieldModule } from '@angular/material/form-field';
import { MatInputModule } from '@angular/material/input';
import { CommonModule } from '@angular/common';
import { MatProgressSpinnerModule } from '@angular/material/progress-spinner';
import { MatSort, MatSortModule, Sort } from '@angular/material/sort';

@Component({
  selector: 'app-table',
  standalone: true,
  imports: [
    CommonModule,
    MatTableModule,
    MatPaginatorModule,
    MatSortModule,
    MatFormFieldModule,
    MatInputModule,
    MatProgressSpinnerModule
  ],
  templateUrl: './table.component.html',
  styleUrls: ['./table.component.scss']
})
export class TableComponent implements OnInit {
  displayedColumns: string[] = ['id', 'name', 'email', 'role'];
  dataSource = new MatTableDataSource<User>();
  totalItems = 0;
  pageSize = 5;
  currentPage = 0;
  currentSortField = 'id';
  currentSortDirection: 'asc' | 'desc' = 'asc';
  currentSearch = '';

  @ViewChild(MatPaginator) paginator!: MatPaginator;
  @ViewChild(MatSort) sort!: MatSort;

  constructor(private tableService: TableService) { }

  ngOnInit(): void {
    this.loadUsers();
  }

  loadUsers(): void {
    this.tableService
      .getPaginatedUsers(
        this.currentPage + 1,
        this.pageSize,
        this.currentSortField,
        this.currentSortDirection,
        this.currentSearch
      )
      .subscribe({
        next: (response) => {
          this.dataSource.data = response.data;
          this.totalItems = response.total;
        },
        error: (err) => console.error('Error loading users:', err),
      });
  }

  onPageChange(event: PageEvent): void {
    this.pageSize = event.pageSize;
    this.currentPage = event.pageIndex;
    this.loadUsers();
  }

  onSortChange(sort: Sort): void {
    this.currentSortField = sort.active;
    this.currentSortDirection = sort.direction === '' ? 'asc' : (sort.direction as 'asc' | 'desc');
    this.loadUsers();
  }

  applyFilter(event: Event): void {
    const filterValue = (event.target as HTMLInputElement).value;
    this.currentSearch = filterValue.trim().toLowerCase();
    this.currentPage = 0; // reset to first page
    this.loadUsers();
  }
}
Step 3: Update the Service for Server-Side Pagination
Let’s modify src/app/services/table.service.ts to handle pagination, sorting, and filtering via query parameters.
import { HttpClient, HttpParams } from '@angular/common/http';
import { Injectable } from '@angular/core';
import { map, Observable } from 'rxjs';

export interface User {
  id: number;
  name: string;
  email: string;
  role: string;
}

export interface PaginatedResponse {
  data: User[];
  total: number;
}

@Injectable({
  providedIn: 'root'
})
export class TableService {
  private apiUrl = 'http://localhost:3000/users'; // URL from your json-server mock API

  constructor(private http: HttpClient) { }

  getUsers(): Observable<User[]> {
    return this.http.get<User[]>(this.apiUrl);
  }

  getPaginatedUsers(
    page: number,
    limit: number,
    sortField: string,
    sortOrder: string,
    search: string
  ): Observable<PaginatedResponse> {
    let params = new HttpParams()
      .set('_page', page)
      .set('_limit', limit)
      .set('_sort', sortField)
      .set('_order', sortOrder);

    if (search) {
      params = params.set('q', search);
    }

    return this.http.get<PaginatedResponse>(this.apiUrl, {
      params,
      observe: 'response'
    }).pipe(map(response => ({
      data: response.body as unknown as User[],
      total: Number(response.headers.get('X-Total-Count'))
    })));
  }
}
💡 Note:
json-serverautomatically supports_page,_limit,_sort,_order, andqquery parameters. TheX-Total-Countheader contains the total record count.
Step 4: Add Material Sort Module
Make sure your component imports MatSortModule.
If not already included, update TableComponent imports:
imports: [MatPaginator, MatSort, MatTableDataSource]Step 5: Add Styling (Optional)
src/app/components/table/table.component.scss
.table-container {
  padding: 16px;
  overflow: auto;
}

.search-box {
  width: 300px;
  margin-bottom: 16px;
}
✅ Result
Now you have:
-
Paginated table
-
Sortable columns
-
Search filter integrated with backend
-
All fully managed on the server side through
json-serverquery parameters
You can test it by running:
npm run server
ng serve
Then open your browser at http://localhost:4200 — and try changing pages, sorting by name or role, and searching by keyword.
Final Review and Best Practices
You’ve now built a fully functional Angular 20 standalone application with Angular Material Table, complete server-side pagination, sorting, and search — all integrated with a mock REST API using json-server. 🎯
Let’s quickly recap and go over some important best practices to keep your app clean, scalable, and production-ready.
Project Review
1. Angular Standalone Architecture
You used Angular’s modern standalone component approach, removing the need for NgModules.
This simplifies project structure and makes component imports more explicit.
2. Angular Material Integration
By combining MatTable, MatPaginator, MatSort, and MatFormField, you achieved a clean, responsive, and interactive data grid UI.
3. Server-Side Pagination and Sorting
Instead of relying on the frontend to slice data, you implemented true server-side logic using query parameters:
-
_pageand_limit→ pagination -
_sortand_order→ sorting -
q→ search
This pattern scales efficiently when working with large datasets or production APIs.
4. Reusable Data Service
Your TableService encapsulates all HTTP logic — a best practice for code reusability, separation of concerns, and testability.
Best Practices for Real-World Applications
1. Use Environment Variables
Define your API endpoints inside src/environments/environment.ts:
export const environment = {
  apiUrl: 'https://api.yourdomain.com'
};
Then reference it in your service:
private apiUrl = `${environment.apiUrl}/users`;2. Handle Loading and Error States
Add spinners and error messages in your template:
<mat-spinner *ngIf="isLoading"></mat-spinner>
<div *ngIf="errorMessage" class="error">{{ errorMessage }}</div>
And toggle these flags in your component when fetching data.
3. Use RxJS Operators for Optimization
When combining pagination, sort, and search, consider using merge or switchMap from RxJS to handle multiple event streams more reactively:
merge(this.sort.sortChange, this.paginator.page)
  .pipe(
    startWith({}),
    switchMap(() => this.tableService.getPaginatedUsers(...))
  )
  .subscribe(...);
4. Keep the UI Consistent
Follow Angular Material’s design patterns:
-
Use
mat-elevation-z8for table shadows. -
Add responsive design with CSS grid or flex.
-
Limit table width for better readability on small screens.
5. Prepare for Real Backend APIs
When connecting to a real API (instead of json-server):
-
Replace
_page,_limit,_sort,_order, andqwith your API’s query schema. -
Ensure your backend includes total count metadata (e.g.,
{ data: [], total: 100 }).
6. Reuse and Generalize Your Table Component
You can easily refactor your table into a generic data-table component that takes dynamic columns and API endpoints as inputs:
@Input() displayedColumns: string[] = [];
@Input() apiEndpoint!: string;
This makes it a reusable component across your project.
🚀 You Did It!
You’ve successfully implemented:
-
✅ Angular Material Table
-
✅ Server-side Pagination
-
✅ Sorting and Filtering
-
✅ Integration with Mock REST API
-
✅ Clean, modern standalone Angular 20 structure
This setup is production-friendly, easily extendable, and adaptable to any RESTful API.
You can find the full source code on our GitHub.
If you don’t want to waste your time designing your front-end or your budget to spend by hiring a web designer, then Angular Templates is the best place to go. So, speed up your front-end web development with premium Angular templates. Choose your template for your front-end project here.
That's just the basics. If you need more deep learning about Angular, you can take the following cheap course:
- Angular - The Complete Guide (2025 Edition)
- Complete Angular Course 2025 - Master Angular in only 6 days
- Angular Deep Dive - Beginner to Advanced (Angular 20)
- Modern Angular 20 with Signals - The missing guide
- The Modern Angular Bootcamp
- Angular (Full App) with Angular Material, Angularfire & NgRx
- Angular Front End Development Beginner to Master 2025
- 30 Days of Angular: Build 30 Projects with Angular
- Angular 20 Full Course - Complete Zero to Hero Angular 20
- Angular Material In Depth (Angular 20)
Thanks!