
Comprehensive step by step tutorial on building Spring Boot 2.0.0, MongoDB and React.js CRUD Web Application. Previously we have done a tutorial on building Spring Boot, MongoDB and Angular 5 CRUD Web Application. From there we have a lesson that integrates React.js or other front-end frameworks with Java web application is simple. We will run the React.js application on the same port as the Spring Boot Java Web Application.
Table of Contents:
- Generate Spring Boot 2.0.0 Web Application
- Create Java Model or Entity Class
- Create a New Java Repository Interface for Contact Model
- Create a New Spring MVC RESTful Controller
- Test The REST API using CURL
- Create a React App
- Add React Router DOM for CRUD Front End
- Add List of Contacts to Existing App Component
- Add a Components for Create a New Contact
- Add a Component for Show Contact Details
- Add a Component for Edit a Contact
- Run and Test Spring Boot 2.0.0, MongoDB and React.js CRUD Web Application
The following tools, frameworks, and modules are required for this tutorial achievement:
- Java Development Kit 8
- Spring Boot 2.0.0
- Spring Web
- Spring Data
- Gradle
- MongoDB
- React.js
- Node.js
- Spring Initializer
- Terminal or Command Line
- Text Editor or IDE
Before continuing to the main steps, make sure that you have installed above tools, frameworks, and modules in your machine.
Generate Spring Boot 2.0.0 Web Application
As usual, we start creating the Spring Boot 2.0.0 application by generating the application and its library using Spring Initializer. Spring Initializr provides an extensible API to generate quickstart projects, and to inspect the metadata used to generate projects, for instance, to list the available dependencies and versions. After go to Spring Initializer using the web browser, create the new application and add the library as below.

Click `Generate Project` button and the Spring boot 2.0.0 application will be downloaded by your browser. Next, extract the zipped Spring Boot project then copy or move to your Java projects folder. To run the Spring Boot application, type this command from the terminal or command line.
cd react
./gradlew bootRun
You will not find a landing page on the browser yet because of there's no frontend or HTML page in the static folder. To connect Spring Boot with MongoDB, open and edit `src/main/java/resources/application.properties` then add this lines.
spring.data.mongodb.database=springreact
spring.data.mongodb.host=localhost
spring.data.mongodb.port=27017
Next, start MongoDB in the other terminal or command line if it's not run yet. Run again Spring Boot application. Now, Spring Boot and MongoDB are connected and ready.
Create Java Model or Entity Class
If are using Text Editor, you have to create a folder for models. From the terminal create a models folder in `src/main/java/com/djamware/react`.
mkdir src/main/java/com/djamware/react/modelsTo create Model or Entity Class simply create a new file at `src/main/java/com/djamware/react/models` then name it `Contact.java`.
touch src/main/java/com/djamware/react/models/Contact.javaOpen and edit `src/main/java/com/djamware/react/models/Contact.java` then add these lines of codes that contain a POJO for the contact model or entity including the constructor, getter, and setter.
package com.djamware.react.models;

import org.springframework.data.annotation.Id;
import org.springframework.data.mongodb.core.mapping.Document;

@Document(collection = "contacts")
public class Contact {
    @Id
    String id;
    String name;
    String address;
    String city;
    String phone;
    String email;

    public Contact() {
    }

    public Contact(String name, String address, String city, String phone, String email) {
        this.name = name;
        this.address = address;
        this.city = city;
        this.phone = phone;
        this.email = email;
    }

    public String getId() {
        return id;
    }

    public void setId(String id) {
        this.id = id;
    }

    public String getName() {
        return name;
    }

    public void setName(String name) {
        this.name = name;
    }

    public String getAddress() {
        return address;
    }

    public void setAddress(String address) {
        this.address = address;
    }

    public String getCity() {
        return city;
    }

    public void setCity(String city) {
        this.city = city;
    }

    public String getPhone() {
        return phone;
    }

    public void setPhone(String phone) {
        this.phone = phone;
    }

    public String getEmail() {
        return email;
    }

    public void setEmail(String email) {
        this.email = email;
    }
}
That class mapped to MongoDB collection with the name `contacts`.
Create a New Java Repository Interface for Contact Model
For connecting to Contact model, we need to create a Java interface or repository. Create a folder named `repositories` inside `src/main/java/com/djamware/react/` folder.
mkdir src/main/java/com/djamware/react/repositoriesNext, create a Java Interface file inside that folder.
touch src/main/java/com/djamware/react/repositories/ContactRepository.javaOpen and edit `src/main/java/com/djamware/react/repositories/ContactRepository.java` then add this lines of codes of extended CrudRepository and only add a single method for delete contact.
package com.djamware.react.repositories;

import com.djamware.react.models.Contact;
import org.springframework.data.repository.CrudRepository;

public interface ContactRepository extends CrudRepository<Contact, String> {
    @Override
    void delete(Contact deleted);
}
We only add `findOne` and `delete` method to the interface because the rest method already handled by `CrudRepository` of Spring Data MongoDB.
Create a New Spring MVC RESTful Controller
Now, it's a time for RESTful Web Service (REST API) implementation by creating a new Spring MVC RESTful controller file. Create a folder named `controllers` inside `src/main/java/com/djamware/react/` folder.
mkdir src/main/java/com/djamware/react/controllersCreate a Java file named `ContactController.java` inside that new folder.
touch src/main/java/com/djamware/react/controllers/ContactController.javaOpen and edit `src/main/java/com/djamware/react/controllers/ContactController.java` then add this lines of codes that implementing request and response from or to the client-side using REST API. The REST API determine by @RestController and @RequestMapping Spring MVC annotation.
package com.djamware.react.controllers;

import com.djamware.react.models.Contact;
import com.djamware.react.repositories.ContactRepository;
import org.springframework.beans.factory.annotation.Autowired;
import org.springframework.web.bind.annotation.PathVariable;
import org.springframework.web.bind.annotation.RequestBody;
import org.springframework.web.bind.annotation.RequestMapping;
import org.springframework.web.bind.annotation.RequestMethod;
import org.springframework.web.bind.annotation.RestController;
import java.util.Optional;

@RestController
public class ContactController {

    @Autowired
    ContactRepository contactRepository;

    @RequestMapping(method=RequestMethod.GET, value="/contacts")
    public Iterable<Contact> contact() {
        return contactRepository.findAll();
    }

    @RequestMapping(method=RequestMethod.POST, value="/contacts")
    public Contact save(@RequestBody Contact contact) {
        contactRepository.save(contact);

        return contact;
    }

    @RequestMapping(method=RequestMethod.GET, value="/contacts/{id}")
    public Optional<Contact> show(@PathVariable String id) {
        return contactRepository.findById(id);
    }

    @RequestMapping(method=RequestMethod.PUT, value="/contacts/{id}")
    public Contact update(@PathVariable String id, @RequestBody Contact contact) {
        Optional<Contact> optcontact = contactRepository.findById(id);
        Contact c = optcontact.get();
        if(contact.getName() != null)
            c.setName(contact.getName());
        if(contact.getAddress() != null)
            c.setAddress(contact.getAddress());
        if(contact.getCity() != null)
            c.setCity(contact.getCity());
        if(contact.getPhone() != null)
            c.setPhone(contact.getPhone());
        if(contact.getEmail() != null)
            c.setEmail(contact.getEmail());
        contactRepository.save(c);
        return c;
    }

    @RequestMapping(method=RequestMethod.DELETE, value="/contacts/{id}")
    public String delete(@PathVariable String id) {
        Optional<Contact> optcontact = contactRepository.findById(id);
        Contact contact = optcontact.get();
        contactRepository.delete(contact);

        return "";
    }
}
Test the REST API using CURL
Now, re-run again Spring Boot application then test the REST API using CURL from the terminal.
./gradlew bootRunOpen another terminal then type this command to get a Contact list from the REST API.
curl -i -H "Accept: application/json" localhost:8080/contactsIt should display a response like this.
HTTP/1.1 200
Content-Type: application/json;charset=UTF-8
Transfer-Encoding: chunked
Date: Mon, 05 Feb 2018 12:14:39 GMT

[]
To add a contact, type this command to post a contact data.
curl -i -X POST -H "Content-Type: application/json" -d '{"name":"John Doe","address":"Jl. Cipaganti No.112","city":"Bandung","phone":"0811223112233","email":"[email protected]"}' localhost:8080/contactsIt should display a response like this.
HTTP/1.1 200
Content-Type: application/json;charset=UTF-8
Transfer-Encoding: chunked
Date: Tue, 06 Feb 2018 02:59:00 GMT

{"id":"5a7919f4b9d4f13c2cb6f539","name":"John Doe","address":"Jl. Cipaganti No.112","city":"Bandung","phone":"0811223112233","email":"[email protected]"}
You can check on MongoDB console to verify that new contact data is saved. Next, to get a single contact data by ID type this command.
curl -i -H "Accept: application/json" localhost:8080/contacts/5a784bbfb9d4f121d9a31195And here's the response.
HTTP/1.1 200
Content-Type: application/json;charset=UTF-8
Transfer-Encoding: chunked
Date: Mon, 05 Feb 2018 12:22:49 GMT

{"id":"5a784bbfb9d4f121d9a31195","name":"John Doe","address":"Jl. Cipaganti No.112","city":"Bandung","phone":"0811223112233","email":"[email protected]"}
To update existing contact by ID type this command.
curl -i -X PUT -H "Content-Type: application/json" -d '{"name":"John Dodol"}' localhost:8080/contacts/5a784bbfb9d4f121d9a31195It should response like this.
HTTP/1.1 200
Content-Type: application/json;charset=UTF-8
Transfer-Encoding: chunked
Date: Sat, 24 Mar 2018 08:49:11 GMT

{"id":"5a784bbfb9d4f121d9a31195","name":"John Dodol","address":"Jl. Cipaganti No.112","city":"Bandung","phone":"0811223112233","email":"[email protected]"}
To delete a contact by ID type this command.
curl -i -X DELETE localhost:8080/contacts/5a784bbfb9d4f121d9a31195Here's the response.
HTTP/1.1 200
Content-Type: text/plain;charset=UTF-8
Content-Length: 0
Date: Sat, 24 Mar 2018 07:51:42 GMT
Create a React.js Application
This time for the frontend side, in the terminal and root project folder type this command.
create-react-app frontendThat command will create a React.js application folder named `frontend`. To make React build running as Spring Boot frontend, open and edit `frontend/package.json` then change `build` value in the scripts block as below.
"scripts": {
  "start": "react-scripts start",
  "build": "react-scripts build && rm -rf ../src/main/resources/static && mv build ../src/main/resources/static",
  "test": "react-scripts test --env=jsdom",
  "eject": "react-scripts eject"
},
Now, test the React.js configuration by type this command.
cd ./frontend
npm run build
Back to root folder then run again Spring Boot application.
cd ..
./gradlew bootRun
Now, when you pointing your browser to `localhost:8080`, you should see this page.

Add React Router DOM for CRUD Front End
This React front end consists of the Contacts list, detail, create and edit. For navigating between that component, we need to create a route. We will use react-router-dom as React router library. First, install modules required by the components after stop the Spring Boot application.
cd ./frontend
npm install --save react-router-dom
npm install --save-dev bootstrap
npm install --save axios
Next, open and edit `src/index.js` then replace all codes with this.
import React from 'react';
import ReactDOM from 'react-dom';
import { BrowserRouter as Router, Route } from 'react-router-dom';
import '../node_modules/bootstrap/dist/css/bootstrap.min.css';
import App from './App';
import './App.css';
import Edit from './components/Edit';
import Create from './components/Create';
import Show from './components/Show';

ReactDOM.render(
  <Router>
      <div>
        <Route exact path='/' component={App} />
        <Route path='/edit/:id' component={Edit} />
        <Route path='/create' component={Create} />
        <Route path='/show/:id' component={Show} />
      </div>
  </Router>,
  document.getElementById('root')
);
You see that Edit, Create and Show added as the separate component. Bootstrap also included in the import to making the views better. Now, create the new edit, create and show files.
mkdir src/components
touch src/components/Create.js
touch src/components/Show.js
touch src/components/Edit.js
Add List of Contacts to Existing App Component
To get the list of Contacts and display to the page, open and edit `frontend/src/App.js` file then replace with these lines of codes which contain React App component that fetch data from REST API then display to HTML template as a List.
import React, { Component } from 'react';
import ReactDOM from 'react-dom';
import { Link } from 'react-router-dom';
import axios from 'axios';

class App extends Component {

  constructor(props) {
    super(props);
    this.state = {
      contacts: []
    };
  }

  componentDidMount() {
    axios.get('/contacts')
      .then(res => {
        this.setState({ contacts: res.data });
        console.log(this.state.contacts);
      });
  }

  render() {
    return (
      <div class="container">
        <div class="panel panel-default">
          <div class="panel-heading">
            <h3 class="panel-title">
              CONTACTS LIST
            </h3>
          </div>
          <div class="panel-body">
            <h4><Link to="/create"><span class="glyphicon glyphicon-plus-sign" aria-hidden="true"></span> Add Contact</Link></h4>
            <table class="table table-stripe">
              <thead>
                <tr>
                  <th>Name</th>
                  <th>Address</th>
                </tr>
              </thead>
              <tbody>
                {this.state.contacts.map(c =>
                  <tr>
                    <td><Link to={`/show/${c.id}`}>{c.name}</Link></td>
                    <td>{c.address}</td>
                  </tr>
                )}
              </tbody>
            </table>
          </div>
        </div>
      </div>
    );
  }
}

export default App;
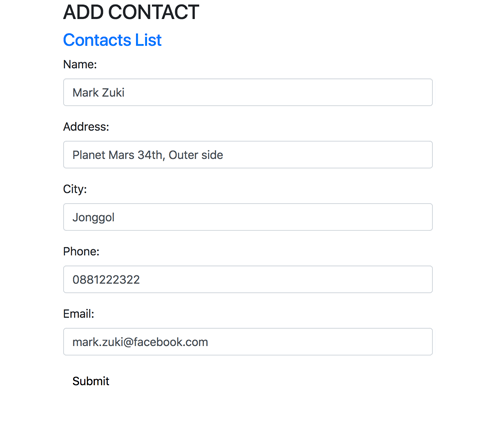
Add a Components for Create a New Contact
For adding a new Contact, open and edit `frontend/src/components/Create.js` then replace all codes with these lines of codes.
import React, { Component } from 'react';
import ReactDOM from 'react-dom';
import axios from 'axios';
import { Link } from 'react-router-dom';

class Create extends Component {

  constructor() {
    super();
    this.state = {
      name: '',
      address: '',
      city: '',
      phone: '',
      email: ''
    };
  }
  onChange = (e) => {
    const state = this.state
    state[e.target.name] = e.target.value;
    this.setState(state);
  }

  onSubmit = (e) => {
    e.preventDefault();

    const { name, address, city, phone, email } = this.state;

    axios.post('/contacts', { name, address, city, phone, email })
      .then((result) => {
        this.props.history.push("/")
      });
  }

  render() {
    const { name, address, city, phone, email } = this.state;
    return (
      <div class="container">
        <div class="panel panel-default">
          <div class="panel-heading">
            <h3 class="panel-title">
              ADD CONTACT
            </h3>
          </div>
          <div class="panel-body">
            <h4><Link to="/"><span class="glyphicon glyphicon-th-list" aria-hidden="true"></span> Contacts List</Link></h4>
            <form onSubmit={this.onSubmit}>
              <div class="form-group">
                <label for="isbn">Name:</label>
                <input type="text" class="form-control" name="name" value={name} onChange={this.onChange} placeholder="Name" />
              </div>
              <div class="form-group">
                <label for="title">Address:</label>
                <input type="text" class="form-control" name="address" value={address} onChange={this.onChange} placeholder="Address" />
              </div>
              <div class="form-group">
                <label for="author">City:</label>
                <input type="text" class="form-control" name="city" value={city} onChange={this.onChange} placeholder="City" />
              </div>
              <div class="form-group">
                <label for="published_date">Phone:</label>
                <input type="text" class="form-control" name="phone" value={phone} onChange={this.onChange} placeholder="Phone Number" />
              </div>
              <div class="form-group">
                <label for="publisher">Email:</label>
                <input type="email" class="form-control" name="email" value={email} onChange={this.onChange} placeholder="Email Address" />
              </div>
              <button type="submit" class="btn btn-default">Submit</button>
            </form>
          </div>
        </div>
      </div>
    );
  }
}

export default Create;
Add a Component for Show Contact Details
To show contact details that listed on the home page, open and edit `frontend/src/components/Show.js` then replace all codes with these lines of codes.
import React, { Component } from 'react';
import axios from 'axios';
import { Link } from 'react-router-dom';
class Show extends Component {
constructor(props) {
super(props);
this.state = {
contact: {}
};
}
componentDidMount() {
axios.get('/contacts/'+this.props.match.params.id)
.then(res => {
this.setState({ contact: res.data });
console.log(this.state.contact);
});
}
delete(id){
console.log(id);
axios.delete('/contacts/'+id)
.then((result) => {
this.props.history.push("/")
});
}
render() {
return (
<div class="container">
<div class="panel panel-default">
<div class="panel-heading">
<h3 class="panel-title">
Contact Details
</h3>
</div>
<div class="panel-body">
<h4><Link to="/"><span class="glyphicon glyphicon-th-list" aria-hidden="true"></span> Contacts List</Link></h4>
<dl>
<dt>Name:</dt>
<dd>{this.state.contact.name}</dd>
<dt>Address:</dt>
<dd>{this.state.contact.address}</dd>
<dt>City:</dt>
<dd>{this.state.contact.city}</dd>
<dt>Phone Number:</dt>
<dd>{this.state.contact.phone}</dd>
<dt>Email Address:</dt>
<dd>{this.state.contact.email}</dd>
</dl>
<Link to={`/edit/${this.state.contact.id}`} class="btn btn-success">Edit</Link>
<button onClick={this.delete.bind(this, this.state.contact.id)} class="btn btn-danger">Delete</button>
</div>
</div>
</div>
);
}
}
export default Show;In this component, there are two buttons for edit current contact and for delete current contact. Delete function included in this component.
Add a Component for Edit a Contact
Aftershow contact details, we need to edit the contact. For that open and edit, `frontend/src/components/Edit.js` then add these lines of codes.
import React, { Component } from 'react';
import axios from 'axios';
import { Link } from 'react-router-dom';

class Edit extends Component {

  constructor(props) {
    super(props);
    this.state = {
      contact: {}
    };
  }

  componentDidMount() {
    axios.get('/contacts/'+this.props.match.params.id)
      .then(res => {
        this.setState({ contact: res.data });
        console.log(this.state.contact);
      });
  }

  onChange = (e) => {
    const state = this.state.contact
    state[e.target.name] = e.target.value;
    this.setState({contact:state});
  }

  onSubmit = (e) => {
    e.preventDefault();

    const { name, address, city, postalCode, phone } = this.state.contact;

    axios.put('/contacts/'+this.props.match.params.id, { name, address, city, postalCode, phone })
      .then((result) => {
        this.props.history.push("/show/"+this.props.match.params.id)
      });
  }

  render() {
    return (
      <div class="container">
        <div class="panel panel-default">
          <div class="panel-heading">
            <h3 class="panel-title">
              EDIT Contact
            </h3>
          </div>
          <div class="panel-body">
            <h4><Link to={`/show/${this.state.contact.id}`}><span class="glyphicon glyphicon-eye-open" aria-hidden="true"></span> Contact List</Link></h4>
            <form onSubmit={this.onSubmit}>
              <div class="form-group">
                <label for="name">Name:</label>
                <input type="text" class="form-control" name="name" value={this.state.contact.name} onChange={this.onChange} placeholder="Name" />
              </div>
              <div class="form-group">
                <label for="title">Address:</label>
                <input type="text" class="form-control" name="address" value={this.state.contact.address} onChange={this.onChange} placeholder="Address" />
              </div>
              <div class="form-group">
                <label for="author">City:</label>
                <input type="text" class="form-control" name="city" value={this.state.contact.city} onChange={this.onChange} placeholder="City" />
              </div>
              <div class="form-group">
                <label for="published_date">Phone Number:</label>
                <input type="text" class="form-control" name="phone" value={this.state.contact.phone} onChange={this.onChange} placeholder="Phone Number" />
              </div>
              <div class="form-group">
                <label for="description">Email:</label>
                <input type="email" class="form-control" name="email" value={this.state.contact.email} onChange={this.onChange} placeholder="Email Address" />
              </div>
              <button type="submit" class="btn btn-default">Update</button>
            </form>
          </div>
        </div>
      </div>
    );
  }
}

export default Edit;
Run and Test Spring Boot 2.0.0, MongoDB and React.js CRUD Web Application
It's time for running the server and client-side and test all CRUD functionality. Type this command to build the React.js application and deploy to Spring Boot 2.0.0 application.
npm run buildNow, back to the root directory then type this command to run again Spring Boot 2.0.0 application.
cd ..
./gradlew bootRun
Here the whole application looks like.


That's it, a simple CRUD application build by Spring Boot 2.0.0, MongoDB and React.js. You can compare with the full working source code from our GitHub.
That's just the basics. If you need more deep learning about Spring Boot, you can take the following cheap course:
- [NEW] Spring Boot 3, Spring 6 & Hibernate for Beginners
- Java Spring Framework 6, Spring Boot 3, Spring AI Telusko
- [NEW] Master Microservices with SpringBoot,Docker,Kubernetes
- Spring Boot Microservices Professional eCommerce Masterclass
- Java Spring Boot: Professional eCommerce Project Masterclass
- Master Backend Development using Java & Spring Boot
- Spring Boot REST APIs: Building Modern APIs with Spring Boot
- [NEW] Spring Boot 3, Spring Framework 6: Beginner to Guru
- Spring 6 & Spring Boot 3: AI, Security, Docker, Cloud
- From Java Dev to AI Engineer: Spring AI Fast Track
Thanks!