
A comprehensive step by step tutorial on securing MERN (MongoDB, Express.js, React.js, and Node.js) Stack web application using Passport.js. Previously, you have learned how to secure Node.js RESTful API and MERN Stack CRUD web application. Now, we will create the authentication system for MERN stack web application using the same concept of the previous tutorial.
Table of Contents:
- Install and Create React App
- Install and Configure Express.js
- Install and Configure Mongoose.js
- Create Mongoose.js Model or Schema
- Create Express Routes
- Install and Configure Passport.js
- Create Express Router for REST API Login
- Secure Book REST API Router
- Install and Configure Required React Modules
- Add List of Book to Existing App Component
- Add React Component for Login
- Add React Component for Register
- Run and Test the MERN Stack Secure Application
The flow of the web application is very simple. The React front will access secure REST API from Express.js backend then it will redirect to Login page if there's no authority to access the REST API. We also provide Sign up/Register page to register a new user then can access the secured REST API.
The following tools, framework, and modules are required for this tutorial achievement:
- Node.js (Stable build recommended)
- Express.js
- MongoDB
- Mongoose.js
- React.js
- Terminal or Node Command Line
- IDE or Text Editor
We assume that you have already installed Node.js and MongoDB. Make sure Node.js command line is working (on Windows) or runnable in Linux/OS X terminal. You can run MongoDB in the different terminal or command line. Type this command in the terminal or Node command line to check Node.js version.
node -vAnd here is our Node.js version.
v8.9.4
Install and Create React App
We will use React App creator (create-react-app) to create or generate a new React.js application. Type this command to install it.
sudo npm install -g create-react-appNext, create a new React.js application by typing this command.
create-react-app mern-secureThat command will create a new React.js application with the name `mern-secure` and also install all required or default Node modules. Next, go to the newly created app folder.
cd ./mern-secureFor sanitation purpose, run the React.js application for the first time by type this command.
npm startIt will automatically open the default browser the point to `http://localhost:3000`, so the landing page should be like this.
Install and Configure Express.js
Express is a web application framework for Node.js, released as free and open-source software under the MIT License. It is designed for building web applications and APIs.[3] It has been called the de facto standard server framework for Node.js. To make the web application run on Express.js, we have to move the default React.js starting point to Express.js. But first, we have to install Express.js and it's dependencies after stopping the running React.js application (press CTRL+C).
npm install --save express body-parser morgan body-parser serve-faviconCreate a folder with the name `bin` and add a file with the name `www` on the root of the project. We use `bin` folder and `www` file as starting the file for Express.js following generated Express.js application. You may change your desire file and folder for that.
mkdir bin
touch bin/www
Open and edit `bin/www` file then add these lines of codes that contain HTTP Server configuration, PORT listener, and error handling.
#!/usr/bin/env node

/**
 * Module dependencies.
 */

var app = require('../app');
var debug = require('debug')('mean-app:server');
var http = require('http');

/**
 * Get port from environment and store in Express.
 */

var port = normalizePort(process.env.PORT || '3000');
app.set('port', port);

/**
 * Create HTTP server.
 */

var server = http.createServer(app);

/**
 * Listen on provided port, on all network interfaces.
 */

server.listen(port);
server.on('error', onError);
server.on('listening', onListening);

/**
 * Normalize a port into a number, string, or false.
 */

function normalizePort(val) {
  var port = parseInt(val, 10);

  if (isNaN(port)) {
    // named pipe
    return val;
  }

  if (port >= 0) {
    // port number
    return port;
  }

  return false;
}

/**
 * Event listener for HTTP server "error" event.
 */

function onError(error) {
  if (error.syscall !== 'listen') {
    throw error;
  }

  var bind = typeof port === 'string'
    ? 'Pipe ' + port
    : 'Port ' + port;

  // handle specific listen errors with friendly messages
  switch (error.code) {
    case 'EACCES':
      console.error(bind + ' requires elevated privileges');
      process.exit(1);
      break;
    case 'EADDRINUSE':
      console.error(bind + ' is already in use');
      process.exit(1);
      break;
    default:
      throw error;
  }
}

/**
 * Event listener for HTTP server "listening" event.
 */

function onListening() {
  var addr = server.address();
  var bind = typeof addr === 'string'
    ? 'pipe ' + addr
    : 'port ' + addr.port;
  debug('Listening on ' + bind);
}
Now, open and edit `package.json` then replace `start` value.
"scripts": {
  "start": "node ./bin/www",
  "build": "react-scripts build",
  "test": "react-scripts test --env=jsdom",
  "eject": "react-scripts eject"
}
Next, create `app.js` in the root of the project folder.
touch app.jsOpen and edit `app.js` then add this lines of codes that contain Express router initialization, configuration, and error handling.
var express = require('express');
var path = require('path');
var favicon = require('serve-favicon');
var logger = require('morgan');
var bodyParser = require('body-parser');

var book = require('./routes/book');
var app = express();

app.use(logger('dev'));
app.use(bodyParser.json());
app.use(bodyParser.urlencoded({'extended':'false'}));
app.use(express.static(path.join(__dirname, 'build')));

app.use('/api/book', book);

// catch 404 and forward to error handler
app.use(function(req, res, next) {
  var err = new Error('Not Found');
  err.status = 404;
  next(err);
});

// error handler
app.use(function(err, req, res, next) {
  // set locals, only providing error in development
  res.locals.message = err.message;
  res.locals.error = req.app.get('env') === 'development' ? err : {};

  // render the error page
  res.status(err.status || 500);
  res.render('error');
});

module.exports = app;
Create routes folder and Javascript file for the book route inside that folder.
mkdir routes
touch routes/book.js
Open and edit `book.js` then add these lines of simple GET method that return simple text as the response.
var express = require('express');
var router = express.Router();

/* GET home page. */
router.get('/', function(req, res, next) {
  res.send('Express REST API');
});

module.exports = router;
Now, open and edit `src/registerServiceWorkers.js` then add to the register function this `fetch` event listener below `load` event listener.
window.addEventListener('fetch', (event) => {
  if ( event.request.url.match( '^.*(\/api\/).*$' ) ) {
    return false;
  }
});
So, the complete register function will look like this.
export default function register() {
  if (process.env.NODE_ENV === 'production' && 'serviceWorker' in navigator) {
    // The URL constructor is available in all browsers that support SW.
    const publicUrl = new URL(process.env.PUBLIC_URL, window.location);
    if (publicUrl.origin !== window.location.origin) {
      // Our service worker won't work if PUBLIC_URL is on a different origin
      // from what our page is served on. This might happen if a CDN is used to
      // serve assets; see https://github.com/facebookincubator/create-react-app/issues/2374
      return;
    }

    window.addEventListener('load', () => {
      const swUrl = `${process.env.PUBLIC_URL}/service-worker.js`;

      if (isLocalhost) {
        // This is running on localhost. Lets check if a service worker still exists or not.
        checkValidServiceWorker(swUrl);

        // Add some additional logging to localhost, pointing developers to the
        // service worker/PWA documentation.
        navigator.serviceWorker.ready.then(() => {
          console.log(
            'This web app is being served cache-first by a service ' +
              'worker. To learn more, visit https://goo.gl/SC7cgQ'
          );
        });
      } else {
        // Is not local host. Just register service worker
        registerValidSW(swUrl);
      }
    });

    window.addEventListener('fetch', (event) => {
      if ( event.request.url.match( '^.*(\/api\/).*$' ) ) {
        return false;
      }
    });
  }
}
Now, check the configuration by running again the Node server that handled by Express.js now.
npm run build
npm start
Open the browser then go to `http://localhost:3000` then you will see previous React home page. Then change the address to `http://localhost:3000/api/book`. You will see this response of web page.
Install and Configure Mongoose.js
We will use Mongoose.js as ORM for MongoDB in Node.js environment. Mongoose provides a straight-forward, schema-based solution to model your application data. It includes built-in type casting, validation, query building, business logic hooks and more, out of the box. First, install Mongoose.js module and its dependencies by typing this command.
npm install --save mongoose bluebirdOpen and edit `app.js` then add these lines to the bottom of other variable lines.
var mongoose = require('mongoose');
mongoose.Promise = require('bluebird');
mongoose.connect('mongodb://localhost/mern-secure', { promiseLibrary: require('bluebird') })
  .then(() =>  console.log('connection succesful'))
  .catch((err) => console.error(err));
You can test the connection to MongoDB run again the Node application and you will see this message on the terminal.
connection succesfulIf you are still using built-in Mongoose Promise library, you will get this deprecated warning on the terminal.
(node:42758) DeprecationWarning: Mongoose: mpromise (mongoose's default promise library) is deprecated, plug in your own promise library instead: http://mongoosejs.com/docs/promises.htmlThat's the reason why we added `bluebird` modules and register it as Mongoose Promise library.
Create Mongoose.js Model or Schema
Add a models folder on the root of project folder for hold Mongoose.js model files.
mkdir modelsCreate new Javascript file that uses for Mongoose.js model. We will create a model of Book collection.
touch models/Book.jsNow, open and edit `models/Book.js` file and add Mongoose require.
var mongoose = require('mongoose');Then add model fields like this.
var BookSchema = new mongoose.Schema({
  isbn: String,
  title: String,
  author: String,
  description: String,
  published_date: { type: Date },
  publisher: String,
  updated_date: { type: Date, default: Date.now },
});
That Schema will mapping to MongoDB collections called book. If you want to know more about Mongoose Schema Datatypes you can find it here. Next, export that schema.
module.exports = mongoose.model('Book', BookSchema);
Create Express Routes
Open and edit again `routes/book.js` then replace all codes with this routers that implement GET, POST, PUT, and DELETE methods.
var express = require('express');
var router = express.Router();
var mongoose = require('mongoose');
var Book = require('../models/Book.js');

/* GET ALL BOOKS */
router.get('/', function(req, res, next) {
  Book.find(function (err, products) {
    if (err) return next(err);
    res.json(products);
  });
});

/* SAVE BOOK */
router.post('/', function(req, res, next) {
  Book.create(req.body, function (err, post) {
    if (err) return next(err);
    res.json(post);
  });
});

module.exports = router;
Run again the Express server then open the other terminal or command line to test the REST API by type this command.
curl -i -H "Accept: application/json" localhost:3000/api/bookIf that command return response like below then REST API is ready to go.
HTTP/1.1 200 OK
X-Powered-By: Express
Content-Type: application/json; charset=utf-8
Content-Length: 2
ETag: W/"2-l9Fw4VUO7kr8CvBlt4zaMCqXZ0w"
Date: Fri, 23 Feb 2018 11:12:41 GMT
Connection: keep-alive

[]
Now, let's populate Book collection with initial data sent from REST API. Run this command to populate it.
curl -i -X POST -H "Content-Type: application/json" -d '{ "isbn":"1783551623, 9781783551620","title":"React.js Essentials: A Fast-paced Guide to Designing and Building Scalable and Maintainable Web Apps With React.js","author": "Artemij Fedosejev","description":"A fast-paced guide to designing and building scalable and maintainable web apps with React.js.","published_date":"2015-08-27T16:00:00Z","publisher":"Packt Publishing" }' localhost:3000/api/bookYou will see this response to the terminal if success.
HTTP/1.1 200 OK
X-Powered-By: Express
Content-Type: application/json; charset=utf-8
Content-Length: 459
ETag: W/"1cb-LkngRBTijVMByPCsm1m2YqH4e6E"
Date: Fri, 23 Feb 2018 11:13:50 GMT
Connection: keep-alive

{"isbn":"1783551623, 9781783551620","title":"React.js Essentials: A Fast-paced Guide to Designing and Building Scalable and Maintainable Web Apps With React.js","author":"Artemij Fedosejev","description":"A fast-paced guide to designing and building scalable and maintainable web apps with React.js.","published_date":"2015-08-27T16:00:00.000Z","publisher":"Packt Publishing","updated_date":"2018-02-23T11:13:50.529Z","_id":"5a8ff76eaca1ee2822adf317","__v":0}
Install and Configure Passport.js
It's time for securing REST API. We will use Passport.js as a middleware for securing Node.js app. Passport is authentication middleware for Node.js. Extremely flexible and modular, Passport can be unobtrusively dropped into any Express-based web application. A comprehensive set of strategies support authentication using a username and password, Facebook, Twitter, and more. First, install Passport.js module and its dependencies (bcrypt-node, jsonwebtoken, morgan, passport-jwt).
npm install --save bcrypt-nodejs jsonwebtoken morgan passport passport-jwtCreate a new folder for configuration files and add files to that folder.
mkdir config
touch config/settings.js
touch config/passport.js
Open and edit `config/settings.js` then add this lines of codes.
module.exports = {
  'secret':'mernsecure'
};
That file holds a secret code for generating JWT token. Next, open and edit `config/passport.js` then add these lines of codes.
var JwtStrategy = require('passport-jwt').Strategy,
    ExtractJwt = require('passport-jwt').ExtractJwt;

// load up the user model
var User = require('../models/user');
var settings = require('../config/settings'); // get settings file

module.exports = function(passport) {
  var opts = {};
  opts.jwtFromRequest = ExtractJwt.fromAuthHeaderWithScheme("jwt");
  opts.secretOrKey = settings.secret;
  passport.use(new JwtStrategy(opts, function(jwt_payload, done) {
    User.findOne({id: jwt_payload.id}, function(err, user) {
          if (err) {
              return done(err, false);
          }
          if (user) {
              done(null, user);
          } else {
              done(null, false);
          }
      });
  }));
};
This config is used for getting the user by matching JWT token with token get from the client. This configuration needs to create a User model. For that, create a new Javascript file inside models folder.
touch models/User.jsOpen and edit `models/User.js` then add these lines of codes.
var mongoose = require('mongoose');
var Schema = mongoose.Schema;
var bcrypt = require('bcrypt-nodejs');

var UserSchema = new Schema({
  username: {
        type: String,
        unique: true,
        required: true
    },
  password: {
        type: String,
        required: true
    }
});

UserSchema.pre('save', function (next) {
    var user = this;
    if (this.isModified('password') || this.isNew) {
        bcrypt.genSalt(10, function (err, salt) {
            if (err) {
                return next(err);
            }
            bcrypt.hash(user.password, salt, null, function (err, hash) {
                if (err) {
                    return next(err);
                }
                user.password = hash;
                next();
            });
        });
    } else {
        return next();
    }
});

UserSchema.methods.comparePassword = function (passw, cb) {
    bcrypt.compare(passw, this.password, function (err, isMatch) {
        if (err) {
            return cb(err);
        }
        cb(null, isMatch);
    });
};

module.exports = mongoose.model('User', UserSchema);
The different of User models are an additional function for creating an encrypted password using `Bcrypt` and function for comparing encrypted password.
Create Express Router for REST API Login
Now, it's time for the real game. We will create a Router for authenticating the user and restrict resources. In routes, folder creates a new Javascript file.
touch routes/auth.jsOpen and edit `routes/auth.js` then declares all required variables.
var mongoose = require('mongoose');
var passport = require('passport');
var settings = require('../config/settings');
require('../config/passport')(passport);
var express = require('express');
var jwt = require('jsonwebtoken');
var router = express.Router();
var User = require("../models/user");
Create a router for signup or register the new user.
router.post('/register', function(req, res) {
  if (!req.body.username || !req.body.password) {
    res.json({success: false, msg: 'Please pass username and password.'});
  } else {
    var newUser = new User({
      username: req.body.username,
      password: req.body.password
    });
    // save the user
    newUser.save(function(err) {
      if (err) {
        return res.json({success: false, msg: 'Username already exists.'});
      }
      res.json({success: true, msg: 'Successful created new user.'});
    });
  }
});
Create a router for login or sign-in.
router.post('/login', function(req, res) {
  User.findOne({
    username: req.body.username
  }, function(err, user) {
    if (err) throw err;

    if (!user) {
      res.status(401).send({success: false, msg: 'Authentication failed. User not found.'});
    } else {
      // check if password matches
      user.comparePassword(req.body.password, function (err, isMatch) {
        if (isMatch && !err) {
          // if user is found and password is right create a token
          var token = jwt.sign(user.toJSON(), settings.secret);
          // return the information including token as JSON
          res.json({success: true, token: 'JWT ' + token});
        } else {
          res.status(401).send({success: false, msg: 'Authentication failed. Wrong password.'});
        }
      });
    }
  });
});
Export the router variable as a module.
module.exports = router;Open and edit `app.js` again to mapping authentication router to URL. Add this require variable after book variable.
var auth = require('./routes/auth');Add `app.use` after book `app.use`.
app.use('/api/auth', auth);
Secure Book REST API Router
It's time to securing the RESTful API resources. We will add a restriction for Book RESTful API. For that, open and edit `routes/book.js` then add this require variables.
var passport = require('passport');
require('../config/passport')(passport);
Replace all save book router with this.
router.post('/', passport.authenticate('jwt', { session: false}), function(req, res) {
  var token = getToken(req.headers);
  if (token) {
    Book.create(req.body, function (err, post) {
      if (err) return next(err);
      res.json(post);
    });
  } else {
    return res.status(403).send({success: false, msg: 'Unauthorized.'});
  }
});
Replace all get books router with this.
router.get('/', passport.authenticate('jwt', { session: false}), function(req, res) {
  var token = getToken(req.headers);
  if (token) {
    Book.find(function (err, books) {
      if (err) return next(err);
      res.json(books);
    });
  } else {
    return res.status(403).send({success: false, msg: 'Unauthorized.'});
  }
});
Add function to get and extract JWT token.
getToken = function (headers) {
  if (headers && headers.authorization) {
    var parted = headers.authorization.split(' ');
    if (parted.length === 2) {
      return parted[1];
    } else {
      return null;
    }
  } else {
    return null;
  }
};
And of course, this router should be exported as a module by adding this line.
module.exports = router;Now, run again the Express server then test the modified Book router by sending the same request.
curl -i -H "Accept: application/json" localhost:3000/api/bookIt should return a response like this messages.
HTTP/1.1 401 Unauthorized
X-Powered-By: Express
Date: Fri, 23 Feb 2018 12:53:10 GMT
Connection: keep-alive
Content-Length: 12
That's mean the Book REST API is secure and accessible to an authorized user.
Install and Configure Required React Modules
We need additional required React modules for navigating the views, accessing REST API and styling the front end. Type this commands to install the required modules of react-router-dom, bootstrap, and Axios.
npm install --save react-router-dom
npm install --save-dev bootstrap
npm install --save axios
Next, open and edit `src/index.js` then replace all codes with this.
import React from 'react';
import ReactDOM from 'react-dom';
import { BrowserRouter as Router, Route } from 'react-router-dom';
import '../node_modules/bootstrap/dist/css/bootstrap.min.css';
import '../node_modules/bootstrap/dist/css/bootstrap-theme.min.css';
import './index.css';
import App from './App';
import registerServiceWorker from './registerServiceWorker';
import Login from './components/Login';
import Register from './components/Register';

ReactDOM.render(
  <Router>
      <div>
        <Route exact path='/' component={App} />
        <Route path='/login' component={Login} />
        <Route path='/register' component={Register} />
      </div>
  </Router>,
  document.getElementById('root')
);
registerServiceWorker();
As you see that Login and Register added as the separate component. Bootstrap also included in the import to making the views better. Now, create the new login and register files.
mkdir src/components
touch src/components/Login.js
touch src/components/Register.js
Add List of Book to Existing App Component
As you see in the previous step that App component act as home or root page. This component handles the list of books. Open and edit `src/App.js` then replace all codes with these codes.
import React, { Component } from 'react';
import ReactDOM from 'react-dom';
import { Link } from 'react-router-dom';
import axios from 'axios';
class App extends Component {
constructor(props) {
super(props);
this.state = {
books: []
};
}
componentDidMount() {
axios.defaults.headers.common['Authorization'] = localStorage.getItem('jwtToken');
axios.get('/api/book')
.then(res => {
this.setState({ books: res.data });
console.log(this.state.books);
})
.catch((error) => {
if(error.response.status === 401) {
this.props.history.push("/login");
}
});
}
logout = () => {
localStorage.removeItem('jwtToken');
window.location.reload();
}
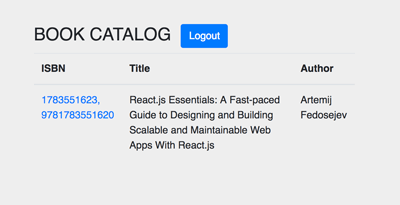
render() {
return (
<div class="container">
<div class="panel panel-default">
<div class="panel-heading">
<h3 class="panel-title">
BOOK CATALOG
{localStorage.getItem('jwtToken') &&
<button class="btn btn-primary" onClick={this.logout}>Logout</button>
}
</h3>
</div>
<div class="panel-body">
<table class="table table-stripe">
<thead>
<tr>
<th>ISBN</th>
<th>Title</th>
<th>Author</th>
</tr>
</thead>
<tbody>
{this.state.books.map(book =>
<tr>
<td><Link to={`/show/${book._id}`}>{book.isbn}</Link></td>
<td>{book.title}</td>
<td>{book.author}</td>
</tr>
)}
</tbody>
</table>
</div>
</div>
</div>
);
}
}
export default App;As you can see, there's a call to Book RESTful API when the page is loaded. If API calls response `401` error status then it will be redirected to the login page. We also put a logout button inside the condition where JWT token does not exist in local storage.
Add React Component for Login
Previously we have created a Javascript file for login component. Now, we will create a React component for login. Open and edit `src/components/Login.js` then add/replace these lines of codes.
import React, { Component } from 'react';
import ReactDOM from 'react-dom';
import axios from 'axios';
import { Link } from 'react-router-dom';
import './Login.css';

class Login extends Component {

  constructor() {
    super();
    this.state = {
      username: '',
      password: '',
      message: ''
    };
  }
  onChange = (e) => {
    const state = this.state
    state[e.target.name] = e.target.value;
    this.setState(state);
  }

  onSubmit = (e) => {
    e.preventDefault();

    const { username, password } = this.state;

    axios.post('/api/auth/login', { username, password })
      .then((result) => {
        localStorage.setItem('jwtToken', result.data.token);
        this.setState({ message: '' });
        this.props.history.push('/')
      })
      .catch((error) => {
        if(error.response.status === 401) {
          this.setState({ message: 'Login failed. Username or password not match' });
        }
      });
  }

  render() {
    const { username, password, message } = this.state;
    return (
      <div class="container">
        <form class="form-signin" onSubmit={this.onSubmit}>
          {message !== '' &&
            <div class="alert alert-warning alert-dismissible" role="alert">
              { message }
            </div>
          }
          <h2 class="form-signin-heading">Please sign in</h2>
          <label for="inputEmail" class="sr-only">Email address</label>
          <input type="email" class="form-control" placeholder="Email address" name="username" value={username} onChange={this.onChange} required/>
          <label for="inputPassword" class="sr-only">Password</label>
          <input type="password" class="form-control" placeholder="Password" name="password" value={password} onChange={this.onChange} required/>
          <button class="btn btn-lg btn-primary btn-block" type="submit">Login</button>
          <p>
            Not a member? <Link to="/register"><span class="glyphicon glyphicon-plus-sign" aria-hidden="true"></span> Register here</Link>
          </p>
        </form>
      </div>
    );
  }
}

export default Login;
As you can see in the codes, login action will get JWT token if successful then save it to local storage before redirect to the main page. Next, add style to this page by creating a new CSS file.
touch src/components/Login.cssOpen and edit `src/components/Login.css` then add this lines of CSS codes.
body {
  padding-top: 40px;
  padding-bottom: 40px;
  background-color: #eee;
}

.form-signin {
  max-width: 330px;
  padding: 15px;
  margin: 0 auto;
}
.form-signin .form-signin-heading,
.form-signin .checkbox {
  margin-bottom: 10px;
}
.form-signin .checkbox {
  font-weight: normal;
}
.form-signin .form-control {
  position: relative;
  height: auto;
  -webkit-box-sizing: border-box;
          box-sizing: border-box;
  padding: 10px;
  font-size: 16px;
}
.form-signin .form-control:focus {
  z-index: 2;
}
.form-signin input[type="email"] {
  margin-bottom: -1px;
  border-bottom-right-radius: 0;
  border-bottom-left-radius: 0;
}
.form-signin input[type="password"] {
  margin-bottom: 10px;
  border-top-left-radius: 0;
  border-top-right-radius: 0;
}
.form-signin p {
  margin-top: 10px;
}
Add React Component for Register
Previously we have created a Javascript file for register component. Now, we will create a React component for register. So, open and edit `src/components/Register.js` then add/replace these lines of codes.
import React, { Component } from 'react';
import ReactDOM from 'react-dom';
import axios from 'axios';
import { Link } from 'react-router-dom';
import './Login.css';

class Create extends Component {

  constructor() {
    super();
    this.state = {
      username: '',
      password: ''
    };
  }
  onChange = (e) => {
    const state = this.state
    state[e.target.name] = e.target.value;
    this.setState(state);
  }

  onSubmit = (e) => {
    e.preventDefault();

    const { username, password } = this.state;

    axios.post('/api/auth/register', { username, password })
      .then((result) => {
        this.props.history.push("/login")
      });
  }

  render() {
    const { username, password } = this.state;
    return (
      <div class="container">
        <form class="form-signin" onSubmit={this.onSubmit}>
          <h2 class="form-signin-heading">Register</h2>
          <label for="inputEmail" class="sr-only">Email address</label>
          <input type="email" class="form-control" placeholder="Email address" name="username" value={username} onChange={this.onChange} required/>
          <label for="inputPassword" class="sr-only">Password</label>
          <input type="password" class="form-control" placeholder="Password" name="password" value={password} onChange={this.onChange} required/>
          <button class="btn btn-lg btn-primary btn-block" type="submit">Register</button>
        </form>
      </div>
    );
  }
}

export default Create;
On that codes, we use the same style with login component. Register action will redirect to login component after successful registration.
Run and Test the MERN Stack Secure Application
It's a time to test the whole MERN stack secure application. The React.js application will integrate with Express.js by building the React.js application. Type this command to build the React.js application.
npm run-script buildNext, type this command to run the Express.js application.
npm startOpen the browser then point to `localhost:3000`. You will see the default landing page redirected to the login page.

And here's the rest of the register page and main page.

That's it, the complete tutorial of securing MERN stack web application using Passport.js authentication. If there's something wrong with the steps of the tutorial, you can compare it with the full working source code from our GitHub.
That just the basic. If you need more deep learning about MERN Stack, React.js or React Native you can take the following cheap course:
- Mastering React JS
- Master React Native Animations
- React: React Native Mobile Development: 3-in-1
- MERN Stack Front To Back: Full Stack React, Redux & Node. js
- Learning React Native Development
Thanks!