
Comprehensive step by step tutorial of how to build Ionic, Angular 5, Cordova and Firebase simple chat app. The scenario for this app is filled Nickname then save to Firebase Database, choose chat rooms from ROOM list, inside chat room type and read chat messages. This time we will use Firebase module directly instead of using AngularFire.
Jumps to the steps:
- Setup Google Firebase
- Create a New Ionic 3, Angular 5 and Cordova App
- Install and Configure the Firebase Module
- Create Sign-in or Enter Nickname Page
- Create Room List and Add-Room Page
- Modify Home Page as Chat Page
- Run the Ionic Angular Firebase Chat App on The Devices
The following tools, framework, and modules are required for this tutorial:
- Ionic 3
- Node.js
- Angular 5
- Firebase NPM Module
- Firebase/Google Account
- Terminal or Node.js Command Line
- IDE or Text Editor
Before moving to the steps, make sure you have installed the latest Node.js and Ionic 3. To check it, type this command in the terminal or Node.js command line.
node -v
v8.9.3
npm -v
5.5.1
ionic -v
3.19.0
cordova -v
7.1.0
That's the last version when this tutorial was written. For update Node.js and it's `npm` download from Node.js https://nodejs.org and choose the recommended version. For Ionic 3, type this command.
sudo npm i -D -E ionic@latest
sudo npm i -g cordova
Setup Google Firebase
Go to https://console.firebase.google.com and log in using your Google account to enter your Firebase dashboard.
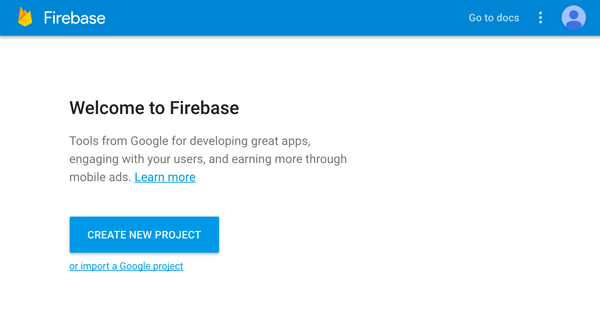
Click CREATE NEW PROJECT button, name it as you like (ours: GeoTracker) and choose your country. Finally, click CREATE PROJECT button.
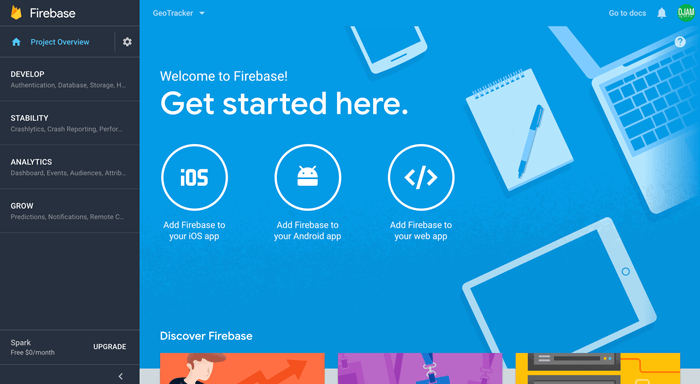
Go to Develop menu then choose Database and click Get Started button. Click the RULES tab then edit to make your database writable and readable for everyone then click `PUBLISH` button.

Create a New Ionic 3, Angular 5 and Cordova App
To create a new Ionic 3, Angular 5 and Cordova app, type this command.
ionic start ionic-firebase-chat blankYou will see this output, then type `Y` for including Cordova to the app creation.
✔ Creating directory ./ionic-firebase-chat - done!
✔ Downloading and extracting blank starter - done!

? Would you like to integrate your new app with Cordova to target native iOS and Android? (y/N)
Just wait for a few minutes because it will also install NPM modules. Next, go to the newly created app folder.
cd ./ionic-firebase-chatFor sanitizing, run the app on the browser for the first time to make sure everything working properly.
ionic serve -lAnd you will see this landing page of Ionic 3 and Angular 5 app.

Install and Configure the Firebase Module
Firebase library ship with NPM module. For that, type this command to install the module.``
npm install --save [email protected]Why are we using Firebase module version 4.8.0? because it's working version right now. It seems a lot of trouble when using the version larger than 4.8.0. So be careful choosing Firebase module version, otherwise, you like to experiment with the all-new version by your self. Next, register the Firebase module in the Ionic 3 Angular 5 app by open and edit this file `src/app.component.ts` then add this import of Firebase.
import * as firebase from ‘firebase’;Declare a constant variable for holds Firebase setting (apiKey, authDomain, databaseURL, projectId, storageBucket) before `@Component`.
const config = {
  apiKey: 'YOUR_APIKEY',
  authDomain: 'YOUR_AUTH_DOMAIN',
  databaseURL: 'YOUR_DATABASE_URL',
  projectId: 'YOUR_PROJECT_ID',
  storageBucket: 'YOUR_STORAGE_BUCKET',
};
Add this line inside the constructor for running the Firebase configuration.
constructor(platform: Platform, statusBar: StatusBar, splashScreen: SplashScreen) {
  platform.ready().then(() => {
    // Okay, so the platform is ready and our plugins are available.
    // Here you can do any higher level native things you might need.
    statusBar.styleDefault();
    splashScreen.hide();
  });
  firebase.initializeApp(config);
}
Now, Firebase database is ready to populate.
Create Sign-in or Enter Nickname Page
To add a new page for sign in or enter a nickname, run this command.
ionic g page SigninThat command will create a new page bundle contains HTML, TS and SCSS files. Next, open and edit `src/pages/signin/signin.ts` then add this import of RoomPage.
import { RoomPage } from '../room/room';That import declares `RoomPage` that will add later. Now, add this variable before the constructor for hold sign-in data.
data = { nickname:"" };Create this function for Sign In or Enter the Room using a specific nickname.
enterNickname() {
  this.navCtrl.setRoot(RoomPage, {
    nickname: this.data.nickname
  });
}
Open and edit `src/pages/signin/signin.html` then replace all tags with this login form.
<ion-header>
  <ion-navbar>
    <ion-title>Signin</ion-title>
  </ion-navbar>
</ion-header>

<ion-content padding>
  <form (ngSubmit)="enterNickname()">
    <ion-list>
      <ion-item>
        <ion-label floating>Enter your Nickname</ion-label>
        <ion-input type="text" [(ngModel)]="data.nickname" name="nickname" required=""></ion-input>
      </ion-item>
      <ion-item>
        <button ion-button full round color="secondary" type="submit">Enter</button>
      </ion-item>
    </ion-list>
  </form>
</ion-content>
Create Room List and Add-Room Page
To add a new page for Room list and `add-room`, type this command.
ionic g page Room
ionic g page AddRoom
Open and edit `src/pages/room/room.ts` then replace all imports with this Component, IonicPage, NavController, NavParams, AddRoomPage, HomePage, and Firebase.
import { Component } from '@angular/core';
import { IonicPage, NavController, NavParams } from 'ionic-angular';
import { AddRoomPage } from '../add-room/add-room';
import { HomePage } from '../home/home';
import * as firebase from 'Firebase';
Declare variables before the constructor for hold room list and referencing Firebase database.
rooms = [];
ref = firebase.database().ref('chatrooms/');
Add this Firebase function to listening to any value changes from Firebase Database.
constructor(public navCtrl: NavController, public navParams: NavParams) {
  this.ref.on('value', resp => {
    this.rooms = [];
    this.rooms = snapshotToArray(resp);
  });
}
Add this constant function below the Class block for converting Firebase response to an array.
export const snapshotToArray = snapshot => {
    let returnArr = [];

    snapshot.forEach(childSnapshot => {
        let item = childSnapshot.val();
        item.key = childSnapshot.key;
        returnArr.push(item);
    });

    return returnArr;
};
Add this function under the constructor for navigating to `add-room` page.
addRoom() {
  this.navCtrl.push(AddRoomPage);
}
Add this function for join or navigating to Home Page of selected Room.
joinRoom(key) {
  this.navCtrl.setRoot(HomePage, {
    key:key,
    nickname:this.navParams.get("nickname")
  });
}
Now, open and edit `src/pages/room/room.html` then replace all tags with this.
<ion-header>
  <ion-navbar>
    <ion-title>Room</ion-title>
    <ion-buttons end>
      <button ion-button icon-only (click)="addRoom()">
        <ion-icon name="add-circle"></ion-icon>
      </button>
    </ion-buttons>
  </ion-navbar>
</ion-header>

<ion-content padding>
  <ion-list>
    <ion-item *ngFor="let room of rooms">
      {{room.roomname}}
      <ion-icon name="chatboxes" item-end (click)="joinRoom(room.key)"></ion-icon>
    </ion-item>
  </ion-list>
</ion-content>
Next, open and edit `src/pages/add-room/add-room.ts` then replace all imports with this.
import { Component } from '@angular/core';
import { IonicPage, NavController, NavParams } from 'ionic-angular';
import * as firebase from 'Firebase';
Declare these variables before the constructor for hold data object and Firebase database reference.
data = { roomname:'' };
ref = firebase.database().ref('chatrooms/');
Add this function to the constructor for saving a new Room data to Firebase Database.
addRoom() {
  let newData = this.ref.push();
  newData.set({
    roomname:this.data.roomname
  });
  this.navCtrl.pop();
}
Now, open and edit `src/pages/add-room/add-room.html` then replace all tags with this.
<ion-header>
  <ion-navbar>
    <ion-title>AddRoom</ion-title>
  </ion-navbar>
</ion-header>


<ion-content padding>
  <form (ngSubmit)="addRoom()">
    <ion-list>
      <ion-item>
        <ion-label floating>Enter Room Name</ion-label>
        <ion-input type="text" [(ngModel)]="data.roomname" name="roomname" required=""></ion-input>
      </ion-item>
      <ion-item>
        <button ion-button full round color="secondary" type="submit">Add</button>
      </ion-item>
    </ion-list>
  </form>
</ion-content>
Modify Home Page as Chat Page
Finally, we just need to modify the existing Home Page for Chat page. Open and edit `src/pages/home/home.ts` then replace all imports with this.
import { Component, ViewChild } from '@angular/core';
import { NavController, NavParams, Content } from 'ionic-angular';
import { RoomPage } from '../room/room';
import * as firebase from 'Firebase';
Declare content module on the first line of the Class block.
@ViewChild(Content) content: Content;Following by adding these variables for the hold data object, chats array, room key, nickname and status for sign out.
data = { type:'', nickname:'', message:'' };
chats = [];
roomkey:string;
nickname:string;
offStatus:boolean = false;
Add this lines inside the constructor body.
constructor(public navCtrl: NavController, public navParams: NavParams) {
  this.roomkey = this.navParams.get("key") as string;
  this.nickname = this.navParams.get("nickname") as string;
  this.data.type = 'message';
  this.data.nickname = this.nickname;

  let joinData = firebase.database().ref('chatrooms/'+this.roomkey+'/chats').push();
  joinData.set({
    type:'join',
    user:this.nickname,
    message:this.nickname+' has joined this room.',
    sendDate:Date()
  });
  this.data.message = '';

  firebase.database().ref('chatrooms/'+this.roomkey+'/chats').on('value', resp => {
    this.chats = [];
    this.chats = snapshotToArray(resp);
    setTimeout(() => {
      if(this.offStatus === false) {
        this.content.scrollToBottom(300);
      }
    }, 1000);
  });
}
Create a function for sending a message that actually saves message data to Firebase database as room child.
sendMessage() {
  let newData = firebase.database().ref('chatrooms/'+this.roomkey+'/chats').push();
  newData.set({
    type:this.data.type,
    user:this.data.nickname,
    message:this.data.message,
    sendDate:Date()
  });
  this.data.message = '';
}
Create a function for exit or sign out from the current chat room. This also sends the message for exit status to Firebase database.
exitChat() {
  let exitData = firebase.database().ref('chatrooms/'+this.roomkey+'/chats').push();
  exitData.set({
    type:'exit',
    user:this.nickname,
    message:this.nickname+' has exited this room.',
    sendDate:Date()
  });

  this.offStatus = true;

  this.navCtrl.setRoot(RoomPage, {
    nickname:this.nickname
  });
}
Next, add this constant function after the Class body for converting Firebase response to an array.
export const snapshotToArray = snapshot => {
    let returnArr = [];

    snapshot.forEach(childSnapshot => {
        let item = childSnapshot.val();
        item.key = childSnapshot.key;
        returnArr.push(item);
    });

    return returnArr;
};
Now, open and edit `src/pages/home/home.html` then replace all tags with this.
<ion-header>
  <ion-navbar>
    <ion-title>
      Ionic Firebase Chat
    </ion-title>
    <ion-buttons end>
      <button ion-button icon-only (click)="exitChat()">
        <ion-icon name="exit"></ion-icon>
      </button>
    </ion-buttons>
  </ion-navbar>
</ion-header>

<ion-content>
  <ion-list>
    <ion-item *ngFor="let chat of chats" no-lines>
      <div class="chat-status" text-center *ngIf="chat.type==='join'||chat.type==='exit';else message">
        <span class="chat-date">{{chat.sendDate | date:'short'}}</span>
        <span class="chat-content-center">{{chat.message}}</span>
      </div>
      <ng-template #message>
        <div class="chat-message" text-right *ngIf="chat.user === nickname">
          <div class="right-bubble">
            <span class="msg-name">Me</span>
            <span class="msg-date">{{chat.sendDate | date:'short'}}</span>
            <p text-wrap>{{chat.message}}</p>
          </div>
        </div>
        <div class="chat-message" text-left *ngIf="chat.user !== nickname">
          <div class="left-bubble">
            <span class="msg-name">{{chat.user}}</span>
            <span class="msg-date">{{chat.sendDate | date:'short'}}</span>
            <p text-wrap>{{chat.message}}</p>
          </div>
        </div>
      </ng-template>
    </ion-item>
  </ion-list>
</ion-content>

<ion-footer>
  <ion-grid>
    <ion-row>
      <ion-col col-10>
        <ion-input type="text" placeholder="Type a message" [(ngModel)]="data.message" name="message"></ion-input>
      </ion-col>
      <ion-col col-2 (click)="sendMessage()">
        <ion-icon name="paper-plane"></ion-icon>
      </ion-col>
    </ion-row>
  </ion-grid>
</ion-footer>
To make your chat page more stylish, open and edit `src/pages/home/home.scss` then add this SCSS codes.
page-home {
  ion-content {
    background: url(../assets/imgs/chat-back.png) no-repeat center center fixed;
    background-size: cover;
    height: 100%;
    overflow: hidden;
    .item-md, .item-ios {
      background: none;
    }
  }
  ion-footer {
    background: white;
    ion-icon {
      padding: 10px;
      font-size: 20px;
      color: green;
    }
  }
  .chat-status {
    min-height: 49px;
    .chat-date {
      display: block;
      font-size: 10px;
      font-style: italic;
      color: #fff;
      text-shadow: 0px -1px 0px #222, 0px 1px 0px #aaa;
      height: 15px;
      left: 10%;
      right:10%;
    }
    .chat-content-center {
      padding: 5px 10px;
      background-color: #e1e1f7;
      border-radius: 6px;
      font-size: 12px;
      color: #555;
      height: 34px;
      left: 10%;
      right:10%;
    }
  }
  .chat-message {
    width: 80%;
    min-height: 40px;
    .right-bubble {
        position: relative;
        background: #dcf8c6;
        border-top-left-radius: .4em;
      border-bottom-left-radius: .4em;
      border-bottom-right-radius: .4em;
      padding: 5px 10px 10px;
      left: 15%;
      span.msg-name {
        font-size: 12px;
        font-weight: bold;
        color: green;
      }
      span.msg-date {
        font-size: 10px;
      }
    }

    .right-bubble:after {
        content: '';
        position: absolute;
        right: 0;
        top: 0;
        width: 0;
        height: 0;
        border: 27px solid transparent;
        border-left-color: #dcf8c6;
        border-right: 0;
        border-top: 0;
        margin-top: -13.5px;
        margin-right: -27px;
    }
    .left-bubble {
        position: relative;
        background: #ffffff;
      border-top-right-radius: .4em;
      border-bottom-left-radius: .4em;
      border-bottom-right-radius: .4em;
      padding: 5px 10px 10px;
      left: 5%;
      span.msg-name {
        font-size: 12px;
        font-weight: bold;
        color: blue;
      }
      span.msg-date {
        font-size: 10px;
      }
    }

    .left-bubble:after {
        content: '';
        position: absolute;
        left: 0;
        top: 0;
        width: 0;
        height: 0;
        border: 27px solid transparent;
        border-right-color: #ffffff;
        border-left: 0;
        border-top: 0;
        margin-top: -13.5px;
        margin-left: -27px;
    }
  }
}
Run the Ionic Angular Firebase Chat App on The Devices
This time to run the Ionic 3, Angular 5 and Firebase Chat app on the real devices. Before that remove/add the Cordova platform first.
ionic cordova platform rm ios
ionic cordova platform add ios
ionic cordova platform rm android
ionic cordova platform add android
Now, run to the device by type this command.
ionic cordova run androidor
ionic cordova run iosThen you will see the Ionic 3, Angular 5 and Firebase chat app like below.

That's it, the simple Ionic 3, Angular 5, Cordova and Firebase chat app. If there are any missing steps in this tutorial you can compare with the working source codes on our GitHub.
We know that building beautifully designed Ionic apps from scratch can be frustrating and very time-consuming. Check Ionic 4 - Full Starter App and save development and design time. Android, iOS, and PWA, 100+ Screens and Components, the most complete and advance Ionic Template.
That just the basic. If you need more deep learning about Ionic, Angular, and Typescript, you can take the following cheap course:
- IONIC 4 Design Hybrid Mobile Applications IOS & Android
- Wordpress Rest API and Ionic 4 (Angular) App With Auth
- Mobile App from Development to Deployment - IONIC 4
- Ionic 4 Crash Course with Heartstone API & Angular
- Ionic 4 Mega Course: Build 10 Real World Apps
Thanks!