
A comprehensive step by step tutorial on how to create Ionic 3, Angular 5, Firebase and Google Maps Location Tracking like Uber App. This app simply works for tracking the geolocation of devices that run this app then display to Google Maps. Every running app will send current Geolocation to Firebase database and get all Geolocation of other devices that run the same app from Firebase database. Previously we have created a tutorial about Ionic 3 Google Maps Direction Service, you can learn the basic from there.
Table of Content:
- Setup Google Firebase
- Setup Google Maps API on Google Developer Console
- Create a New Ionic 3 Angular 5 App
- Install and Configure the Firebase Module
- Add Google Maps Javascript API
- Install and Configure Ionic 3 Cordova Native Geolocation Plugin
- Populate Google Maps with Geolocation from Firebase Database
Geolocation in the mobile phone is the identification or estimation of the real-world geographic location of an object which is a mobile phone. In its simplest form geolocation, involves the generation of a set of geographic coordinates and is closely related to the use of positioning systems, but its usefulness is enhanced by the use of these coordinates to determine a meaningful location, such as a street address. Google Maps is a web mapping service developed by Google. It offers satellite imagery, aerial photography, street maps, 360° panoramic views of streets, real-time traffic conditions, and route planning for traveling by foot, car, bicycle, or public transportation. So, we will combine these two technologies in Ionic Angular app.
On the Firebase we just put a simple data structure contains UUID, Latitude, and Longitude. Each device that uses this app will have only one record. It will be updated in real-time when Geolocation updated.
The following tools, framework, and modules are required for this tutorial:
- Ionic 3
- Node.js
- Angular 5
- Ionic 3 Geolocation Native Plugin
- Firebase NPM Module
- Firebase/Google Account
- Terminal or Node.js Command Line
- IDE or Text Editor
Before moving to the steps, make sure you have installed the latest Node.js and Ionic 3. To check it, type this command in the terminal or Node.js command line.
node -v
v8.9.3
npm -v
5.5.1
ionic -v
3.19.0
cordova -v
7.1.0
That's the last version when this tutorial was written. For update Node.js and it's `npm` download from Node.js and choose the recommended version. For Ionic 3, type this command.
sudo npm i -D -E ionic@latestFor Cordova, you can install it later before adding the platform.
Setup Firebase
Go to https://console.firebase.google.com and log in using your google account.
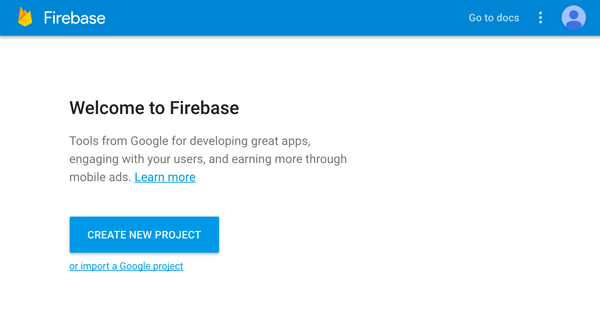
Click CREATE NEW PROJECT button, name it as you like (ours: GeoTracker) and choose your country. Finally, click CREATE PROJECT button.
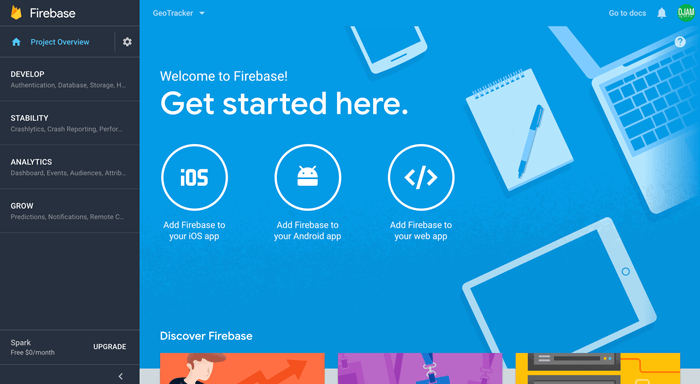
Click Settings (Gear Button) on the top left side of Overview then choose Project Settings. You will find the API key in here, make sure you copy it somewhere in your local directory.

Go to Develop menu then choose Database and click Get Started button. Click the RULES tab then edit to make your database writable and readable for everyone then click `PUBLISH` button.

Setup Google Maps on Google Developer Console
To setup Google Maps Javascript API, open your browser then go to Google Developer Console https://console.developers.google.com/. Click the drop-down on the right of Google APIs logo then click `+` button to create a new project on the dialog.

Give the project name `GeoTracker` then click the Create button.

While `GeoTracker` selected in Project drop-down, click on `ENABLE APIS AND SERVICES` button. Choose Google Javascript API then Click Enable Button.

After enabling Google Maps then Go to Credentials page by click on Credentials left the menu then choose API Key.

Write down the key on a notepad or any text editor, because we will use it later on the app.
Create a New Ionic 3 Angular 5 App
As usual, we always start the steps of the tutorial by creating a new application from scratch. To create a new Ionic 3 and Angular 5 app just type this command in the terminal or Node.js command line.
ionic start ionic-geolocation-tracking blankThat command tells Ionic 3 to create a new Ionic 3 app with the name `ionic-geolocation-tracking` and generate a default blank template. Just wait a few minutes for auto-installing Node modules. Now, go to the newly created folder.
cd ./ionic-geolocation-trackingFor sanitizing, run the app on the browser for the first time to make sure everything working properly.
ionic serve -lAnd you will see this landing page of Ionic 3 and Angular 5 app.

Install and Configure the Firebase Module
We are about using Firebase without `AngularFire` modules. The Firebase JavaScript SDK implements the client-side libraries used by applications using Firebase services. Type this command to install it, before this stop the running app.
npm install --save [email protected]Warning: please use above version `4.8.0` because we are facing an error on 4.8.1 version.
Next, register the Firebase module in the Ionic 3 Angular 5 app by open and edit this file `src/app.component.ts` then add this import.
import * as firebase from ‘firebase’;Declare a constant variable for holds Firebase setting before `@NgModule`.
const config = {
  apiKey: 'YOUR_APIKEY',
  authDomain: 'YOUR_AUTH_DOMAIN',
  databaseURL: 'YOUR_DATABASE_URL',
  projectId: 'YOUR_PROJECT_ID',
  storageBucket: 'YOUR_STORAGE_BUCKET',
};
Add this line inside the constructor for running the Firebase configuration.
constructor(platform: Platform, statusBar: StatusBar, splashScreen: SplashScreen) {
  platform.ready().then(() => {
    // Okay, so the platform is ready and our plugins are available.
    // Here you can do any higher level native things you might need.
    statusBar.styleDefault();
    splashScreen.hide();
  });
  firebase.initializeApp(config);
}
Add Google Maps Javascript API
Now, we will be implementing Google Maps Javascript API in Ionic Angular app. To show a Google Maps to the app, open and edit `src/index.html` then add this line to the bottom of the HTML before the end of `<BODY>` tag.
<script src="https://maps.googleapis.com/maps/api/js?key=YOUR_API_KEY"></script>Next, open and edit `src/pages/home/home.html` then replace the content of `<ion-content>` with this tag.
<ion-content padding>
  <div #map id="map"></div>
</ion-content>
Now, open and edit `src/pages/home/home.ts` then modify this import.
import { Component, ViewChild, ElementRef } from '@angular/core';
import { NavController, Platform } from 'ionic-angular';
Declare Google variable before `@Component`.
declare var google: any;Add these variables below the Class name.
@ViewChild('map') mapElement: ElementRef;
map: any;
Inject Ionic Platform to the constructor.
constructor(public navCtrl: NavController, public platform: Platform) { }Create this function to init or load Google Maps.
initMap() {
  this.map = new google.maps.Map(this.mapElement.nativeElement, {
    zoom: 7,
    center: {lat: 41.85, lng: -87.65}
  });
}
Call that `initMap` function inside the constructor wrapped by platform device ready.
constructor(public navCtrl: NavController, public platform: Platform) {
  platform.ready().then(() => {
    this.initMap();
  });
}
Now, you can load the Google Maps with just running Ionic 3 app on the browser.
Install and Configure Ionic 3 Cordova Native Geolocation Plugin
Now, we will install and configure Ionic 3 Cordova Native Geolocation Plugin. Cordova Geolocation plugin provides information about the device's location, such as latitude and longitude. To install Cordova and Ionic 3 Native Geolocation plugin, type this command.
ionic cordova plugin add cordova-plugin-geolocation --variable GEOLOCATION_USAGE_DESCRIPTION="To locate you"
npm install --save @ionic-native/geolocation
Modify `src/app/app.module.ts` then add this import of Geolocation.
import { Geolocation } from '@ionic-native/geolocation';Add Geolocation to `@NgModule` imports.
providers: [
  StatusBar,
  SplashScreen,
  {provide: ErrorHandler, useClass: IonicErrorHandler},
  Geolocation
]
Now, open and edit again `src/pages/home/home.ts` then add this import.
import { Geolocation } from '@ionic-native/geolocation';Inject Geolocation to the constructor.
constructor(public navCtrl: NavController, public platform: Platform, private geolocation: Geolocation) {
  platform.ready().then(() => {
    this.initMap();
  });
}
Declare an array variable for holds markers before the constructor.
markers = [];Modify `initMap` function to load current location from Geolocation Native Plugin.
initMap() {
  this.geolocation.getCurrentPosition({ maximumAge: 3000, timeout: 5000, enableHighAccuracy: true }).then((resp) => {
    let mylocation = new google.maps.LatLng(resp.coords.latitude,resp.coords.longitude);
    this.map = new google.maps.Map(this.mapElement.nativeElement, {
      zoom: 15,
      center: mylocation
    });
  });
  let watch = this.geolocation.watchPosition();
  watch.subscribe((data) => {
    this.deleteMarkers();
    let updatelocation = new google.maps.LatLng(data.coords.latitude,data.coords.longitude);
    let image = 'assets/imgs/blue-bike.png';
    this.addMarker(updatelocation,image);
    this.setMapOnAll(this.map);
  });
}
Add this required functions for delete, add and set markers on the map.
addMarker(location, image) {
  let marker = new google.maps.Marker({
    position: location,
    map: this.map,
    icon: image
  });
  this.markers.push(marker);
}

setMapOnAll(map) {
  for (var i = 0; i < this.markers.length; i++) {
    this.markers[i].setMap(map);
  }
}

clearMarkers() {
  this.setMapOnAll(null);
}

deleteMarkers() {
  this.clearMarkers();
  this.markers = [];
}
This time we have to remove/add Cordova Platform before testing on the device. Type this command to remove/add Cordova Platform.
ionic cordova platform rm android
ionic cordova patform add android
ionic cordova platform rm ios
ionic cordova patform add ios
Now, test on the real device by type this command.
ionic cordova run androidor
ionic cordova run iosYou will see Google Maps with default current location and marker.
Populate Google Maps with Geolocation from Firebase Database
The data structure on the Firebase required UUID field which can achieve by installing Ionic 3 Cordova Native Device plugin. To install this plugin, type this commands.
ionic cordova plugin add cordova-plugin-device
npm install --save @ionic-native/device
Modify `src/app/app.module.ts` to register the Device module by adding this Device import first.
import { Device } from '@ionic-native/device';Then add to `@ngModule` providers.
providers: [
  StatusBar,
  SplashScreen,
  {provide: ErrorHandler, useClass: IonicErrorHandler},
  Geolocation,
  Device
]
Next, modify `src/pages/home/home.ts` then add this import.
import { Device } from '@ionic-native/device';Inject Device module to the constructor.
constructor(public navCtrl: NavController,
  public platform: Platform,
  private geolocation: Geolocation,
  private device: Device) {
  platform.ready().then(() => {
    this.initMap();
  });
}
For the Firebase database, add this Firebase import first.
import * as firebase from 'Firebase';Add these variables below other variables that previously added.
markers = [];
ref = firebase.database().ref('geolocations/');
Create a new function for update/add Geolocation data to the Firebase database.
updateGeolocation(uuid, lat, lng) {
  if(localStorage.getItem('mykey')) {
    firebase.database().ref('geolocations/'+localStorage.getItem('mykey')).set({
      uuid: uuid,
      latitude: lat,
      longitude : lng
    });
  } else {
    let newData = this.ref.push();
    newData.set({
      uuid: uuid,
      latitude: lat,
      longitude: lng
    });
    localStorage.setItem('mykey', newData.key);
  }
}
Call that function inside watch position subscribe.
watch.subscribe((data) => {
  this.deleteMarkers();
  this.updateGeolocation(this.device.uuid, data.coords.latitude,data.coords.longitude);
  let updatelocation = new google.maps.LatLng(data.coords.latitude,data.coords.longitude);
  let image = 'assets/imgs/blue-bike.png';
  this.addMarker(updatelocation,image);
  this.setMapOnAll(this.map);
});
To get the list of other device position, first, create this function below the closing of the Class to convert Firebase object to an array.
export const snapshotToArray = snapshot => {
    let returnArr = [];

    snapshot.forEach(childSnapshot => {
        let item = childSnapshot.val();
        item.key = childSnapshot.key;
        returnArr.push(item);
    });

    return returnArr;
};
Next, add this function inside the constructor for detecting Firebase data change then update the markers.
this.ref.on('value', resp => {
  this.deleteMarkers();
  snapshotToArray(resp).forEach(data => {
    if(data.uuid !== this.device.uuid) {
      let image = 'assets/imgs/green-bike.png';
      let updatelocation = new google.maps.LatLng(data.latitude,data.longitude);
      this.addMarker(updatelocation,image);
      this.setMapOnAll(this.map);
    } else {
      let image = 'assets/imgs/blue-bike.png';
      let updatelocation = new google.maps.LatLng(data.latitude,data.longitude);
      this.addMarker(updatelocation,image);
      this.setMapOnAll(this.map);
    }
  });
});
Now, you can run again the app to multiple devices to see different locations for each device.
That's it, this tutorial just the basic usage of Geolocation and Google maps markers for tracking device position on the maps. You can learn from the source code directly on our GitHub.
We know that building beautifully designed Ionic apps from scratch can be frustrating and very time-consuming. Check Ionic 4 - Full Starter App and save development and design time. Android, iOS, and PWA, 100+ Screens and Components, the most complete and advance Ionic Template.
That just the basic. If you need more deep learning about Ionic, Angular, and Typescript, you can take the following cheap course:
- IONIC 4 Design Hybrid Mobile Applications IOS & Android
- Wordpress Rest API and Ionic 4 (Angular) App With Auth
- Mobile App from Development to Deployment - IONIC 4
- Ionic 4 Crash Course with Heartstone API & Angular
- Ionic 4 Mega Course: Build 10 Real World Apps
Thanks!