
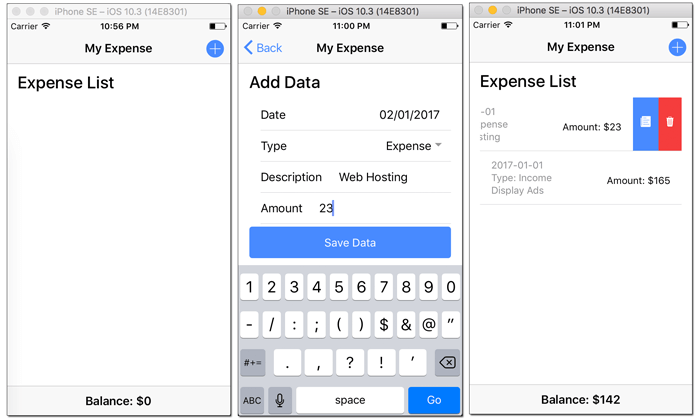
[2017] Step by step tutorial on how to create an offline mobile app with Ionic 3, Angular 4 and SQLite using Ionic 3 Native SQLite Plugin. Previously we learn how to access data from API for Ionic 3 mobile app, now we have to learn how to use local database SQLite for Ionic 3 mobile app. This time we will build an expense management app, which stores income and expense data. The table will look like this.

Shortcut to the steps:
- Create a new Ionic 3 and Angular 4 App
- Add and Configure Ionic 3 Native SQLite and Toast Plugin
- Create List of Expense with Add, Edit and Delete Button
- Create a New Page of Adding New Data
- Create a Page for Edit Data
- Run and Test The Ionic 3, Angular 4 and SQLite App on the Device
Before we go to the next steps, the following tools, module, and dependencies are required:
- Node.js (Stable or recommended version)
- Latest Ionic 3, Angular 4 and Cordova
- Ionic Native SQLite Plugin
- Ionic Native Toast Plugin
- Terminal or Command Line
- Text Editor or IDE
- Android or iOS device
We assume that you have installed Node.js and able to run `npm` in Node.js command line (Windows) or Terminal (OS X/Linux). To make sure everything is up to date, type this command in the terminal or Node command line.
npm install -g ionic cordovaSometimes on OS X terminal need `sudo` for that command.
Create a new Ionic 3 and Angular 4 App
As usual, we start tutorial from scratch or from zero. In the terminal or Node command line type this command to create a new Ionic 3 and Angular 4 app with the name "ionic3-sqlite". Make sure you are in your projects folder.
ionic start ionic3-sqlite blankGo to the newly created app folder.
cd ionic3-sqliteRun the app for the browser to make sure everything working properly by type this command.
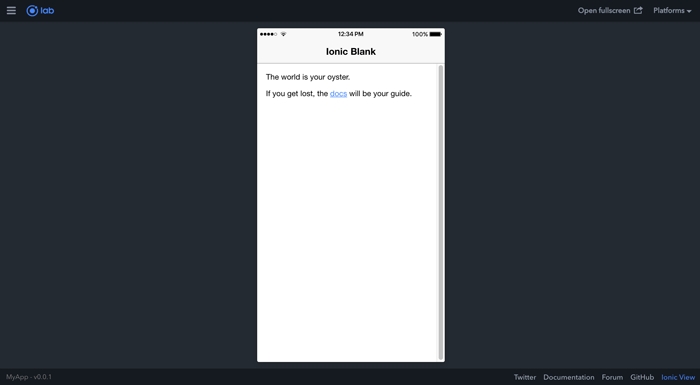
ionic serve --labIf you see this page in your browser that means you are ready to move.
Add and Configure Ionic 3 Native SQLite and Toast Plugin
To add Ionic 3 Native SQLite and Toast plugin, just type this commands.
ionic cordova plugin add cordova-sqlite-storage
npm install --save @ionic-native/sqlite
ionic cordova plugin add cordova-plugin-x-toast
npm install --save @ionic-native/toast
Now, open and edit `src/app/app.module.ts` then add these imports of SQLite (@ionic-native/sqlite) and Toast (@ionic-native/toast).
import { SQLite } from '@ionic-native/sqlite';
import { Toast } from '@ionic-native/toast';
Add `BarcodeScanner` and `Toast` to `@NgModule` providers, so it will look like this.
providers: [
  StatusBar,
  SplashScreen,
  {provide: ErrorHandler, useClass: IonicErrorHandler},
  SQLite,
  Toast
]
Create List of Expense with Add, Edit and Delete Button
The implementation of CRUD mobile app with Ionic 3, Angular 4 and SQLite start by creating a list of expense. For that, open and edit default `src/pages/home/home.ts` then add these imports of SQLite, SQLiteObject (@ionic-native/sqlite), and required page.
import { SQLite, SQLiteObject } from '@ionic-native/sqlite';
import { AddDataPage } from '../add-data/add-data';
import { EditDataPage } from '../edit-data/edit-data';
Two imports of Add and Edit data required new pages for add and edit data that will be added later. Now, inject `SQLite` on the constructor variable.
constructor(public navCtrl: NavController,
  private sqlite: SQLite) {}
Add this variable for an array of expenses, total income, total expense and balance before the constructor.
expenses: any = [];
totalIncome = 0;
totalExpense = 0;
balance = 0;
Add these functions below the constructor for the complete CRUD.
ionViewDidLoad() {
  this.getData();
}

ionViewWillEnter() {
  this.getData();
}

getData() {
  this.sqlite.create({
    name: 'ionicdb.db',
    location: 'default'
  }).then((db: SQLiteObject) => {
    db.executeSql('CREATE TABLE IF NOT EXISTS expense(rowid INTEGER PRIMARY KEY, date TEXT, type TEXT, description TEXT, amount INT)', {})
    .then(res => console.log('Executed SQL'))
    .catch(e => console.log(e));
    db.executeSql('SELECT * FROM expense ORDER BY rowid DESC', {})
    .then(res => {
      this.expenses = [];
      for(var i=0; i<res.rows.length; i++) {
        this.expenses.push({rowid:res.rows.item(i).rowid,date:res.rows.item(i).date,type:res.rows.item(i).type,description:res.rows.item(i).description,amount:res.rows.item(i).amount})
      }
    })
    .catch(e => console.log(e));
    db.executeSql('SELECT SUM(amount) AS totalIncome FROM expense WHERE type="Income"', {})
    .then(res => {
      if(res.rows.length>0) {
        this.totalIncome = parseInt(res.rows.item(0).totalIncome);
        this.balance = this.totalIncome-this.totalExpense;
      }
    })
    .catch(e => console.log(e));
    db.executeSql('SELECT SUM(amount) AS totalExpense FROM expense WHERE type="Expense"', {})
    .then(res => {
      if(res.rows.length>0) {
        this.totalExpense = parseInt(res.rows.item(0).totalExpense);
        this.balance = this.totalIncome-this.totalExpense;
      }
    })
  }).catch(e => console.log(e));
}

addData() {
  this.navCtrl.push(AddDataPage);
}

editData(rowid) {
  this.navCtrl.push(EditDataPage, {
    rowid:rowid
  });
}

deleteData(rowid) {
  this.sqlite.create({
    name: 'ionicdb.db',
    location: 'default'
  }).then((db: SQLiteObject) => {
    db.executeSql('DELETE FROM expense WHERE rowid=?', [rowid])
    .then(res => {
      console.log(res);
      this.getData();
    })
    .catch(e => console.log(e));
  }).catch(e => console.log(e));
}
Next, open and edit `src/pages/home/home.html` then replace all code with this.
<ion-header>
  <ion-navbar>
    <ion-title>
      My Expense
    </ion-title>
    <ion-buttons end>
      <button ion-button icon-only (click)="addData()">
        <ion-icon name="add-circle"></ion-icon>
      </button>
    </ion-buttons>
  </ion-navbar>
</ion-header>

<ion-content padding>
  <h2>Expense List</h2>
  <ion-list>
    <ion-item-sliding *ngFor="let expense of expenses; let i=index">
      <ion-item nopadding>
        <p>
          <span>{{expense.date}}</span><br>
          Type: {{expense.type}}<br>
          {{expense.description}}
        </p>
        <h3 item-end>
          Amount: ${{expense.amount}}
        </h3>
      </ion-item>
      <ion-item-options side="right">
        <button ion-button color="primary" (click)="editData(expense.rowid)">
          <ion-icon name="paper"></ion-icon>
        </button>
        <button ion-button color="danger" (click)="deleteData(expense.rowid)">
          <ion-icon name="trash"></ion-icon>
        </button>
      </ion-item-options>
    </ion-item-sliding>
  </ion-list>
</ion-content>
<ion-footer>
  <ion-toolbar>
    <ion-title>Balance: ${{balance}}</ion-title>
  </ion-toolbar>
</ion-footer>
The add button is presented by a plus button on the navigation bar. The Edit and Delete button will show by sliding list item to the left.
Create a New Page of Adding New Data
Type this command for creating a new page for adding new data.
ionic g page AddDataOpen and edit `src/pages/add-data/add-data.ts` then replace all codes with this.
import { Component } from '@angular/core';
import { IonicPage, NavController, NavParams } from 'ionic-angular';
import { SQLite, SQLiteObject } from '@ionic-native/sqlite';
import { Toast } from '@ionic-native/toast';

@IonicPage()
@Component({
  selector: 'page-add-data',
  templateUrl: 'add-data.html',
})
export class AddDataPage {

  data = { date:"", type:"", description:"", amount:0 };

  constructor(public navCtrl: NavController,
    public navParams: NavParams,
    private sqlite: SQLite,
    private toast: Toast) {}

  saveData() {
    this.sqlite.create({
      name: 'ionicdb.db',
      location: 'default'
    }).then((db: SQLiteObject) => {
      db.executeSql('INSERT INTO expense VALUES(NULL,?,?,?,?)',[this.data.date,this.data.type,this.data.description,this.data.amount])
        .then(res => {
          console.log(res);
          this.toast.show('Data saved', '5000', 'center').subscribe(
            toast => {
              this.navCtrl.popToRoot();
            }
          );
        })
        .catch(e => {
          console.log(e);
          this.toast.show(e, '5000', 'center').subscribe(
            toast => {
              console.log(toast);
            }
          );
        });
    }).catch(e => {
      console.log(e);
      this.toast.show(e, '5000', 'center').subscribe(
        toast => {
          console.log(toast);
        }
      );
    });
  }

}
Next, open and edit `src/pages/add-data/add-data.html` then replace all codes with this.
<ion-header>

  <ion-navbar>
    <ion-title>My Expense</ion-title>
  </ion-navbar>

</ion-header>

<ion-content padding>
  <h2>Add Data</h2>
  <form (ngSubmit)="saveData()">
    <ion-item>
      <ion-label>Date</ion-label>
      <ion-datetime displayFormat="MM/DD/YYYY" [(ngModel)]="data.date" name="date" required=""></ion-datetime>
    </ion-item>
    <ion-item>
      <ion-label>Type</ion-label>
      <ion-select [(ngModel)]="data.type" name="type" required="">
        <ion-option value="Income">Income</ion-option>
        <ion-option value="Expense">Expense</ion-option>
      </ion-select>
    </ion-item>
    <ion-item>
      <ion-label>Description</ion-label>
      <ion-input type="text" placeholder="Description" [(ngModel)]="data.description" name="description" required="" ></ion-input>
    </ion-item>
    <ion-item>
      <ion-label>Amount</ion-label>
      <ion-input type="number" placeholder="Amount" [(ngModel)]="data.amount" name="amount" required="" ></ion-input>
    </ion-item>
    <button ion-button type="submit" block>Save Data</button>
  </form>
</ion-content>
Create a Page for Edit Data
Type this command for creating a new page for edit data.
ionic g page EditDataOpen and edit `src/pages/edit-data/edit-data.ts` then replace all codes with this.
import { Component } from '@angular/core';
import { IonicPage, NavController, NavParams } from 'ionic-angular';
import { SQLite, SQLiteObject } from '@ionic-native/sqlite';
import { Toast } from '@ionic-native/toast';

@IonicPage()
@Component({
  selector: 'page-edit-data',
  templateUrl: 'edit-data.html',
})
export class EditDataPage {

  data = { rowid:0, date:"", type:"", description:"", amount:0 };

  constructor(public navCtrl: NavController,
    public navParams: NavParams,
    private sqlite: SQLite,
    private toast: Toast) {
      this.getCurrentData(navParams.get("rowid"));
  }

  getCurrentData(rowid) {
    this.sqlite.create({
      name: 'ionicdb.db',
      location: 'default'
    }).then((db: SQLiteObject) => {
      db.executeSql('SELECT * FROM expense WHERE rowid=?', [rowid])
        .then(res => {
          if(res.rows.length > 0) {
            this.data.rowid = res.rows.item(0).rowid;
            this.data.date = res.rows.item(0).date;
            this.data.type = res.rows.item(0).type;
            this.data.description = res.rows.item(0).description;
            this.data.amount = res.rows.item(0).amount;
          }
        })
        .catch(e => {
          console.log(e);
          this.toast.show(e, '5000', 'center').subscribe(
            toast => {
              console.log(toast);
            }
          );
        });
    }).catch(e => {
      console.log(e);
      this.toast.show(e, '5000', 'center').subscribe(
        toast => {
          console.log(toast);
        }
      );
    });
  }

  updateData() {
    this.sqlite.create({
      name: 'ionicdb.db',
      location: 'default'
    }).then((db: SQLiteObject) => {
      db.executeSql('UPDATE expense SET date=?,type=?,description=?,amount=? WHERE rowid=?',[this.data.date,this.data.type,this.data.description,this.data.amount,this.data.rowid])
        .then(res => {
          console.log(res);
          this.toast.show('Data updated', '5000', 'center').subscribe(
            toast => {
              this.navCtrl.popToRoot();
            }
          );
        })
        .catch(e => {
          console.log(e);
          this.toast.show(e, '5000', 'center').subscribe(
            toast => {
              console.log(toast);
            }
          );
        });
    }).catch(e => {
      console.log(e);
      this.toast.show(e, '5000', 'center').subscribe(
        toast => {
          console.log(toast);
        }
      );
    });
  }

}
Next, open and edit `src/pages/edit-data/edit-data.html` then replace all codes with this.
<ion-header>

  <ion-navbar>
    <ion-title>My Expense</ion-title>
  </ion-navbar>

</ion-header>

<ion-content padding>
  <h2>Edit Data</h2>
  <form (ngSubmit)="updateData()">
    <ion-item>
      <ion-label>Date</ion-label>
      <ion-datetime displayFormat="MM/DD/YYYY" [(ngModel)]="data.date" name="date" required=""></ion-datetime>
    </ion-item>
    <ion-item>
      <ion-label>Type</ion-label>
      <ion-select [(ngModel)]="data.type" name="type" required="">
        <ion-option value="Income">Income</ion-option>
        <ion-option value="Expense">Expense</ion-option>
      </ion-select>
    </ion-item>
    <ion-item>
      <ion-label>Description</ion-label>
      <ion-input type="text" placeholder="Description" [(ngModel)]="data.description" name="description" required="" ></ion-input>
    </ion-item>
    <ion-item>
      <ion-label>Amount</ion-label>
      <ion-input type="number" placeholder="Amount" [(ngModel)]="data.amount" name="amount" required="" ></ion-input>
    </ion-item>
    <ion-input type="hidden" [(ngModel)]="data.rowid" name="rowid"></ion-input>
    <button ion-button type="submit" block>Update Data</button>
  </form>
</ion-content>
Run and Test The Ionic 3, Angular 4 and SQLite App on the Device
Before running the Ionic 3, Angular 4 and SQLite app on the device, remove and add the platforms first.
ionic cordova platform rm android
ionic cordova platform rm ios
ionic cordova platform add android
ionic cordova platform add ios
Now, run the app on the iOS device first by type this command.
ionic cordova run iosIf you find the error like this.
iOS Error:

** BUILD SUCCEEDED **

Error: Cannot read property 'replace' of undefined

[ERROR] An error occurred while running cordova run ios (exit code 1).
Then run this command to install iOS simulator inside the iOS platform.
cd platforms/ios/cordova && npm install ios-simNow, run again the app after back to the current folder.
cd ../../.. && ionic cordova run iosNow, you can test the CRUD function of the app.
Android should be the same as iOS except for UI behavior. You can run by type this command.
ionic cordova run androidThat it's, We know this tutorial using unclean code. Maybe you can write better code than this example. You can get the full source code on our GitHub.
We know that building beautifully designed Ionic apps from scratch can be frustrating and very time-consuming. Check Ion2FullApp ELITE - The Complete Ionic 3 Starter App and save development and design time.
That just the basic. If you need more deep learning about Ionic, Angular, and Typescript, you can find the following books:
- Pro Typescript, Application-Scale Javascript Development
- Learn Ionic 2, Develop Multi-platform Mobile Apps (Still compatible with Ionic 3)
- Angular 4 Projects, Learn to Build Single Page Web Applications Using 70+ Projects
Or take the following course:
Thanks!