
Almost every web and mobile apps require authentication or login to Facebook. Luckily, Facebook has an API for integrating its authentication mechanism with other web or mobile apps. Right here we will make the mobile apps development that involves sign in with Facebook much easier a multiplatform.
Jumps to the steps:
- Setup a Facebook App
- Create a New Ionic 3 App
- Install and Configure Ionic 3 Native Facebook Plugin
- Implements Facebook Login and Logout
- Test Ionic 3 and Facebook App on the Device
This step by step tutorial on Login with Ionic 3 and Cordova Native Facebook Connect Plugin will begin with the Facebook setup from Facebook Developers Dashboard. Previously, we have done a tutorial of authentication or log in using Google+ and LinkedIn. The following tools, dependencies, modules, and plugin are required for accomplishing this tutorial:
- Node.js
- Ionic 3
- Cordova
- Cordova Facebook Plugin
- Text Editor or IDE
- Terminal or Node command line
Setup a Facebook App
To setup, a Facebook App and get an App ID/Secret, go to Facebook Developers Dashboard. Login with your Facebook developers account.

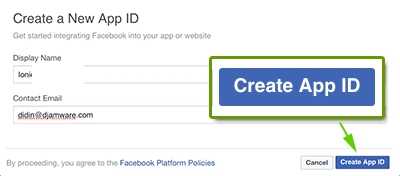
Click `+ Add a New App` button. Enter the display name then click `Create App ID` button.
Now, you can see App ID and Secret, write it to your notepad.

Next, click the `Choose Platform` button.

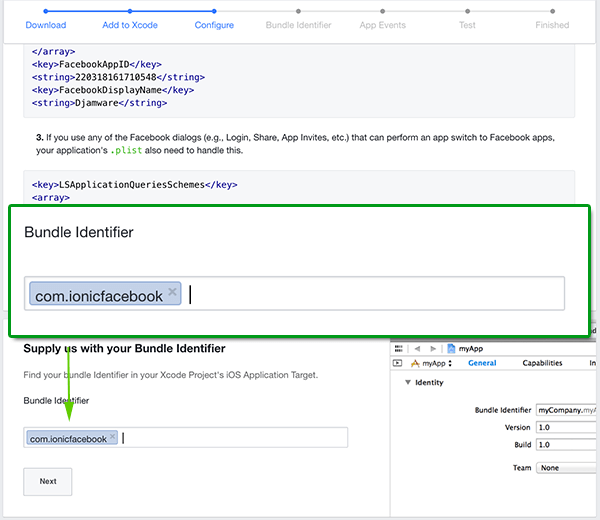
Choose iOS first then on the iOS wizard scroll down to the bottom to enter iOS bundle ID that will supply on `config.xml` later.
Click next then scroll down and back to App dashboard. Click again `Add Platform` on the Settings menu for setup Android App.

Choose Android, fill the Google Package Name then click the Save Changes button.

One more thing for the Android app, it needs key hashes. To get the key hashes, especially in development build open the terminal or command line then type this command.
keytool -list -v -keystore ~/.android/debug.keystore -alias androiddebugkey -storepass android -keypass androidIt will display something like this.
Alias name: androiddebugkey
Creation date: Nov 8, 2015
Entry type: PrivateKeyEntry
Certificate chain length: 1
Certificate[1]:
Owner: CN=Android Debug, O=Android, C=US
Issuer: CN=Android Debug, O=Android, C=US
Serial number: 5e9752f4
Valid from: Sun Nov 08 22:25:34 WIB 2015 until: Tue Oct 31 22:25:34 WIB 2045
Certificate fingerprints:
     MD5:  0A:2D:96:6B:B8:84:F7:37:2E:7E:83:09:43:BB:B7:D4
     SHA1: 2B:52:02:F0:82:94:34:68:FC:B6:DD:81:1D:3A:66:D7:57:3B:B9:11
     SHA256: B1:40:EB:9D:03:50:A2:0F:F2:D4:1B:6D:AA:F6:F9:6A:57:52:B0:70:5A:3C:87:9E:15:F0:BE:7C:90:00:DA:51
     Signature algorithm name: SHA256withRSA
     Version: 3

Extensions:

#1: ObjectId: 2.5.29.14 Criticality=false
SubjectKeyIdentifier [
KeyIdentifier [
0000: C0 3A D3 06 65 23 89 A1   5D 80 CC 55 88 D8 BD 23  .:..e#..]..U...#
0010: 80 6E 67 01                                        .ng.
]
]
You just need to convert SHA1 hex to be base64 characters. We are using these tools for converting it. Just copy and paste SHA1 value that displayed on the terminal to hex string on that site then click the convert button. Now, you get the base64 value that will be copied to Facebook Android app key hashes. Finally, click again the Save Changes button.
Create a New Ionic 3 App
Open the terminal or Node command line then go to your projects folder. Type this command to create a new Ionic 3 app.
ionic start ionic-facebook tabsThat command will create a new Ionic 3 app using the app name `ionic-facebook` and use tabs view template. Just wait a few minutes because it also installs `npm` modules. Now, go to your newly created project.
cd ionic-facebookTo check to make sure app working, just type this command.
ionic serve --labYou will this page if the Ionic 3 app working.

Don't forget to change App ID by open and edit `config.xml` then change this line.
<widget id="com.ionicfacebook" version="0.0.1" xmlns="http://www.w3.org/ns/widgets" xmlns:cdv="http://cordova.apache.org/ns/1.0">
Install and Configure Ionic 3 Native Facebook Plugin
To install Ionic 3 native Facebook plugin, type this command on the terminal or Node command line after stopping running Ionic app by press `Ctrl+C`.
ionic cordova plugin add cordova-plugin-facebook4 --variable APP_ID="YOUR_APP_ID" --variable APP_NAME="YOUR_APP_NAME"`YOUR_APP_ID` is the App ID that you write on previous Facebook setup and `YOUR_APP_NAME` is display name on the Facebook App Dashboard. Also, install `npm` module for it.
npm install --save @ionic-native/facebookNow, open and edit `src/app/app.module.ts` then add this import of Ionic Native Facebook plugin.
import { Facebook } from '@ionic-native/facebook';Also, declare in `@NgModule` providers, so it will look like this.
providers: [
  StatusBar,
  SplashScreen,
  {provide: ErrorHandler, useClass: IonicErrorHandler},
  Facebook
]
Implements Facebook Login and Logout
Our scenario to implements Facebook login and logout is added to Facebook users in the current page if the user logged in using Facebook or show Facebook Login Button. If click on the Facebook login button, it will open the Facebook login in the browser. Now, open and edit `src/pages/home.ts` then add this import of Ionic Native Facebook module.
import { Facebook } from '@ionic-native/facebook';Declare variables to check if the user logged in and holds user data before the constructor.
isLoggedIn:boolean = false;
users: any;
Inject Facebook plugin in the constructor add Facebook Connect method to check if the user is logged in.
constructor(private fb: Facebook) {
  fb.getLoginStatus()
    .then(res => {
      console.log(res.status);
      if(res.status === "connect") {
        this.isLoggedIn = true;
      } else {
        this.isLoggedIn = false;
      }
    })
    .catch(e => console.log(e));
}
Add method for Facebook login after the constructor.
login() {
  this.fb.login(['public_profile', 'user_friends', 'email'])
    .then(res => {
      if(res.status === "connected") {
        this.isLoggedIn = true;
        this.getUserDetail(res.authResponse.userID);
      } else {
        this.isLoggedIn = false;
      }
    })
    .catch(e => console.log('Error logging into Facebook', e));
}
Add the Facebook logout method.
logout() {
  this.fb.logout()
    .then( res => this.isLoggedIn = false)
    .catch(e => console.log('Error logout from Facebook', e));
}
Add Facebook Graph API call method for getting user info.
getUserDetail(userid) {
  this.fb.api("/"+userid+"/?fields=id,email,name,picture,gender",["public_profile"])
    .then(res => {
      console.log(res);
      this.users = res;
    })
    .catch(e => {
      console.log(e);
    });
}
For more information about permissions and fields that returned from the response, you can check on https://developers.facebook.com/docs/facebook-login/permissions/Facebook Developer Documentation. Notes: The allowed fields based on permissions.
Next, open and edit `src/pages/home/home.html` then replace all HTML tags with this Facebook login condition and Facebook basic profile data.
<ion-header>
  <ion-navbar>
    <ion-title>Home</ion-title>
  </ion-navbar>
</ion-header>

<ion-content padding>
  <div *ngIf="isLoggedIn; else facebookLogin">
    <h2>Hi, {{users.name}} ({{users.email}})</h2>
    <p>
      Gender: {{users.gender}}
    </p>
    <p>
      <img src="{{users.picture.data.url}}" width="100" alt="{{users.name}}" />
    </p>
    <p>
      <button ion-button icon-right (click)="logout()">
        Logout
      </button>
    </p>
  </div>
  <ng-template #facebookLogin>
    <button ion-button icon-right (click)="login()">
      Login with
      <ion-icon name="logo-facebook"></ion-icon>
    </button>
  </ng-template>
</ion-content>
Test Ionic 3 and Facebook App on the Device
This Ionic 3 native Facebook plugin is run only on the Android or iOS device. So, prepare the Android or iOS device and connect it to your computer using a data cable. To make sure the Android or iOS platform installed correctly run this command.
ionic cordova platform rm android
ionic cordova platform add android
ionic cordova platform rm ios
ionic cordova platform add ios
Now, run the Ionic 3 Cordova Facebook app on the Device. For this tutorial, we run on an Android device.
ionic cordova run androidYou landing to Ionic 3 homepage like this.

Tap on the `Login with Facebook` button and you redirected to Facebook permission page then after successful login you will see the home page change to this.

That it's. You can test your self on the iOS device, if using simulator there will be an error after login on Facebook via the browser. If you need the source code of this tutorial, you may find on our GitHub.
We know that building beautifully designed Ionic apps from scratch can be frustrating and very time-consuming. Check Ionic 4 - Full Starter App and save development and design time. Android, iOS, and PWA, 100+ Screens and Components, the most complete and advance Ionic Template.
That just the basic. If you need more deep learning about Ionic, Angular, and Typescript, you can take the following cheap course:
- IONIC 4 Design Hybrid Mobile Applications IOS & Android
- Wordpress Rest API and Ionic 4 (Angular) App With Auth
- Mobile App from Development to Deployment - IONIC 4
- Ionic 4 Crash Course with Heartstone API & Angular
- Ionic 4 Mega Course: Build 10 Real World Apps
Thanks!