
A comprehensive tutorial of Node, Express and Passport Facebook, Twitter, Google, and Github login or authentication. This tutorial shows you how to create multiple social media (Facebook, Twitter, Google and GitHub) authentication (login) using Node, Express, Mongoose and `Passport.js`. This authentication is using OAuth provider which has the different name and authentication keys between Facebook, Twitter, Google and GitHub. If you like to use form-based authentication, we already publish authentication or login tutorial using Node.js, Express.js, Passport.js, and Mongoose.js.
Shortcut to the steps:
- Get Facebook APP ID and Secret
- Get Twitter Consumer Key (API Key) and Consumer Secret (API Secret)
- Get Google Client ID and Client Secret
- Get GitHub Client ID and Client Secret
- Generate Express Application
- Add Mongoose as MongoDB and Node ORM
- Add and Configure Passport Facebook Twitter Google and GitHub Module and Dependencies
- Add Login Page for Hold Facebook, Twitter, Google, and GitHub Login Button
The following tools and library are required for this tutorial:
- Node.js
- Express.js Application Generator
- Passport.js, passport-facebook, passport-twitter, passport-google, passport-GitHub Library
- Terminal or Node Command Line
- Text Editor or IDE (Atom, Netbeans, etc)
The first thing before starting the tutorial is making sure that `Node.js` and it's command line installed and working properly. After `Node.js` installed, open terminal or Node command line then type this command.
node -vYou will see the version like this.
v6.9.4Now, install Express generator for generating new Express application by this command.
sudo npm install express-generator -g
Get Facebook APP ID and Secret
Facebook using APPID and App Secret that use for OAuth provider requirements for authentication (login). Open your browser then go to Facebook Developer Dashboard. Log in using your Facebook developer account or your standard user account.

Click Add a New App button then fill Display Name (ours using `MEANSocial`) and email address.

Click Create App ID button, enter captcha then click the Submit button. It will redirect to the Facebook App Dashboard.

Click the Settings menu on the left menu. Click Add Platform then choose the website. Fill site URL with the callback URL for OAuth authentication callback URL.

Don't forget to write down the App ID and App Secret to your notepad.
Get Twitter Consumer Key (API Key) and Consumer Secret (API Secret)
To get Twitter Consumer Key (API Key) and Consumer Secret (API Secret), go to the Twitter Apps console. Log in using your existing Twitter account.

Click Create a new app button then fill all required fields. Fill callback URL with your MEAN application URL, ours using "http://127.0.0.1:3000/auth/twitter/callback". Check developer agreement then clicks Create Your Twitter Application button. It will redirect to your new application dashboard.

Click on Keys and Access Tokens tab.

Now, write down the Consumer Key (API Key) and Consumer Secret (API Secret) to your notepad.
Get Google Client ID and Client Secret
To get the Google Client ID and Client Secret, go to the Google Developer Console. Login using your Gmail account. On the selected project drop down click "+" button to create the new project then give it a name.

Click the Create button then it will redirect to the Project API dashboard.

Click Credentials menu from left menu then click OAuth consent screen tabs to create product name, just fill product name and email then click save button.

Back to the Credentials tab then click Create Credentials and choose OAuth Client ID. Choose Web Application then fill the Authorized redirect URI with MEAN application URL like previously then click create.

Now, you get the Client ID and Secret. Write it down on your notepad.

Get GitHub Client ID and Client Secret
To get GitHub client ID and client secret, go to Github developers. Log in using your GitHub account.

Click Register New OAuth Application button. Fill all required fields, use your MEAN application URL for Authorization callback URL then click Register Application button.

Now, you get the Client ID and Client Secret. Write down to your notepad.

Generate Express Application
Now, we will create Node, Express and Mongoose Web Application. Open terminal od Node command line then types this command.
express --view=pug node-passport-socialThat command creates new Express web application with using `pug` view template, this different than the previous tutorial that uses `ejs` or `jade`. Here's the output from that command.
create : node-passport-social
   create : node-passport-social/package.json
   create : node-passport-social/app.js
   create : node-passport-social/public
   create : node-passport-social/routes
   create : node-passport-social/routes/index.js
   create : node-passport-social/routes/users.js
   create : node-passport-social/views
   create : node-passport-social/views/index.pug
   create : node-passport-social/views/layout.pug
   create : node-passport-social/views/error.pug
   create : node-passport-social/bin
   create : node-passport-social/bin/www
   create : node-passport-social/public/javascripts
   create : node-passport-social/public/images
   create : node-passport-social/public/stylesheets
   create : node-passport-social/public/stylesheets/style.css

   install dependencies:
     $ cd node-passport-social && npm install

   run the app:
     $ DEBUG=node-passport-social:* npm start
Now, do as terminal output command. Type or paste this command.
cd node-passport-social && npm installNext, check if the Express web application working by type this command.
nodemonor
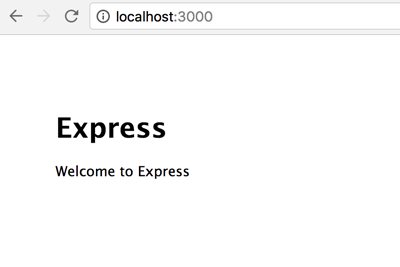
npm startOpen the browser then go to `http://localhost:3000`, you will see this page if everything is working properly.
Add Mongoose as MongoDB and Node ORM
Now, we will add the Mongoose module and dependencies. Stop the app by press `CTRL+C` key. Type this command to install Mongoose the modules and dependencies.
npm install mongoose --saveAlso, install this dependency to make an easy query to find or create data.
npm install find-or-create --saveOpen and edit app.js on the root of the project. Add require a line for Mongoose.
var mongoose = require('mongoose');Create a connection to the MongoDB database. Add these lines of codes after the require section.
mongoose.Promise = global.Promise;

mongoose.connect('mongodb://localhost/mean-social', { useMongoClient: true })
  .then(() =>  console.log('connection successful'))
  .catch((err) => console.error(err));
Create the User model and models folder by typing this command.
mkdir models
touch models/User.js
Open and edit `User.js` model then add these lines of codes.
var mongoose = require('mongoose');

var UserSchema = new mongoose.Schema({
  name: String,
  userid: String,
  updated_at: { type: Date, default: Date.now },
});

UserSchema.statics.findOrCreate = require("find-or-create");

module.exports = mongoose.model('User', UserSchema);
Add and Configure Passport Facebook Twitter Google and GitHub Module and Dependencies
Install the following Passport, Passport-Facebook, Passport-Twitter, Passport-Google and Passport-GitHub dependencies, and modules.
npm install passport passport-facebook passport-twitter passport-google-oauth passport-github --saveAlso, we need to install Express Session dependencies.
npm install express-session --saveNow, add Passport and Express Session require to `app.js`.
var passport = require('passport');
var session = require('express-session');
Then add the use of both requires along with another useful method.
app.use(session({
  secret: 's3cr3t',
  resave: true,
  saveUninitialized: true
}));
app.use(passport.initialize());
app.use(passport.session());
Next, create a folder on the root of the project folder for holds Passport Facebook, Twitter, Google, and GitHub Strategy files.
mkdir authNow, create a Passport Facebook strategy file.
touch auth/facebook.jsOpen and edit `auth/facebook.js` then add these lines of codes.
var passport = require('passport')
  , FacebookStrategy = require('passport-facebook').Strategy;
var User = require('../models/User');

passport.use(new FacebookStrategy({
    clientID: "159030901322260",
    clientSecret: "0d641e47f5d55af221ec80346f3f2d43",
    callbackURL: "http://127.0.0.1:3000/auth/facebook/callback"
  },
  function(accessToken, refreshToken, profile, done) {
    User.findOrCreate({name: profile.displayName}, {name: profile.displayName,userid: profile.id}, function(err, user) {
      if (err) { return done(err); }
      done(null, user);
    });
  }
));

module.exports = passport;
Create a Passport Twitter strategy file.
touch auth/twitter.jsOpen and edit `auth/twitter.js` then add these lines of codes.
var passport = require('passport')
  , TwitterStrategy = require('passport-twitter').Strategy;
var User = require('../models/User');

passport.serializeUser(function (user, fn) {
  fn(null, user);
});

passport.deserializeUser(function (id, fn) {
  User.findOne({_id: id.doc._id}, function (err, user) {
    fn(err, user);
  });
});

passport.use(new TwitterStrategy({
    consumerKey: "nmbk1uqKB0rbWjBxrPv9iksEf",
    consumerSecret: "QeBlJHanPy232ZbOhyPisfI8hLLUVMujXjuI7Sz0Ym4o6m7eGF",
    callbackURL: "http://127.0.0.1:3000/auth/twitter/callback"
  },
  function(accessToken, refreshToken, profile, done) {
    User.findOrCreate({name: profile.displayName}, {name: profile.displayName,userid: profile.id}, function(err, user) {
      if (err) {
        console.log(err);
        return done(err);
      }
      done(null, user);
    });
  }
));

module.exports = passport;
Create a Passport Google strategy file.
touch auth/google.jsOpen and edit `auth/google.js` then add these lines of codes.
var passport = require('passport');
var GoogleStrategy = require('passport-google-oauth').OAuth2Strategy;
var User = require('../models/User');

passport.use(new GoogleStrategy({
    clientID: "591307876438-4nmmm817vks785u467lo22kss40kqno2.apps.googleusercontent.com",
    clientSecret: "BagENe4LxG_PZ_qz2oFX7Aok",
    callbackURL: "http://127.0.0.1:3000/auth/google/callback"
  },
  function(accessToken, refreshToken, profile, done) {
       User.findOrCreate({ userid: profile.id }, { name: profile.displayName,userid: profile.id }, function (err, user) {
         return done(err, user);
       });
  }
));

module.exports = passport;
Create a Passport GitHub strategy file.
touch auth/github.jsOpen and edit `auth/github.js` then add these lines of codes.
var passport = require('passport')
  , GitHubStrategy = require('passport-github').Strategy;
var User = require('../models/User');

passport.use(new GitHubStrategy({
    clientID: "e7b10decd2ed4ef13816",
    clientSecret: "bb073a53914d014f328de98ad9fe5a3cff366912",
    callbackURL: "http://127.0.0.1:3000/auth/github/callback"
  },
  function(accessToken, refreshToken, profile, done) {
    User.findOrCreate({userid: profile.id}, {name: profile.displayName,userid: profile.id}, function (err, user) {
      return done(err, user);
    });
  }
));

module.exports = passport;
Next, create `auth.js` file inside `routes` folder.
touch routes/auth.jsOpen and edit `routes/auth.js` then declare all required to Facebook, Twitter, Google, and GitHub passport.
var express = require('express');
var router = express.Router();
var passportFacebook = require('../auth/facebook');
var passportTwitter = require('../auth/twitter');
var passportGoogle = require('../auth/google');
var passportGitHub = require('../auth/github');
Add routes for the login page.
/* LOGIN ROUTER */
router.get('/login', function(req, res, next) {
  res.render('login', { title: 'Please Sign In with:' });
});
Add routes for logout from logged in session.
/* LOGOUT ROUTER */
router.get('/logout', function(req, res){
  req.logout();
  res.redirect('/');
});
Add routes for Facebook, Twitter, Google, and Github login.
/* FACEBOOK ROUTER */
router.get('/facebook',
  passportFacebook.authenticate('facebook'));

router.get('/facebook/callback',
  passportFacebook.authenticate('facebook', { failureRedirect: '/login' }),
  function(req, res) {
    // Successful authentication, redirect home.
    res.redirect('/');
  });

/* TWITTER ROUTER */
router.get('/twitter',
  passportTwitter.authenticate('twitter'));

router.get('/twitter/callback',
  passportTwitter.authenticate('twitter', { failureRedirect: '/login' }),
  function(req, res) {
    // Successful authentication, redirect home.
    res.redirect('/');
  });

/* GOOGLE ROUTER */
router.get('/google',
  passportGoogle.authenticate('google', { scope: 'https://www.google.com/m8/feeds' }));

router.get('/google/callback',
  passportGoogle.authenticate('google', { failureRedirect: '/login' }),
  function(req, res) {
    res.redirect('/');
  });

/* GITHUB ROUTER */
router.get('/github',
  passportGitHub.authenticate('github', { scope: [ 'user:email' ] }));

router.get('/github/callback',
  passportGitHub.authenticate('github', { failureRedirect: '/login' }),
  function(req, res) {
    // Successful authentication, redirect home.
    res.redirect('/');
  });

module.exports = router;
Next, open and edit `routes/users.js` then replace the default router with this.
/* GET users listing. */
router.get('/', ensureAuthenticated, function(req, res, next) {
  res.render('user', { user: req.user });
});
Create `ensureAuthenticated` function before `module.exports`.
function ensureAuthenticated(req, res, next) {
  if (req.isAuthenticated()) { return next(); }
  res.redirect('/login')
}
Don't forget to register `routes/auth.js` router in `app.js`. Add this lines to `app.js` after another routes variable.
var auth = require('./routes/auth');Add `use` method after users `use` method.
app.use('/auth', auth);
Add Login Page for Hold Facebook, Twitter, Google, and GitHub Login Button
As you see on router files there's a lot of redirect to the login page. For this, we have to create a `pug` file inside `views` folder by type this command.
touch views/login.pugOpen and edit `views/login.pug` then replace all codes with this.
extends layout

block content
  .main.container
    .row
      .col-md-6.col-md-offset-3
        h1.display-4.m-b-2= title

        // sign in form
        div.form-group
          a.btn.btn-primary(href='/auth/facebook') Facebook
        div.form-group
          a.btn.btn-info(href='/auth/twitter') Twitter
        div.form-group
          a.btn.btn-danger(href='/auth/google') Google
        div.form-group
          a.btn.black-back(href='/auth/github') Github
To make styling easier, we have to use Bootstrap. Type this command to install `pug-bootstrap` module and dependencies.
npm install pug-bootstrap --saveOpen and edit `views/layout` then add the include for `pug-bootstrap`, so it will look like this.
doctype html
html
  include ../node_modules/pug-bootstrap/_bootstrap.pug
  head
    title= title
    link(rel='stylesheet', href='/stylesheets/style.css')
  body
    block content
Open and edit `public/stylesheets/style.css` and make it like this.
body {
  padding: 50px;
  font: 14px "Lucida Grande", Helvetica, Arial, sans-serif;
}

a {
  color: #00B7FF;
}

.black-back {
  background-color: #000000;
  color: #FFFFFF;
}

.btn {
  width: 100%;
  height: 50px;
  font-size: 24px;
}
One thing left, is a user page that should open when authentication success. Type this command to create the page.
touch views/user.pugOpen and edit `user.pug` the file then adds these lines of codes.
extends layout

block content
  h1= user.name
  p Welcome to #{user.name}
  a(href="/auth/logout") Logout
Now, you can run again the application on the browser then go to restricted page `http://127.0.0.1:3000/users` it should redirect to the Social Login page. After successful login with one of Social authentication, then it will return back to user page then display the username on the page.
Yeah, I know this a little bit complicated. For that, please give us your suggestions, critics or any problem report under comments below for this tutorial. If you need the working example, you find on our GitHub.
For more detailed on MEAN stack and Node.js, you can take the following course:
- Angular (Angular 2+) & NodeJS - The MEAN Stack Guide
- Start Building Web Apps And Services With Node. js + Express
- Build a REST API with node. js, ExpressJS, and MongoDB
- Angular 5 Bootcamp FastTrack
Thanks