
Today we will share step by step tutorial on what we are experiencing in the real Ionic project of upgrade Ionic and Angular 4 to Ionic 3 and Angular 4. There's a little different than described on official guides. We are more comfortable doing an upgrade by creating new Ionic 3 and Angular 4 project rather than modify existing Ionic 2 and Angular 2 project.
Table of Contents:
- Create new Ionic 3 App
- Check Old Ionic 2 App Plugins
- Copy Folders and Files from Old Ionic 2 to Ionic 3 app
- Modify the Main Ionic Module and Component
- Add iOS and Android Platform and Run from Device
Create new Ionic 3 App
Open terminal or Node.js command line, go to the projects folder then type this command.
ionic start appname sidemenu --v2That command will create new Ionic 3 app with the name "appname", using side menu template and version still same with Ionic 2 by using "--v2" prefix. Use the same template as the previous Ionic 2 app.
Check all default plugins that used on the new Ionic 3 app.
ionic plugin listYou should see the result like this.
cordova-plugin-console 1.0.5 "Console"
cordova-plugin-device 1.1.4 "Device"
cordova-plugin-splashscreen 4.0.2 "Splashscreen"
cordova-plugin-statusbar 2.2.1 "StatusBar"
cordova-plugin-whitelist 1.3.1 "Whitelist"
ionic-plugin-keyboard 2.2.1 "Keyboard"
Check Old Ionic 2 App Plugins
Do the same thing as the previous step.
ionic plugin listNow, you can see different with default plugin that uses by Ionic 3.
cordova-plugin-console 1.0.5 "Console"
cordova-plugin-device 1.1.4 "Device"
cordova-plugin-fcm 2.1.1 "FCMPlugin"
cordova-plugin-inappbrowser 1.6.1 "InAppBrowser"
cordova-plugin-splashscreen 4.0.1 "Splashscreen"
cordova-plugin-statusbar 2.2.1 "StatusBar"
cordova-plugin-whitelist 1.3.1 "Whitelist"
ionic-plugin-keyboard 2.2.1 "Keyboard"
You should check plugin usage in Ionic Native documentation https://ionicframework.com/docs/native/ to make the plugin that actually uses working smoothly. If you find a different usage of the plugin, then you should update or reinstall the plugin. For example, we are using "cordova-plugin-device" then go to Ionic Native docs and find Device.
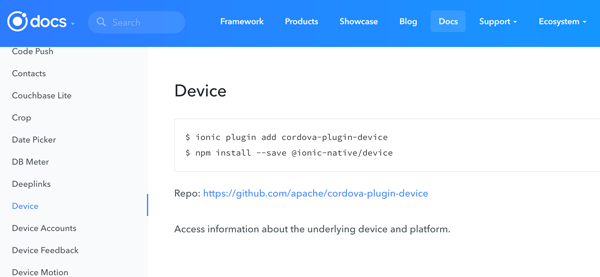
Now, reinstall that plugin.
ionic plugin rm cordova-plugin-device
ionic plugin add cordova-plugin-device
npm install --save @ionic-native/device
Copy Folders and Files from Old Ionic 2 to Ionic 3 app
Not all folders should copy to the new Ionic 3 app. Here's the list of folders and files that may copies.
- resources
- src/assets
- src/pages
- src/providers
- src/themes
- config.xml
- src/app/pipes
And also you can copy your modules, directives or services folder and files.
Modify the Main Ionic Module and Component
Open files "src/app/app.module.ts" from both old Ionic 2 and new Ionic 3 app. Copies all pages, providers, pipes and directives from the old Ionic 2 to the new Ionic 3 App Module. Here's imports example.
import { ApiService } from '../providers/api-service';
import { HomePage } from '../pages/home/home';
import { ListPage } from '../pages/list/list';
import { DetailsPage } from '../pages/details/details';
import { OrderByPipe } from './pipes/order-by';
Declare that imported pages to "@NgModule" declarations and entryComponents. Declare pipes and directives in "@NgModule" declarations. Declare providers in "@NgModule" providers.
If you are using Http module for accessing REST API, add this import.
import { HttpModule } from '@angular/http';Then add in "@NgModule" imports after BrowserModule.
imports: [
  BrowserModule,
  HttpModule,
  IonicModule.forRoot(MyApp, {
    backButtonText: '',
    iconMode: 'ios',
    tabsPlacement: 'top',
    menuType: 'overlay',
  }),
],
If you are using Ionic Native plugins, add the import like this.
import { InAppBrowser } from '@ionic-native/in-app-browser';
import { Device } from '@ionic-native/device';
Then declare in "@NgModule" providers.
providers: [
  StatusBar,
  SplashScreen,
  InAppBrowser,
  Device,
  {provide: ErrorHandler, useClass: IonicErrorHandler},
  ApiService
]
Otherwise, you will face these errors on the browser console log.
ERROR Error: Uncaught (in promise): Error: No provider for Device!
Error
   at Error (native)
   at g (file:///android_asset/www/build/polyfills.js:3:7133)
   at injectionError (file:///android_asset/www/build/main.js:1511:86)
   at noProviderError (file:///android_asset/www/build/main.js:1549:12)
   at ReflectiveInjector_._throwOrNull (file:///android_asset/www/build/main.js:3051:19)
   at ReflectiveInjector_._getByKeyDefault (file:///android_asset/www/build/main.js:3090:25)
   at ReflectiveInjector_._getByKey (file:///android_asset/www/build/main.js:3022:25)
   at ReflectiveInjector_.get (file:///android_asset/www/build/main.js:2891:21)
   at NgModuleInjector.get (file:///android_asset/www/build/main.js:3856:52)
   at resolveDep (file:///android_asset/www/build/main.js:11260:45)
   at createClass (file:///android_asset/www/build/main.js:11128:32)
   at createDirectiveInstance (file:///android_asset/www/build/main.js:10954:37)
   at createViewNodes (file:///android_asset/www/build/main.js:12303:49)
   at createRootView (file:///android_asset/www/build/main.js:12208:5)
   at Object.createProdRootView [as createRootView] (file:///android_asset/www/build/main.js:12786:12) {originalStack: "Error: Uncaught (in promise): Error: No provider f…:///android_asset/www/build/polyfills.js:3:16210)", zoneAwareStack: "Error: Uncaught (in promise): Error: No provider f…:///android_asset/www/build/polyfills.js:3:16210)", rejection: Error: No provider for Device!, promise: t, zone: n…}
That example of error because of Device not declare in "@NgModule" providers.
Next, for "app.component.ts" copy all codes from previous Ionic 2 "app.component.ts". Modify import for Ionic Native to be single import for each other (StatusBar, SplashScreen, InAppBrowser).
import { StatusBar } from '@ionic-native/status-bar';
import { SplashScreen } from '@ionic-native/splash-screen';
import { InAppBrowser } from '@ionic-native/in-app-browser';
Make all modules and plugin injected in the constructor.
constructor(public platform: Platform,
  public statusBar: StatusBar,
  public splashScreen: SplashScreen,
  private iab: InAppBrowser,
  public apiService: ApiService) {}
Change the calls of modules and plugin which have "@Angular" module installed except for plugin that not have like FCM plugin.
Previously:
StatusBar.styleDefault();
Splashscreen.hide();
Now become:
this.statusBar.styleDefault();
this.splashScreen.hide();
FCM plugin or another plugin that not have "@angular" module treat same as previous Ionic 2.
Add iOS and Android Platform and Run from Device
Finally, we have to add or remove/add platform before running on devices.
ionic platform rm android
ionic platform add android
ionic platform rm ios
ionic platform add ios
Now, we can run directly on the device.
ionic run androidFor some Ionic 2 project will use different approach depends on how many plugins or modules that used.
We know that building beautifully designed Ionic apps from scratch can be frustrating and very time-consuming. Check Ionic 4 - Full Starter App and save development and design time. Android, iOS, and PWA, 100+ Screens and Components, the most complete and advance Ionic Template.
That just the basic. If you need more deep learning about Ionic, Angular, and Typescript, you can take the following cheap course:
- IONIC 4 Design Hybrid Mobile Applications IOS & Android
- Wordpress Rest API and Ionic 4 (Angular) App With Auth
- Mobile App from Development to Deployment - IONIC 4
- Ionic 4 Crash Course with Heartstone API & Angular
- Ionic 4 Mega Course: Build 10 Real World Apps
Thanks.