
This is another tutorial of Angular 4 as part of MEAN Stack. Right now, we will build a simple real chat application using MEAN Stack (Angular 4) and Socket.io. Socket.IO enables real-time, bidirectional and event-based communication. It works on every platform, browser or device, focusing equally on reliability and speed. For Angular side, we will use Socket.io client. Socket.io client is a realtime application framework for client-side.
Table of Contents:
- Create Angular Application using Angular CLI
- Add Express.js to the Angular Project
- Create Express REST API
- Create an Angular Provider or Service
- Create Angular Component for Chat
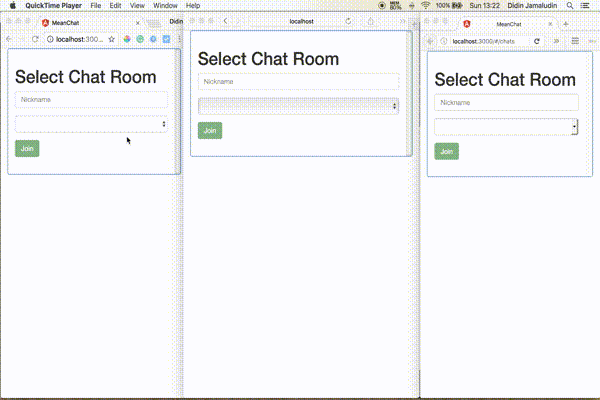
The flow of the MEAN stack Socket.io chat app is very simple. User login using just nickname, choose ROOM to join or create a new room, enter the chat room, and start chat activities. And this is our chat app will look like.
If you not sure where to start, please refer to this tutorial. Don't worry, we always start tutorial from scratch, so you won't miss anything.
Prepare these tools before we start.
Create Angular 4 Application using Angular CLI
After you have successfully installed Node.js, now install or upgrade Angular CLI. Angular CLI is the command-line interface for Angular application that has capabilities to create a new project, run the project, generate components, modules, service, etc. The last version of angular CLI automatically add Angular 4 dependencies instead of Angular 2. Open terminal or Node command line then type this command.
sudo npm install @angular/cli -gNext, go to your Node project folder then create a new Angular 4 application by type this command.
ng new mean-chatOpen the package.json file in the root of this Angular project. You will see a difference between this project and previous Angular CLI project.
"dependencies": {
  "@angular/common": "^4.0.0",
  "@angular/compiler": "^4.0.0",
  "@angular/core": "^4.0.0",
  "@angular/forms": "^4.0.0",
  "@angular/http": "^4.0.0",
  "@angular/platform-browser": "^4.0.0",
  "@angular/platform-browser-dynamic": "^4.0.0",
  "@angular/router": "^4.0.0",
  "core-js": "^2.4.1",
  "rxjs": "^5.1.0",
  "zone.js": "^0.8.4"
},
Now, all Angular dependencies that generated from Angular CLI already Angular 4.
Go to the newly created Angular 4 project in the terminal.
cd mean-chatRun the Angular 2 application by typing this command.
ng serve --prodOpen your browser then point to this address "http://localhost:4200" and you will see this page in your browser.

Add Express.js to the Angular Project
Express.js is the fast, unopinionated, minimalist web framework for Node.js. To install or add to an existing application, stop the server by push keyboard Ctrl+C. Type this command to install Express.js and required dependencies.
npm install --save express body-parser morgan body-parser serve-faviconCreate a folder with the name "bin" and add a file with the name "www" on the root of the project. You can choose your own file and folder for the starting point of Express.js application.
mkdir bin
touch bin/www
Fill "www" file with these codes.
#!/usr/bin/env node

/**
 * Module dependencies.
 */

var app = require('../app');
var debug = require('debug')('mean-app:server');
var http = require('http');

/**
 * Get port from environment and store in Express.
 */

var port = normalizePort(process.env.PORT || '3000');
app.set('port', port);

/**
 * Create HTTP server.
 */

var server = http.createServer(app);

/**
 * Listen on provided port, on all network interfaces.
 */

server.listen(port);
server.on('error', onError);
server.on('listening', onListening);

/**
 * Normalize a port into a number, string, or false.
 */

function normalizePort(val) {
  var port = parseInt(val, 10);

  if (isNaN(port)) {
    // named pipe
    return val;
  }

  if (port >= 0) {
    // port number
    return port;
  }

  return false;
}

/**
 * Event listener for HTTP server "error" event.
 */

function onError(error) {
  if (error.syscall !== 'listen') {
    throw error;
  }

  var bind = typeof port === 'string'
    ? 'Pipe ' + port
    : 'Port ' + port;

  // handle specific listen errors with friendly messages
  switch (error.code) {
    case 'EACCES':
      console.error(bind + ' requires elevated privileges');
      process.exit(1);
      break;
    case 'EADDRINUSE':
      console.error(bind + ' is already in use');
      process.exit(1);
      break;
    default:
      throw error;
  }
}

/**
 * Event listener for HTTP server "listening" event.
 */

function onListening() {
  var addr = server.address();
  var bind = typeof addr === 'string'
    ? 'pipe ' + addr
    : 'port ' + addr.port;
  debug('Listening on ' + bind);
}
Now, open and edit "package.json" then replace "start" value.
"scripts": {
  "ng": "ng",
  "start": "node ./bin/www",
  "build": "ng build",
  "test": "ng test",
  "lint": "ng lint",
  "e2e": "ng e2e"
},
Next, create "app.js" in the root of the project folder.
touch app.jsOpen and edit app.js then add these lines of codes.
var express = require('express');
var path = require('path');
var favicon = require('serve-favicon');
var logger = require('morgan');
var bodyParser = require('body-parser');

var chat = require('./routes/chat');
var app = express();

app.use(logger('dev'));
app.use(bodyParser.json());
app.use(bodyParser.urlencoded({'extended':'false'}));
app.use(express.static(path.join(__dirname, 'dist')));

app.use('/chat', chat);

// catch 404 and forward to error handler
app.use(function(req, res, next) {
  var err = new Error('Not Found');
  err.status = 404;
  next(err);
});

// error handler
app.use(function(err, req, res, next) {
  // set locals, only providing error in development
  res.locals.message = err.message;
  res.locals.error = req.app.get('env') === 'development' ? err : {};

  // render the error page
  res.status(err.status || 500);
  res.render('error');
});

module.exports = app;
Create routes for the chat.
mkdir routes
touch routes/chat.js
Open and edit "chat.js" then add these lines.
var express = require('express');
var router = express.Router();

router.get('/', function(req, res, next) {
  res.send('Express REST API');
});

module.exports = router;
Now, start Express.js server by typing this command.
nodemonor
npm startOpen the browser then point to this address "http://localhost:3000". You will see this page.

Then change the address to "http://localhost:3000/chat". It will show this page.

Create Express REST API
We will access chat data using REST API. Before go further, install Mongoose.js first as an ODM/ORM of MongoDB. Mongoose provides a straight-forward, schema-based solution to model your application data. It includes built-in type casting, validation, query building, business logic hooks and more, out of the box. After stopping the server, type this command for it.
npm install --save mongooseAdd this require to app.js.
var mongoose = require('mongoose');Add these lines after require to make a connection to MongoDB.
mongoose.Promise = global.Promise;

mongoose.connect('mongodb://localhost/mean-chat')
  .then(() =>  console.log('connection successful'))
  .catch((err) => console.error(err));
Now, we will install Socket.io and Socket.io client library. Type this command to achieve it.
npm install --save socketio socket.io-clientNext, we will create single collections for hold chat data. For that, create a model folder and file for building Mongoose Model Schema.
mkdir models
touch models/Chat.js
Open and edit "models/Chat.js" then add these lines of codes.
var mongoose = require('mongoose');

var ChatSchema = new mongoose.Schema({
  room: String,
  nickname: String,
  message: String,
  updated_at: { type: Date, default: Date.now },
});

module.exports = mongoose.model('Chat', ChatSchema);
Open and edit again "routes/chat.js" then replace all codes with this.
var express = require('express');
var router = express.Router();
var mongoose = require('mongoose');
var app = express();
var server = require('http').createServer(app);
var io = require('socket.io')(server);
var Chat = require('../models/Chat.js');

server.listen(4000);

// socket io
io.on('connection', function (socket) {
  console.log('User connected');
  socket.on('disconnect', function() {
    console.log('User disconnected');
  });
  socket.on('save-message', function (data) {
    console.log(data);
    io.emit('new-message', { message: data });
  });
});

/* GET ALL CHATS */
router.get('/:room', function(req, res, next) {
  Chat.find({ room: req.params.room }, function (err, chats) {
    if (err) return next(err);
    res.json(chats);
  });
});

/* SAVE CHAT */
router.post('/', function(req, res, next) {
  Chat.create(req.body, function (err, post) {
    if (err) return next(err);
    res.json(post);
  });
});

module.exports = router;
In that code, we are running Socket.io to listen for 'save-message' that emitted from the client and emit 'new-message' to the clients. Now, re-run our MEAN application. Open another terminal then type this command to test the REST API.
curl -i -H "Accept: application/json" localhost:3000/bookIf that command return response like below then REST API is ready to go.
HTTP/1.1 200 OK
X-Powered-By: Express
Content-Type: application/json; charset=utf-8
Content-Length: 2
ETag: W/"2-11FxOYiYfpMxmANj4kGJzg"
Date: Sat, 18 Mar 2017 23:01:05 GMT
Connection: keep-alive
Create an Angular Provider or Service
For serving asynchronous access to REST API, we will create service or provider. Just type this simple command to create it.
ng g s chatOpen and edit "src/app/app.module.ts" then add this import for chat service.
import { ChatService } from './chat.service';Also, add ChatService to @NgModule providers.
providers: [ChatService],Open and edit "src/app/chat.service.ts" then replace all codes with this implementation of Angular Http, Headers, RxJS operators that GET and POST chat data to the REST API.
import { Injectable } from '@angular/core';
import { Http, Headers } from '@angular/http';
import 'rxjs/add/operator/map';

@Injectable()
export class ChatService {

  constructor(private http: Http) { }

  getChatByRoom(room) {
    return new Promise((resolve, reject) => {
      this.http.get('/chat/' + room)
        .map(res => res.json())
        .subscribe(res => {
          resolve(res);
        }, (err) => {
          reject(err);
        });
    });
  }

  saveChat(data) {
    return new Promise((resolve, reject) => {
        this.http.post('/chat', data)
          .map(res => res.json())
          .subscribe(res => {
            resolve(res);
          }, (err) => {
            reject(err);
          });
    });
  }

}
That codes using Promise response instead of Observable.
Create Angular Component for Chat
Because our application using a single page. We only need to create one Angular 4 component. Type this command to achieve that.
ng g c chatOpen and edit "src/app/chat/chat.component.ts" then add these lines of codes that implementing data for view templates that GET realtime using Socket.io client.
import { Component, OnInit, AfterViewChecked, ElementRef, ViewChild } from '@angular/core';
import { ChatService } from '../chat.service';
import * as io from "socket.io-client";

@Component({
  selector: 'app-chat',
  templateUrl: './chat.component.html',
  styleUrls: ['./chat.component.css']
})
export class ChatComponent implements OnInit, AfterViewChecked {

  @ViewChild('scrollMe') private myScrollContainer: ElementRef;

  chats: any;
  joinned: boolean = false;
  newUser = { nickname: '', room: '' };
  msgData = { room: '', nickname: '', message: '' };
  socket = io('http://localhost:4000');

  constructor(private chatService: ChatService) {}

  ngOnInit() {
    var user = JSON.parse(localStorage.getItem("user"));
    if(user!==null) {
      this.getChatByRoom(user.room);
      this.msgData = { room: user.room, nickname: user.nickname, message: '' }
      this.joinned = true;
      this.scrollToBottom();
    }
    this.socket.on('new-message', function (data) {
      if(data.message.room === JSON.parse(localStorage.getItem("user")).room) {
        this.chats.push(data.message);
        this.msgData = { room: user.room, nickname: user.nickname, message: '' }
        this.scrollToBottom();
      }
    }.bind(this));
  }

  ngAfterViewChecked() {
    this.scrollToBottom();
  }

  scrollToBottom(): void {
    try {
      this.myScrollContainer.nativeElement.scrollTop = this.myScrollContainer.nativeElement.scrollHeight;
    } catch(err) { }
  }

  getChatByRoom(room) {
    this.chatService.getChatByRoom(room).then((res) => {
      this.chats = res;
    }, (err) => {
      console.log(err);
    });
  }

  joinRoom() {
    var date = new Date();
    localStorage.setItem("user", JSON.stringify(this.newUser));
    this.getChatByRoom(this.newUser.room);
    this.msgData = { room: this.newUser.room, nickname: this.newUser.nickname, message: '' };
    this.joinned = true;
    this.socket.emit('save-message', { room: this.newUser.room, nickname: this.newUser.nickname, message: 'Join this room', updated_at: date });
  }

  sendMessage() {
    this.chatService.saveChat(this.msgData).then((result) => {
      this.socket.emit('save-message', result);
    }, (err) => {
      console.log(err);
    });
  }

  logout() {
    var date = new Date();
    var user = JSON.parse(localStorage.getItem("user"));
    this.socket.emit('save-message', { room: user.room, nickname: user.nickname, message: 'Left this room', updated_at: date });
    localStorage.removeItem("user");
    this.joinned = false;
  }

}
That codes describe all functionality of this simple chat application. Now, we will build a view of the chat room. Before edit chat component, open and edit "src/index.html" then replace all codes so it will look like this which we add the Bootstrap CDN for the UI.
<!doctype html>
<html>
<head>
  <meta charset="utf-8">
  <title>MeanChat</title>
  <base href="/">

  <meta name="viewport" content="width=device-width, initial-scale=1">
  <link rel="icon" type="image/x-icon" href="favicon.ico">
  <!-- Latest compiled and minified CSS -->
  <link rel="stylesheet" href="https://maxcdn.bootstrapcdn.com/bootstrap/3.3.7/css/bootstrap.min.css" integrity="sha384-BVYiiSIFeK1dGmJRAkycuHAHRg32OmUcww7on3RYdg4Va+PmSTsz/K68vbdEjh4u" crossorigin="anonymous">
  <!-- Optional theme -->
  <link rel="stylesheet" href="https://maxcdn.bootstrapcdn.com/bootstrap/3.3.7/css/bootstrap-theme.min.css" integrity="sha384-rHyoN1iRsVXV4nD0JutlnGaslCJuC7uwjduW9SVrLvRYooPp2bWYgmgJQIXwl/Sp" crossorigin="anonymous">
</head>
<body>
  <app-root>Loading...</app-root>
  <!-- jQuery library -->
  <script src="https://ajax.googleapis.com/ajax/libs/jquery/3.2.0/jquery.min.js"></script>
  <!-- Latest compiled and minified JavaScript -->
  <script src="https://maxcdn.bootstrapcdn.com/bootstrap/3.3.7/js/bootstrap.min.js" integrity="sha384-Tc5IQib027qvyjSMfHjOMaLkfuWVxZxUPnCJA7l2mCWNIpG9mGCD8wGNIcPD7Txa" crossorigin="anonymous"></script>
</body>
</html>
We are about add bootstrap for styling the chat room. Next, open and edit "src/app/chat/chat.component.html" then replace all codes with these codes.
<div class="container">
    <div class="row">
        <div class="col-md-5">
            <div class="panel panel-primary" *ngIf="joinned; else joinroom">
                <div class="panel-heading">
                    <span class="glyphicon glyphicon-comment"></span> {{ msgData.room }}
                    <div class="btn-group pull-right">
                        <button type="button" class="btn btn-default btn-xs" (click)="logout()">
                            Logout
                        </button>
                    </div>
                </div>
                <div #scrollMe class="panel-body">
                    <ul class="chat">
                        <li *ngFor="let c of chats">
                          <div class="left clearfix" *ngIf="c.nickname===msgData.nickname; else rightchat">
                            <span class="chat-img pull-left">
                              <img src="http://placehold.it/50/55C1E7/fff&text=ME" alt="User Avatar" class="img-circle" />
                            </span>
                            <div class="chat-body clearfix">
                                <div class="header">
                                    <strong class="primary-font">{{ c.nickname }}</strong> <small class="pull-right text-muted">
                                        <span class="glyphicon glyphicon-time"></span>{{ c.updated_at | date: 'medium' }}</small>
                                </div>
                                <p>{{ c.message }}</p>
                            </div>
                          </div>
                          <ng-template #rightchat>
                            <div class="right clearfix">
                              <span class="chat-img pull-right">
                                <img src="http://placehold.it/50/FA6F57/fff&text=U" alt="User Avatar" class="img-circle" />
                              </span>
                              <div class="chat-body clearfix">
                                  <div class="header">
                                      <small class=" text-muted"><span class="glyphicon glyphicon-time"></span>{{ c.updated_at | date: 'medium' }}</small>
                                      <strong class="pull-right primary-font">{{ c.nickname }}</strong>
                                  </div>
                                  <p>{{ c.message }}</p>
                              </div>
                            </div>
                          </ng-template>
                        </li>
                    </ul>
                </div>
                <div class="panel-footer">
                  <form (ngSubmit)="sendMessage()" #msgForm="ngForm">
                    <div class="input-group">
                        <input type="hidden" [(ngModel)]="msgData.room" name="room" />
                        <input type="hidden" [(ngModel)]="msgData.nickname" name="nickname" />
                        <input id="btn-input" type="text" [(ngModel)]="msgData.message" name="message" class="form-control input-sm" placeholder="Type your message here..." required="" />
                        <span class="input-group-btn">
                            <button class="btn btn-warning btn-sm" id="btn-chat" [disabled]="!msgForm.form.valid">
                                Send</button>
                        </span>
                    </div>
                  </form>
                </div>
            </div>
            <ng-template #joinroom>
              <div class="panel panel-primary">
                <div class="panel-body">
                  <h1>Select Chat Room</h1>
                  <form (ngSubmit)="joinRoom()" #joinForm="ngForm">
                    <div class="form-group">
                      <input type="text" class="form-control" [(ngModel)]="newUser.nickname" name="nickname" placeholder="Nickname" required="" />
                    </div>
                    <div class="form-group">
                      <select class="form-control" [(ngModel)]="newUser.room" name="room" required="">
                        <option>Select Room</option>
                        <option value="Javascript">Javascript</option>
                        <option value="Java">Java</option>
                        <option value="Python">Python</option>
                      </select>
                    </div>
                    <div class="form-group">
                      <button type="submit" class="btn btn-success" [disabled]="!joinForm.form.valid">Join</button>
                    </div>
                  </form>
                </div>
              </div>
            </ng-template>
        </div>
    </div>
</div>
Give that view a little style by edit "src/app/chat/chat.component.css" then replace all codes with this.
.chat
{
    list-style: none;
    margin: 0;
    padding: 0;
}

.chat li
{
    margin-bottom: 10px;
    padding-bottom: 5px;
    border-bottom: 1px dotted #B3A9A9;
}

.chat li.left .chat-body
{
    margin-left: 60px;
}

.chat li.right .chat-body
{
    margin-right: 60px;
}


.chat li .chat-body p
{
    margin: 0;
    color: #777777;
}

.panel .slidedown .glyphicon, .chat .glyphicon
{
    margin-right: 5px;
}

.panel-body
{
    overflow-y: scroll;
    height: 250px;
}

::-webkit-scrollbar-track
{
    -webkit-box-shadow: inset 0 0 6px rgba(0,0,0,0.3);
    background-color: #F5F5F5;
}

::-webkit-scrollbar
{
    width: 12px;
    background-color: #F5F5F5;
}

::-webkit-scrollbar-thumb
{
    -webkit-box-shadow: inset 0 0 6px rgba(0,0,0,.3);
    background-color: #555;
}
Finally, build and run this application by type these commands.
ng build --prod
npm start
Now, you can try chatting in multiple different browsers in your PC/Laptop or different PC/Laptop by pointing to this address "localhost:3000" or "your-ip-address:3000".
Warning: This tutorial is experiments of Angular 4 with MEAN Stack. We suggest don't try this tutorial in production.
That it's for now, please give us suggestion or critics to improve this tutorial. If you feel there's is something wrong with this tutorial that you follow, don't worry we have put the complete source code on our Github.
We know that building beautifully designed Ionic apps from scratch can be frustrating and very time-consuming. Check Ionic 4 - Full Starter App and save development and design time. Android, iOS, and PWA, 100+ Screens and Components, the most complete and advance Ionic Template.
That just the basic. If you need more deep learning about Ionic, Angular, and Typescript, you can take the following cheap course:
- IONIC 4 Design Hybrid Mobile Applications IOS & Android
- Wordpress Rest API and Ionic 4 (Angular) App With Auth
- Mobile App from Development to Deployment - IONIC 4
- Ionic 4 Crash Course with Heartstone API & Angular
- Ionic 4 Mega Course: Build 10 Real World Apps
Thanks.