This example is easy to implement in real-world web application. We have to make a step by step tutorial creating REST API web service using Grails 3 from scratch. Just a few steps ahead and less coding, you will get a simple REST API web service running and accessible.
Table of Contents:
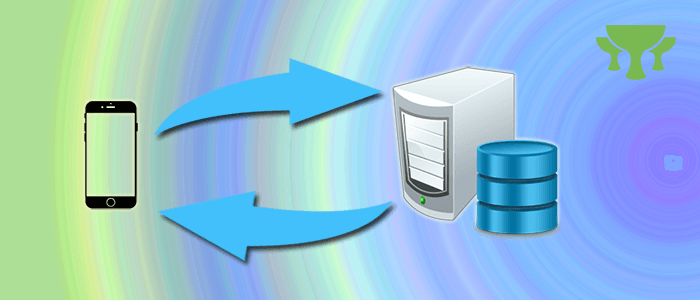
REST is a term of Representational State Transfer or in other word called Restful. This is more of an architectural pattern. Every modern web application uses REST web service as a standard API that accesses web application resources from the mobile app or another application. Web services are all about providing a web API onto your web application and are typically implemented in either REST or SOAP.
Let get started.
Create New Grails 3 Application
As usual, we begin tutorial with creating a fresh new application. Start by opening your console or terminal and go to your projects folder then type this command.
grails create-app SimpleRESTGo to the newly created folder.
cd SimpleRESTType "grails" to enter the interactive grails console. Leave all configuration as default for now because we will start by using current built-in Grails 3 REST Web Service feature.
Create Grails Domain or Entity
In the interactive console type this command to create 2 domain class.
create-domain-class com.djamware.Category
create-domain-class com.djamware.Article
Open Category.groovy using your editor or IDE then make like this.
package com.djamware

import grails.rest.*

@Resource(uri='/category')
class Category {

  String catName
  static hasMany = [articles:Article]

  static constraints = {
    catName blank:false
  }
}
That code is one of the methods to create REST API web service, that's why on that codes importing rest API and annotation for accessible REST URL that pointing to Category class. Next, fill Article.groovy with these codes.
package com.djamware

import grails.rest.*

@Resource(uri='/article')
class Article {

  static belongsTo = [category:Category]
  String title
  String author
  String description
  String content
  Date createDate =  new Date()

  static constraints = {
    title blank: false
    author blank: false
    description blank: false
    content blank: false
  }
}
If we are using @Resource uri name same as Domain class name, default generated url mapping should be remove otherwise accessing this REST api will thrown an error.
Both classes have a relationship as parent and child. Next, let's initiate new data in grails-app/init/Bootstrap.groovy.
import com.djamware.*

class BootStrap {

    def init = { servletContext ->
      def category = new Category(catName:"Programming")
        .addToArticles(new Article(title:"How to Create Grails Web Application",author:"Didin J.",description:"Step by step tutorial on how to create Grails web application from scratch",content:"Step by step tutorial on how to create Grails web application from scratch"))
        .save(flush:true)
    }
    def destroy = {
    }
}
Now, run the app.
run-appTest Grails 3 REST API Web Service
We will test the Grails 3 REST API using CURL command from the terminal. You can use Postman as well or other REST API client to access the Grails 3 REST API. Next, open this URL in your browser.
http://localhost:8080/article/1.jsonYou will see article data return in JSON format.

Test your REST web service in console or terminal by opening another console or terminal and type this command.
curl -i -H "Accept: application/json" localhost:8080/article/1It will show the result in the terminal like this.
HTTP/1.1 200 OK
Server: Apache-Coyote/1.1
X-Application-Context: application:development
Content-Type: application/json;charset=UTF-8
Transfer-Encoding: chunked
Date: Fri, 13 Jan 2017 14:32:18 GMT

{"id":1,"author":"Didin J.","category":{"id":1},"content":"Step by step tutorial on how to create Grails web application from scratch","createDate":"2017-01-13T14:24:29Z","description":"Step by step tutorial on how to create Grails web application from scratch","title":"How to Create Grails Web Application"}
Sometimes you'll need to make your JSON response pretty or customize. For that, you have to open your Boostrap.groovy again and add this method below destroy method.
private void articleMarshaler() {
  JSON.registerObjectMarshaller(Category) { cat ->
    [
      id: cat.id,
      name: cat.catName,
      article: cat.articles.collect { article ->
        [
          id: article.id,
          title: article.title,
          author: article.author,
          description: article.description,
          content: article.content,
          created: new SimpleDateFormat("dd/MM/yyyy").format(article.createDate)
        ]
      }
    ]
  }
}
Don't forget to add an import for JSON and SimpleDateFormat.
import grails.converters.JSON
import java.text.SimpleDateFormat
Call that method inside the init method below initial data.
articleMarshaler()Next, stop and run the app again. Test again in the terminal, this time using category REST web service.
curl -i -H "Accept: application/json" localhost:8080/category/1You will see both categories and its child will response full data as below.
HTTP/1.1 200 OK
Server: Apache-Coyote/1.1
X-Application-Context: application:development
Content-Type: application/json;charset=UTF-8
Transfer-Encoding: chunked
Date: Fri, 13 Jan 2017 14:50:16 GMT

{"id":1,"name":"Programming","article":[{"id":1,"title":"How to Create Grails Web Application","author":"Didin J.","description":"Step by step tutorial on how to create Grails web application from scratch","content":"Step by step tutorial on how to create Grails web application from scratch","created":"13/01/2017"}]}
Next, test the REST Web Service with POST to save data to the server using this command.
curl -i -X POST -H "Content-Type: application/json" -d '{"category":{"id":1},"title":"Article Title 2","author":"Didin J.","description":"Article Description 2","content":"Article Content 2"}' localhost:8080/articleIf you see the response like this, it's mean we have successfully saved data.
HTTP/1.1 201 Created
Server: Apache-Coyote/1.1
X-Application-Context: application:development
Location: http://localhost:8080/article/2
Content-Type: text/xml;charset=UTF-8
Transfer-Encoding: chunked
Date: Wed, 08 Feb 2017 14:56:37 GMT

<?xml version="1.0" encoding="UTF-8"?><article id="2"><author>Didin J.</author><category id="1" /><content>Article Content 2</content><createDate>2017-02-08 21:56:37.327 WIB</createDate><description>Article Description 2</description><title>Article Title 2</title></article>
Next, we have to edit data that previously added with id is 2.
curl -i -X PUT -H "Content-Type: application/json" -d '{"title":"Programming Cobol"}' localhost:8080/article/2Data will be updated if you see this response.
HTTP/1.1 200 OK
Server: Apache-Coyote/1.1
X-Application-Context: application:development
Location: http://localhost:8080/article/2
Content-Type: text/xml;charset=UTF-8
Transfer-Encoding: chunked
Date: Wed, 08 Feb 2017 15:00:57 GMT

<?xml version="1.0" encoding="UTF-8"?><article id="2"><author>Didin J.</author><category id="1" /><content>Article Content 2</content><createDate>2017-02-08 21:56:37.327 WIB</createDate><description>Article Description 2</description><title>Programming Cobol</title></article>
Last, we have to delete data using this command.
curl -i -X DELETE localhost:8080/article/2Data will be deleted if you see the response like this.
HTTP/1.1 204 No Content
Server: Apache-Coyote/1.1
X-Application-Context: application:development
Content-Type: application/json;charset=UTF-8
Date: Wed, 08 Feb 2017 15:03:12 GMT
Conclusion, with just added "@Resource(uri=article)" code in Domain or Entity class, REST API is automatically created with full function of CRUD.
| Method | Endpoints | Notes |
| GET | /article | Get all articles data |
| GET | /article/1 | Get single article |
| POST | /article | Post data |
| PUT | /article/1 | Update data |
| DELETE | /article/1 | Delete data |
That's all, simple REST API web service in Grails 3 by implementing the basic REST web service feature in Domain class.
That just the basic. If you need more deep learning about Groovy and Grails you can take the following cheap course:
- Mastering Grails. A Comprehensive Grails Course.
- Groovy Scripting for Developers / Testers
- Introduction to JVM Languages Clojure, Kotlin, and Groovy
Thanks.